Set Start and End Dates for a Course
All courses follow the start and end dates as set by the Registrar. Instructors can, however, adjust course start and end dates to provide early or extend access, as needed. Per the Registrar’s Office, instructors may not require students to complete any coursework before the start date of the course as there are compliance implications to requiring students to do work early.
Students will only be able to see courses that have been activated. In addition to setting the course start / end date to your specifications, you will want to ensure that you have followed the steps to activate your course.
Follow the steps below to learn how to set start and end dates.
- After logging in, select the course from the My Courses area of the Homepage.
- Click Course Admin from the Navigation Bar.

- Click Course Offering Information.

- Scroll down on the page until you see the Start and End Dates.
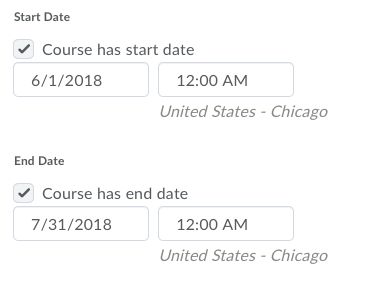
- Check the Box next to “Course has a start date” then select the date field to add your start date. Click the Time field to add a specific time such as 12:00 AM
- Check the Box next to “Course has an end date” then select the date field to add your start date. Click the Time field to add a specific time such as 12:00 AM
- Once your preferences are set, click Save at the bottom of the page.
- At this point you can move on to another area of this course by selecting a link on the Navigation bar, or select a new course by selecting the My Home link on the purple minibar at the top of the screen.