Locate and Pin Your Courses
Courses are automatically created in TCU Online when a faculty member is officially assigned to a course in TCU’s class search. TCU Online will continue to update as faculty are assigned to new courses through the Registrar’s office. Please note, although TCU Online updates frequently, it may take up to 24 hours to reflect recent changes made by the Registrar.
If you are assigned to a course in class search, but are not able to locate it using the instructions below, please contact us via the TCU Online Support form with information regarding the missing course and term.
All users have options for locating courses in TCU Online:
- My Courses Widget
- View All Courses
- Course Selector
Are you using the Brightspace Pulse App? Follow the steps to Pin and Unpin Courses in the Pulse App.
My Courses Widget
About the My Courses Widget
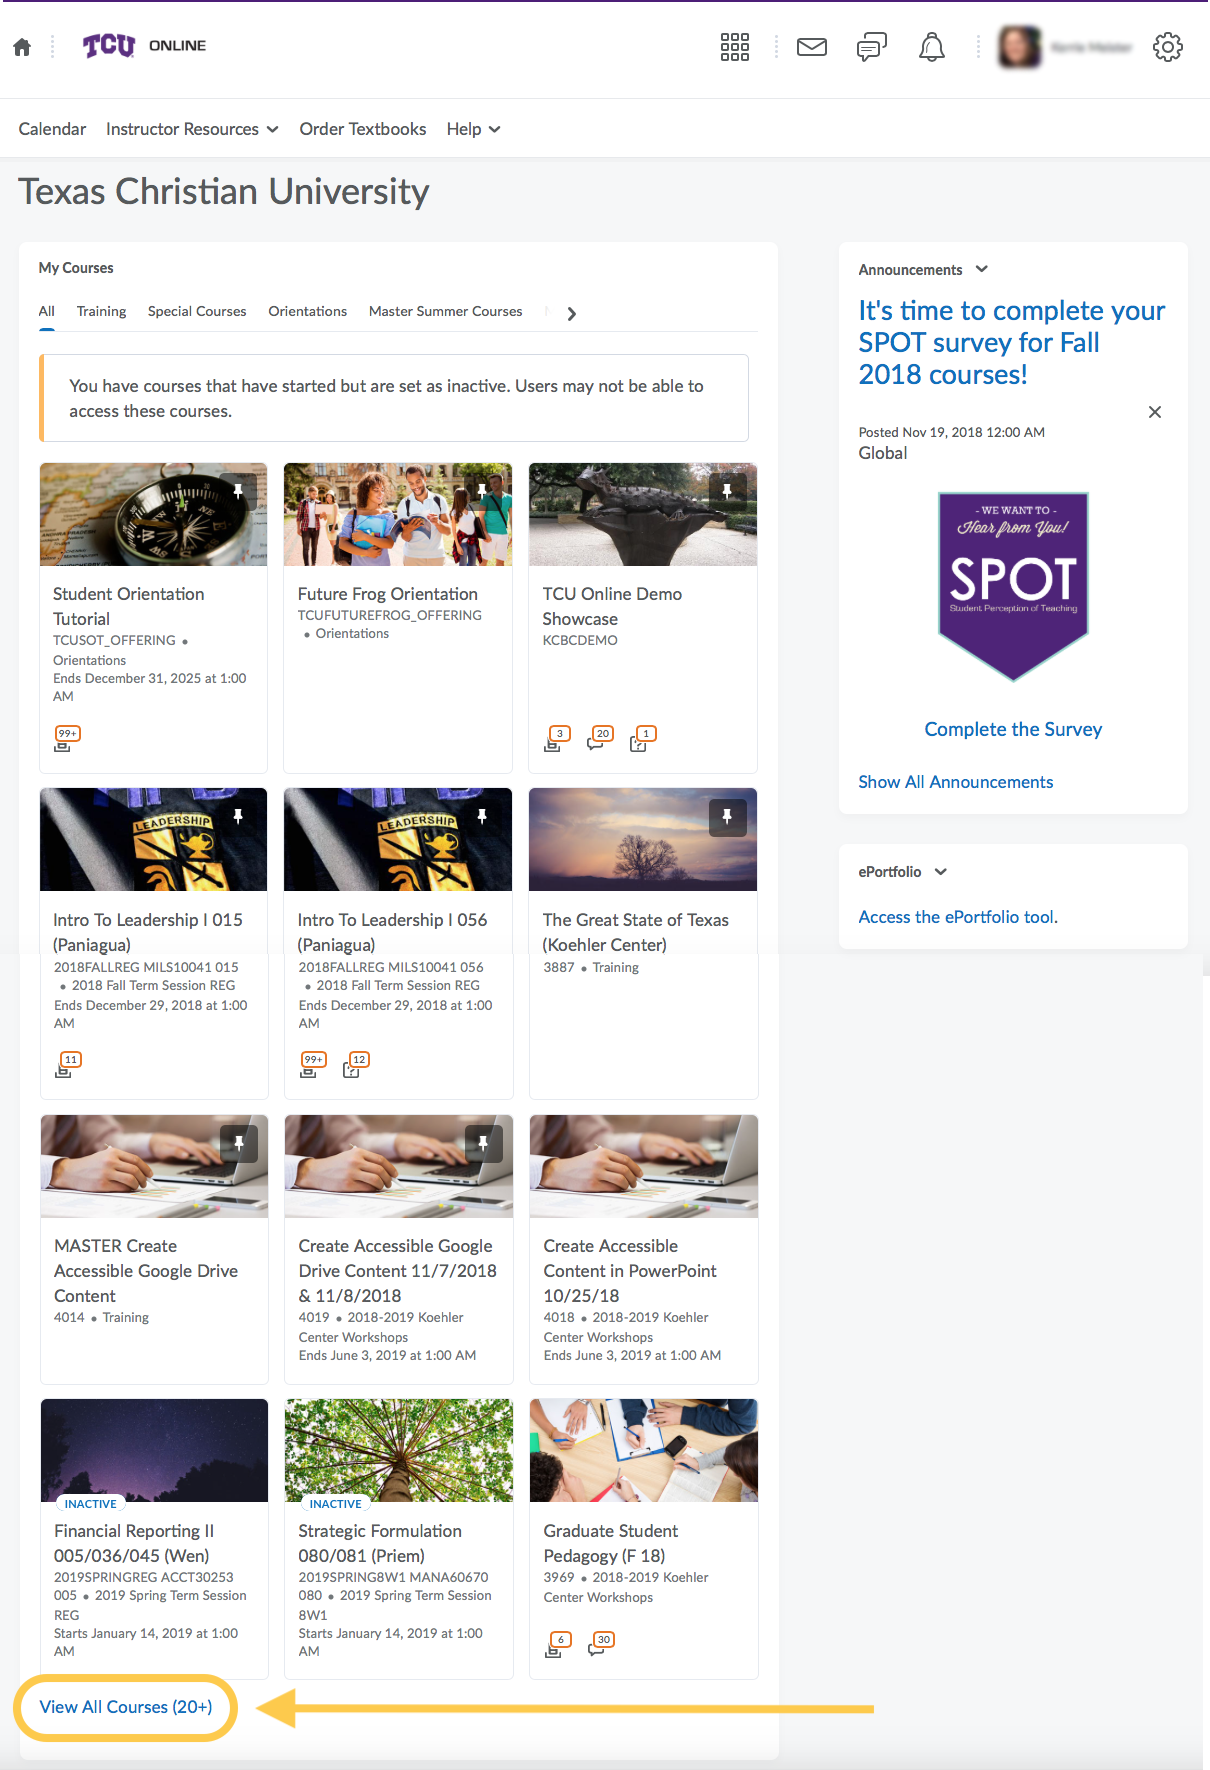
The My Courses widget is the area of the TCU Online My Home page containing course names and corresponding images in a tiled format.
In the My Courses widget, courses have associated images and students can access their favorite courses by pinning them to the top of their course list. In the mobile view, widgets stack on top of each other, and the My Courses widget offers many options to instructors.
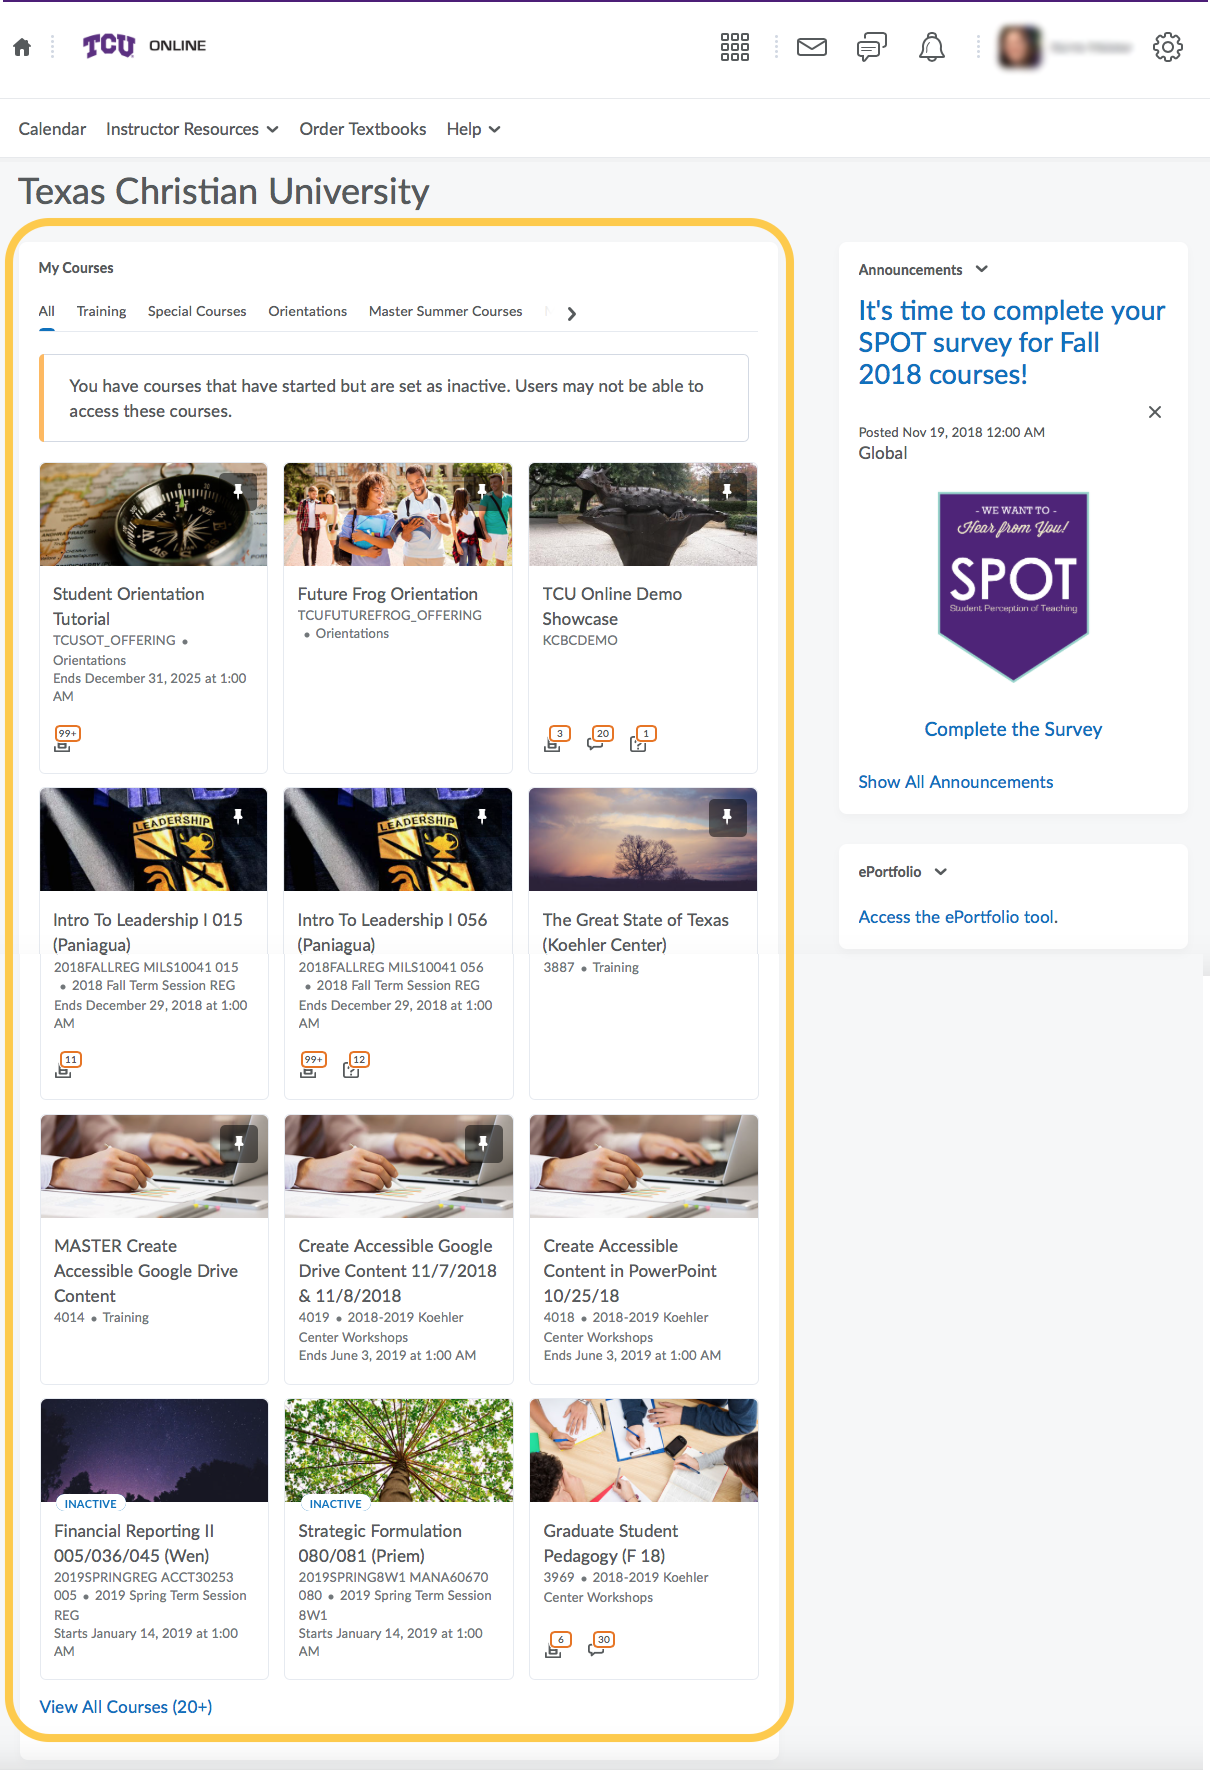
The My Courses widget shows manually pinned courses followed by current enrollments for a total of 12 enrollments. Note that more than 12 courses might appear if they are all manually pinned.
If there are more than 50 total enrollments, the My Courses widget shows manually pinned courses followed by up to 12 last-accessed courses. Note that more than 12 courses might appear in the widget if they are all manually pinned.
If courses are pinned, they will display within a Pinned tab within the My Courses widget.
Courses can be filtered from the My Courses widget by semester, by selecting the semester titles at the top of the widget. Arrows on the top right and left can be used to reveal more semesters.
Course status is indicated with a small banner on the course image when a course is inactive or closed.
Course notification updates display below the course & semester names and are sorted by tool. The update quantity reflects a total count of the unread course updates, including: unread discussion posts, ungraded quiz attempts, and unread assignment submissions. If the total count is more than 99 items, the number appears as 99+.
Pin and Unpin courses in the My Courses Widget
To organize your courses, you can unpin old courses and pin current courses so they will appear at the top of the My Courses widget and within a Pinned tab the My Courses widget.
- On the TCU Online My Home page, move your mouse over the course tile you want to pin. An Actions menu (small icon with 3 dots) will appear in the top right corner of the course image.
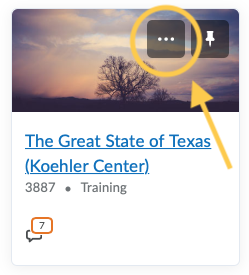
- Click the Actions menu (icon with three dots), and select Pin from the menu. Note: Students will not see “Course Offering Information” or “Change Image” in their Actions menu.
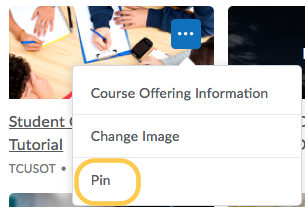
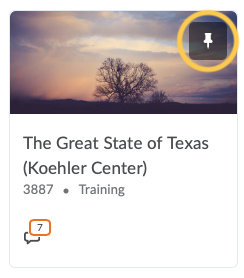
- The course tile will move towards the top of your My Courses widget for easy access later. A pushpin icon will display in the top right of the course tile.
- To unpin a course, select Unpin from the Actions menu, or click the pushpin icon in the top right of the course tile. The course tile will move towards the bottom of your My Courses widget.
View All Courses
How to View All Courses
The View All Courses link is found below the course tiles in the My Courses widget and will display all courses that you are enrolled in within TCU Online.
The View All Courses link drills down into the courses by showing manually pinned courses, followed by current enrollments, then future enrollments (if available or visible to the user), then past enrollments (if available or visible to the user) as the default sort. If the user changes the sort order, the filter does not separate pinned courses from other courses based on sort order, filters, and search terms.
If there are more than 50 total enrollments, the View all Courses area shows manually pinned courses followed by up to 12 last-accessed courses, followed by all remaining courses available or visible to the user as the sort order. If the user changes the sort order, the filter does not separate pinned courses from other courses based on the sort order, filters, and search terms.
Filter, Sort, Search, and Pin Courses in View All Courses
To access your courses, you can filter, sort, search, and pin courses from the View All Courses page.
- From the My Home page, click View All Courses at the bottom of the My Courses widget.
- Optional: Filter the courses:
- On the top right of the screen, click Filter, then select the Role you wish to view.
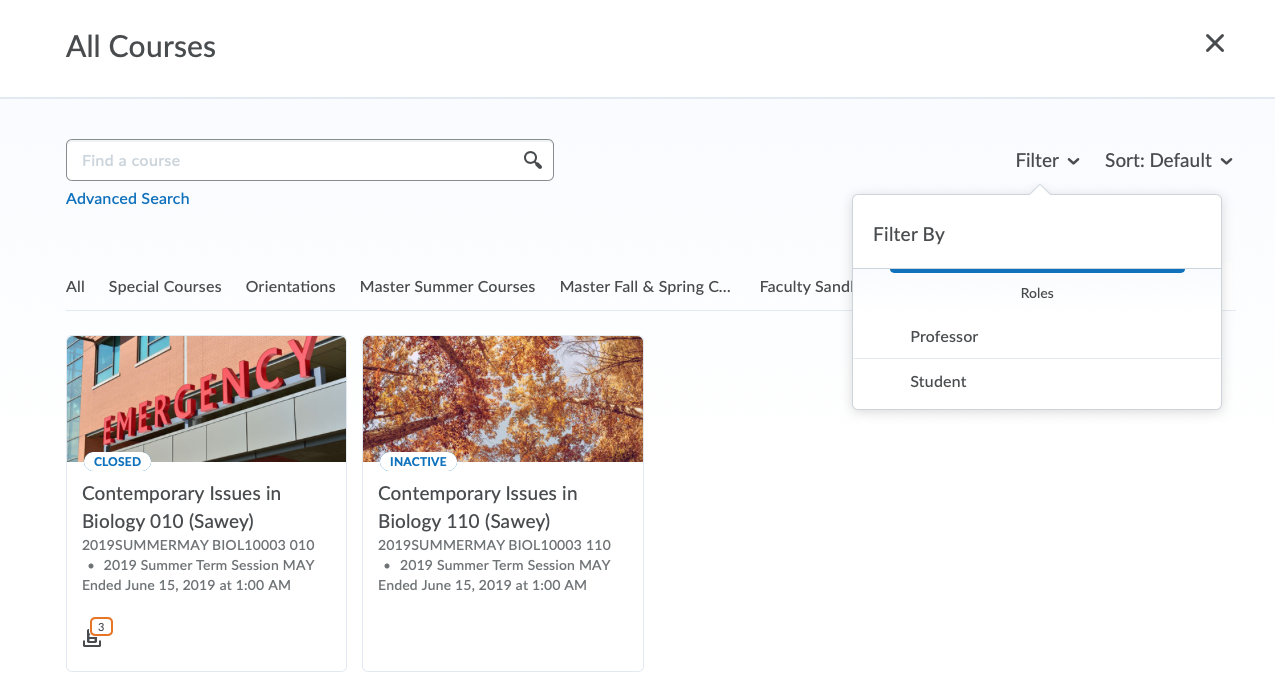
- Your course list will adjust to show the courses according to your selected options.
- On the top right of the screen, click Filter, then select the Role you wish to view.
- Optional: Sort courses:
- On the top right of the screen, click Sort.
- Select the option you want to sort by: Default, Course Name, Course Code, Date Pinned, Last Accessed, or Enrollment Date.
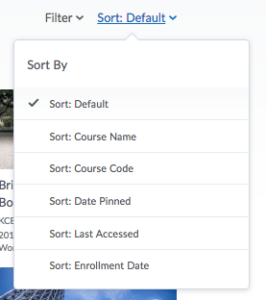
- Your course list will adjust to show the courses according to your sort selection.
- Optional: Search for courses:
- Click in the search field located in the top left of the screen. Type the course name or course number you want to locate. Click enter/return on your keyboard to search.
- Optional: Pin courses:
-
- Move your mouse over the course tile you want to pin. An Actions menu (small icon with 3 dots) will appear in the top right corner of the course image.
- Click the Actions menu (icon with three dots), and select Pin from the menu. Note: Students will not see “Course Offering Information” or “Change Image” in their Actions menu.
- Move your mouse over the course tile you want to pin. An Actions menu (small icon with 3 dots) will appear in the top right corner of the course image.
- The course tile will move towards the top of your My Courses widget for easy access later. A pushpin icon will display in the top right of the course tile.
-
- Click the X in the top right corner of the browser window to close the View All courses page and return to the My Home page.

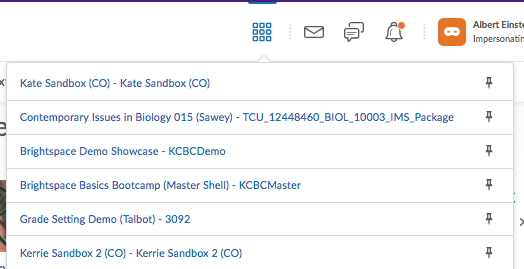
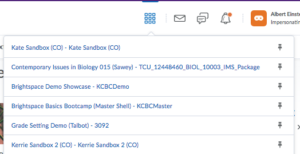
Course Selector
About the Course Selector

The Course Selector is located at the top of your TCU Online page and resembles a waffle icon with 9 squares.
The Course Selector drop-down menu shows manually pinned courses, followed by current enrollments, then future enrollments (if available and visible to the user), and finally, past enrollments (if available and visible to the user).
If there are more than 50 total enrollments, the Course Selector drop-down menu shows manually pinned courses, followed by up to 12 last-accessed courses, followed by all remaining courses available to the user.
Pin and Unpin a Course from the Course Selector
To organize your courses, you can unpin old courses and pin current courses so they will appear at the top of the Course Selector list.
- Click the Course Selector icon.
- Locate the name of the course that you want to pin or unpin.
- Click the Pin icon beside the course to pin or unpin it (pinned courses are shaded dark while unpinned courses are not shaded).
- Refresh your browser to show changes.