Create Group Categories for a Specific Section in a Combined Course
You can use groups to organize students and have them work together on activities, assignments, projects, etc. Students can belong to multiple groups within the same course. Each set of groups is referred to as a Category. For example, you may have a category for Group Discussions that consists of 4 groups, and a separate category for Group Projects that consists of 5 groups.
Follow the steps below to create a new set of group restricted to a specific section in a combined course. Creating group categories will allow students within the groups to communicate, and work together on actives, assignments, projects, etc. As a reminder, a grade item and course activity (discussion or assignment) would need to be created for each group category. This setup can become complicated, so we recommend scheduling a Virtual Lab appointment with the Koehler Center staff to talk through the setup.
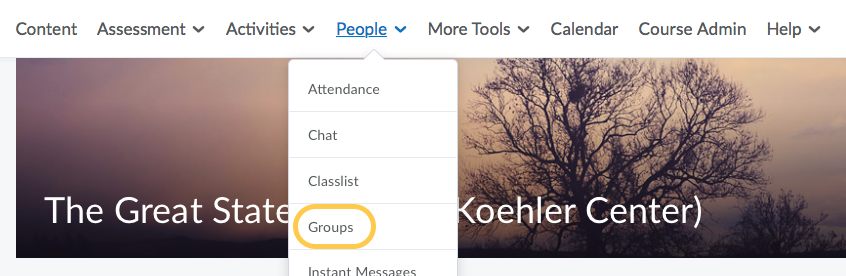
- On the nav bar, click the People menu, then select Groups.
- On the Manage Groups page, click New Category.

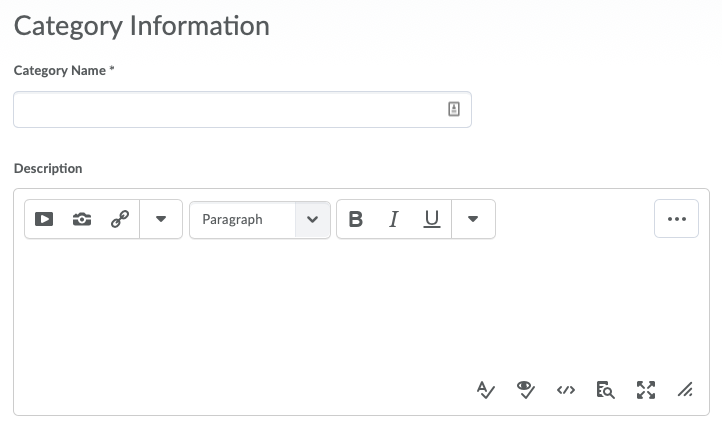
- Enter a Category Name and (Optional) Description.
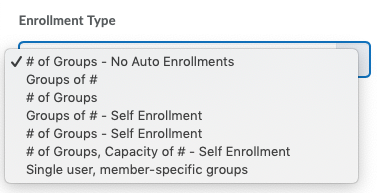
- Select an Enrollment Type from the drop-down list. Learn about Group Enrollment Types.
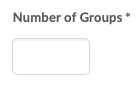
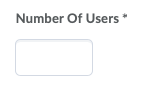
- Depending on the chosen Enrollment Type, enter either the Number of Groups to create, or the Number of Users per group, or both.
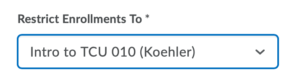
- Required for combined courses with sections that meet at different times: Setting up a separate group category with enrollments restricted by section would allow students to maintain the privacy of their name and course enrollment from those in other sections. Under Restrict Enrollments To: Select the Section from the dropdown menu.
- Optional: To apply a distinctive prefix to each group name and code in the category, enter it in the Group Prefix field. If you do not fill in this field, the prefix defaults to “Group”. You can also return later and customize group names if you would like.

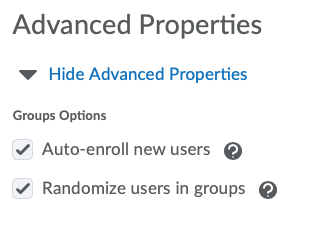
- Depending on the chosen Enrollment Type, if you wish to automatically enroll any new students that get added to your course, select Auto-enroll new users. Depending on the chosen Enrollment Type, if you wish to randomly place users in groups, select Randomize users in groups. If you do not choose this option, users are placed alphabetically based on the Classlist.
- If you selected an Enrollment Type that supports self enrollment, you can set a Self Enrollment Start Date and Time and a Self Enrollment Expiry Date and Time.
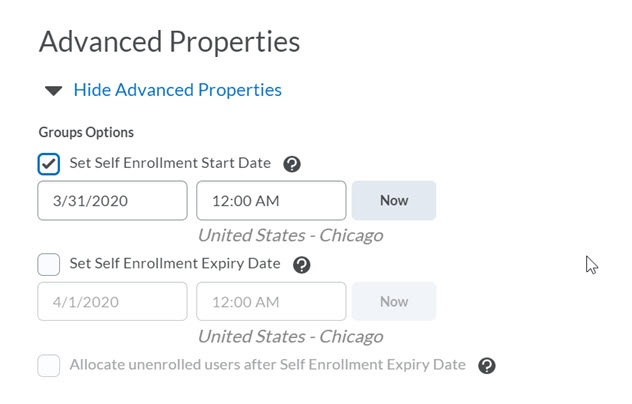
- If you select Set Self Enrollment Expiry Date, but you want all learners who do not enroll before the expiry date to be automatically enrolled, you can select Allocate unenrolled users after Self Enrollment Expiry Date to automatically, randomly, and evenly distribute them into the available groups.
- This option adds group members beyond the capacity of groups, if applicable. The automatic enrollment recurs at a set interval after the expiry date to ensure that all learners are assigned to a group.
- An instructor can increase or decrease the capacity for self-enrollment groups after they have been created, and prior to the group sign-up expiry date. Decreasing a group size to an amount smaller than has already signed up for a group will not re-allocate users to other groups.
- Click Save (Recommended). Then proceed to the Activity tool (Assignment or Discussion) in which you wish to utilize the groups you just created. Alternatively, you can continue and follow the steps to Create Group Workspaces such as Discussions and Assignments from within the Groups tool.


If you have multiple sections in your combined course that need groups categories, repeat these steps for the additional sections.