Create an Announcement
The steps below share how to create an announcement. If you plan to include multimedia in your announcement or want to share an announcement with a specific section, check out the following guides: Create a Video Announcement Using the Video Note Tool, Create an Announcement for a Specific Section in a Combined Course
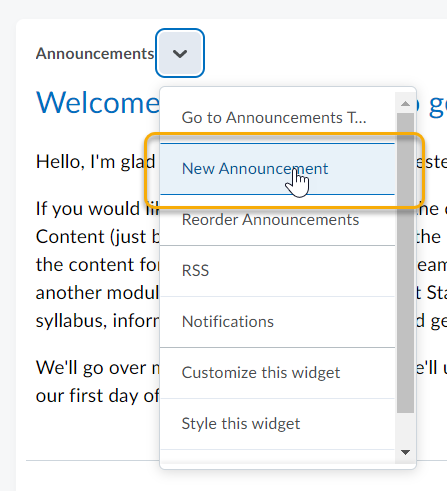
- From the course homepage Announcements widget, select the context menu to the right of Announcements, then select New Announcement.

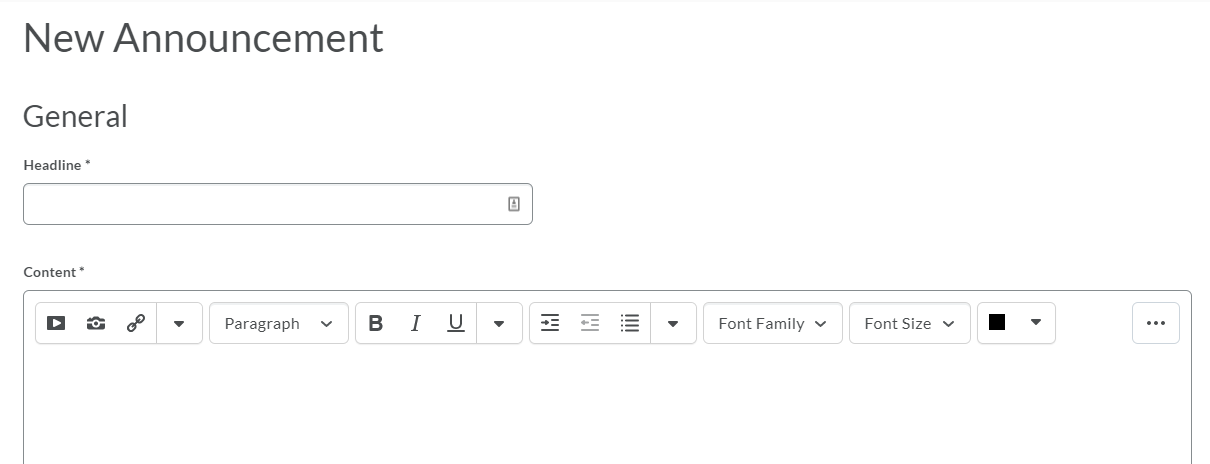
- Enter a Headline and Content for your Announcement.

- By default, the Announcement’s start date and time will appear below the announcement headline on the course homepage. Optional: Uncheck the Show Start Date checkbox for Always show start date to hide the announcement start date.

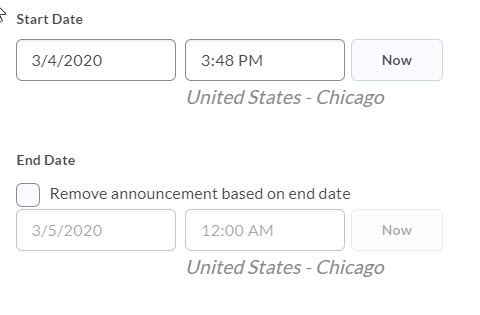
- In the Start Date and End Date fields, select the dates that you want the announcement to be available. Announcements publish immediately, unless you specify an alternate start date. Note: Post-dated Announcements items do not display in the Announcements widget even if users have permission to see future Announcements items. They can be found within the list of Announcements items on the Announcements page.
- Recommended: Set an End Date so only relevant announcements display. You can remove an Announcements item on a specific date by selecting the Remove Announcement based on end date check box. You and administrators can still see the Announcements item after its end date, but it will not display in the Announcements widget for your students.
- Optional: In the Attachments section, add files, record audio recordings, or record video as part of your Announcements item.

- To include Additional Release Conditions, click Attach Existing or Create and Attach.

- To save and continue editing the Announcement item later, click Save as Draft. Students cannot see draft Announcement items. To release an Announcement item to users, click Publish.
