Share the Glossary Tool
Instructors can share the Glossary tool with their students by either directing the students to access from the tool from the nav bar, add a link within a content module, or hyperlink within the HTML editor.
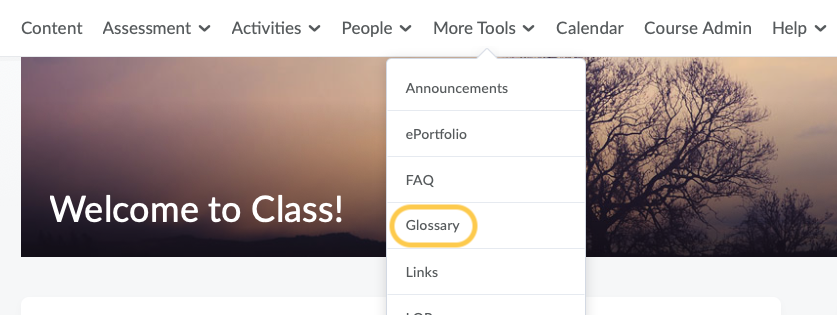
Access from the Glossary Tool
All users enrolled in a course can access your Glossary content from the Glossary Tool. To access the tool, on the nav bar, click the More Tools menu, then select Glossary.
Add a Link to the Glossary tool within a Content Module
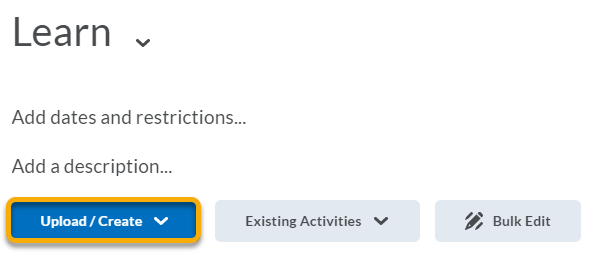
- On the nav bar click on Content.

- Within the Module you want to create the link, click on the Upload/Create button.
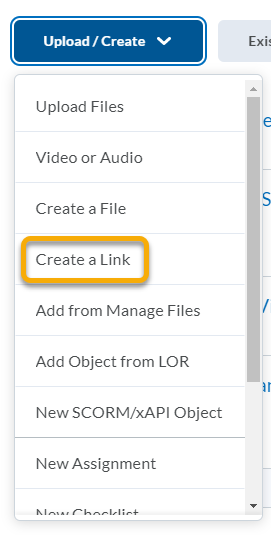
- Select Create a Link from the menu.
- Enter a Title, such as “Glossary.”
- Copy and paste the following URL to the Glossary into the URL field: https://tcu.brightspace.com/d2l/lms/glossary/glossary.d2l?ou={orgUnitId}
- Uncheck the box for Open as External Resource (since we are linking to a tool within TCU Online).
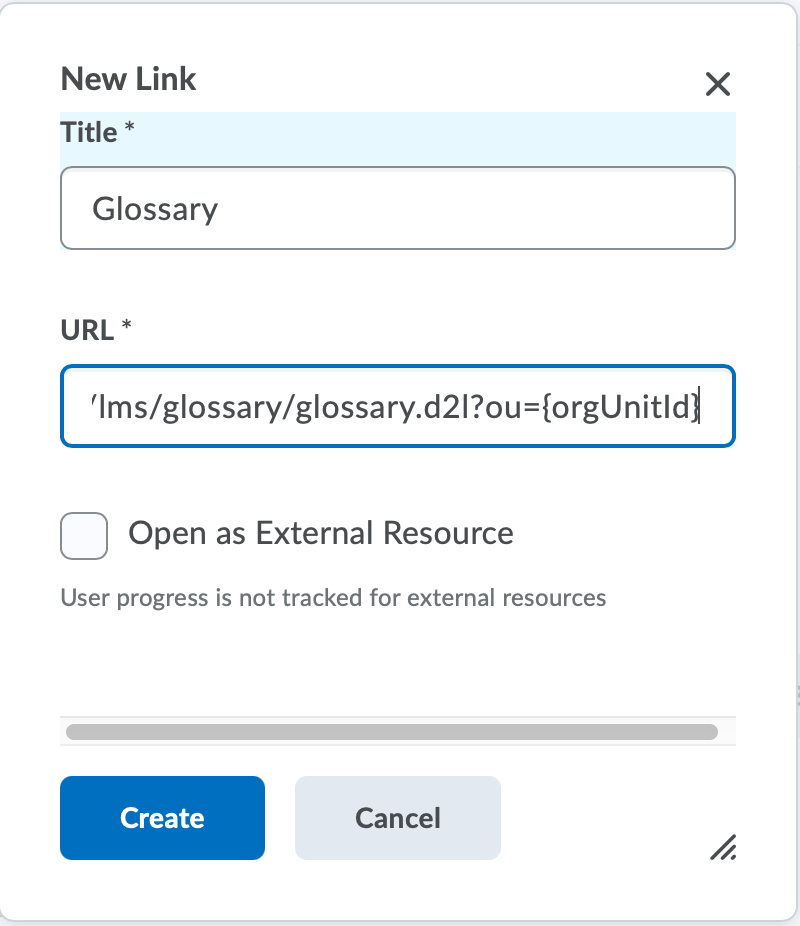
- Click on the Create button.
- The link will display within the content module.

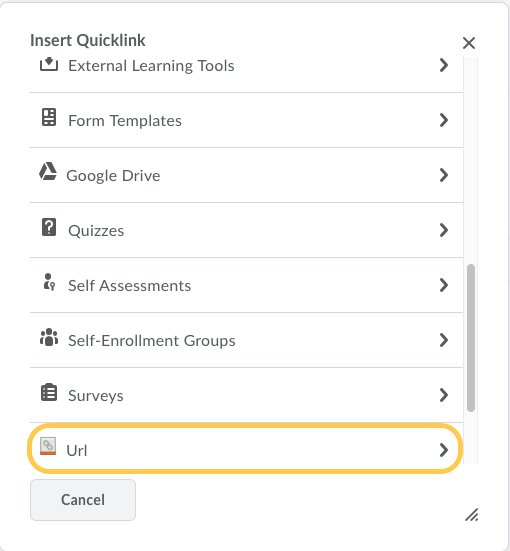
Add a QuickLink to the Glossary tool from the HTML Editor
- Within the HTML editor anywhere in the course, Instructors can click the “Insert QuickLink” button.

- In the Insert QuickLinks window, scroll down and select URL.
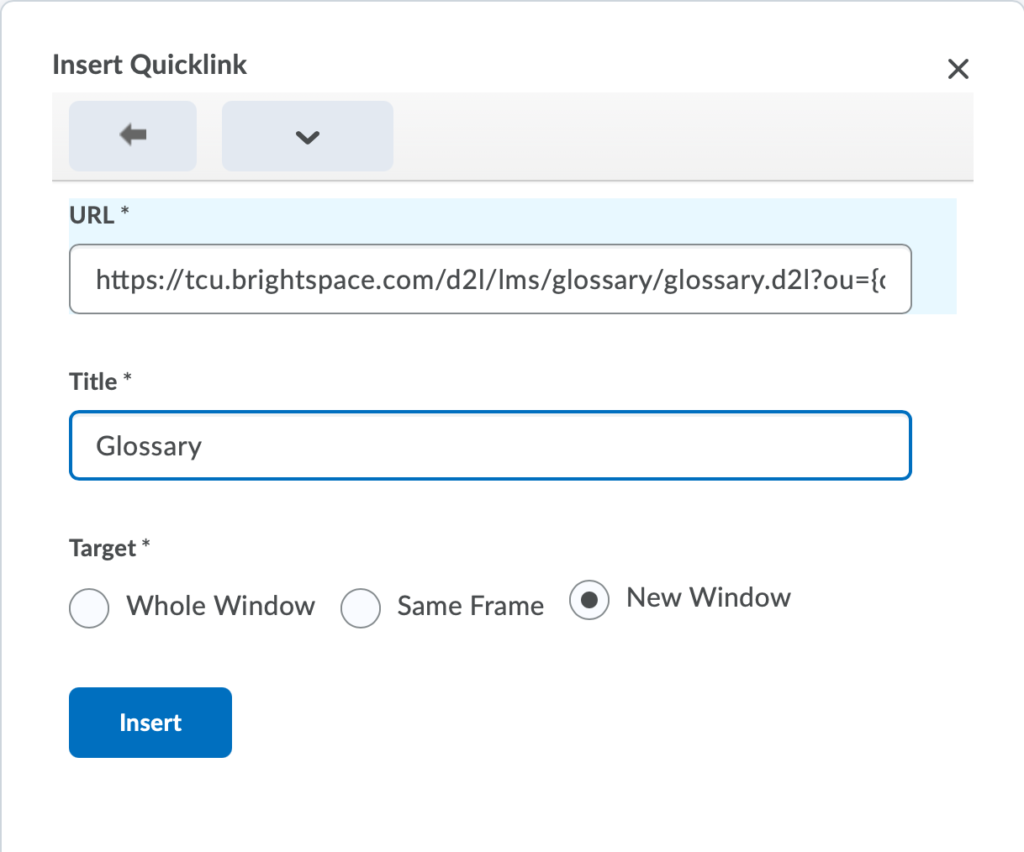
- Paste the following URL into the URL field: https://tcu.brightspace.com/d2l/lms/glossary/glossary.d2l?ou={orgUnitId}
- Add a Title – this is the link text students will click. In this example, I typed Glossary. Select the Target to either Same Frame (the link will open to replace the current page) or New Window (the link will open a new tab). Then, click Insert.
- Continue writing your content in the HTML editor, then click Save or Update.
