Schedule a Meeting with Zoom in TCU Online for a Specific Section in a Combined Course
Follow these steps to schedule a meeting in zoom for a specific section in a combined course using the Zoom integration in TCU Online.
As a note, all students will see the meetings within the course, if they click the People menu on the nav bar, then select Zoom.
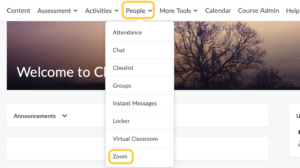
- On the nav bar, click the People menu, then select Zoom.
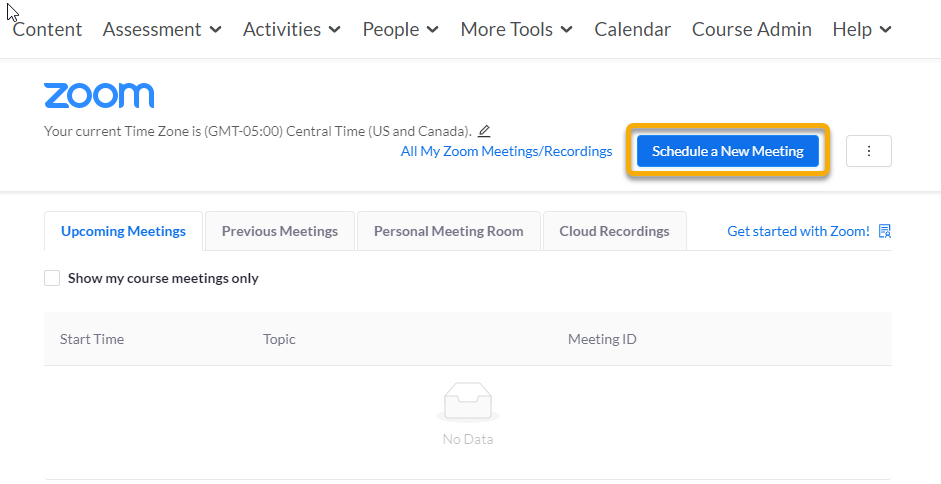
- Click on the Schedule a New Meeting button.
- Enter a name for the meeting in the Topic box. Important: Create this name to include the specific section number so students and you will understand who is expected to participate. For example, you may want to add “- section 010 only” (replace 010 with the section number) to the end of the meeting title.

- Enter a description for the meeting in the description box, if desired.

- Enter the date and starting time in the When boxes.

- Using the drop-downs select the duration for the meeting.

- Adjust the time zone if needed.

- Check the box if your meeting will be a recurring meeting.

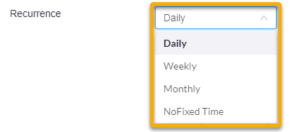
- Enter Recurrence – daily, weekly, monthly, and no fixed time.
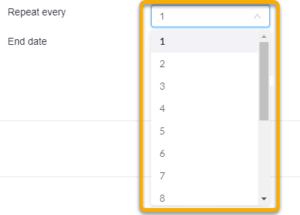
- Select number of repeating occurrences.
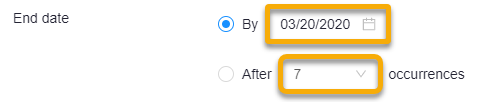
- Select an End Date or to End After a certain number of occurrences.
- Enter Recurrence – daily, weekly, monthly, and no fixed time.
- Check the box if you wish to require Registration.

- Video: Select your preference of video on or off for Host and Participants. Selecting On will automatically turn on the video upon launching Zoom for your meeting(s).

- Select how participants will receive audio: Telephone, Computer Audio, or Both (recommended).

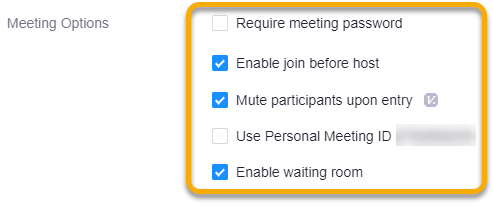
- Check the box for additional Meeting Options: Require meeting password, Enable join before host, Mute participants upon entry, Use Personal Meeting ID, and Enable waiting room.
- Enter email addresses for Alternative Hosts as necessary. This is another user (example: your co-instructor) who can launch the meeting.

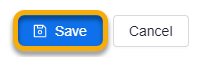
- Click on the Save button.
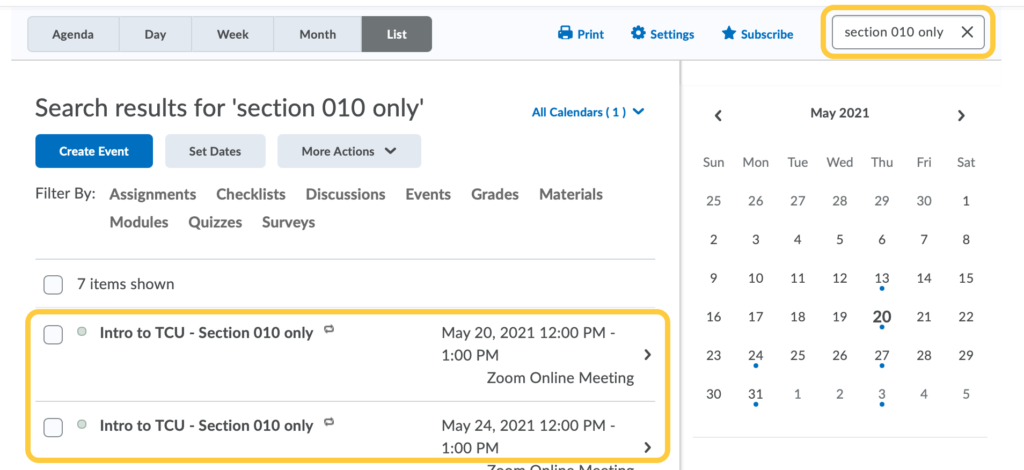
- The meetings will now be added into the Calendar in the course and all users will view it. To restrict this to only the enrolled students in the specific section, we will need to change the participants in the Calendar event. Click the Calendar link on the nav bar.

- In the search field, type the name of the meeting, or part of the name, then press Enter/Return on your keyboard. For example, if you added “section 010 only” in the meeting title, type that in the search field. The search results will display all instances of that meeting (if recurring). Click on the meeting title in the search results.
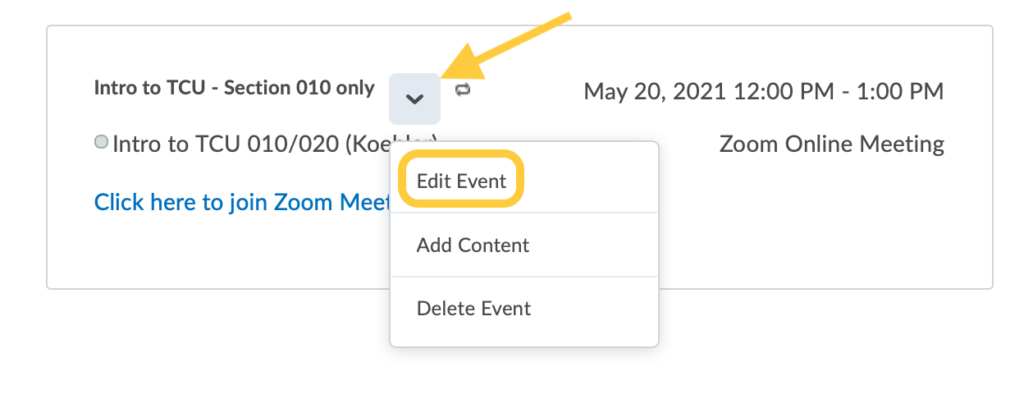
- Click the context menu to the right of the meeting title, and select Edit Event.
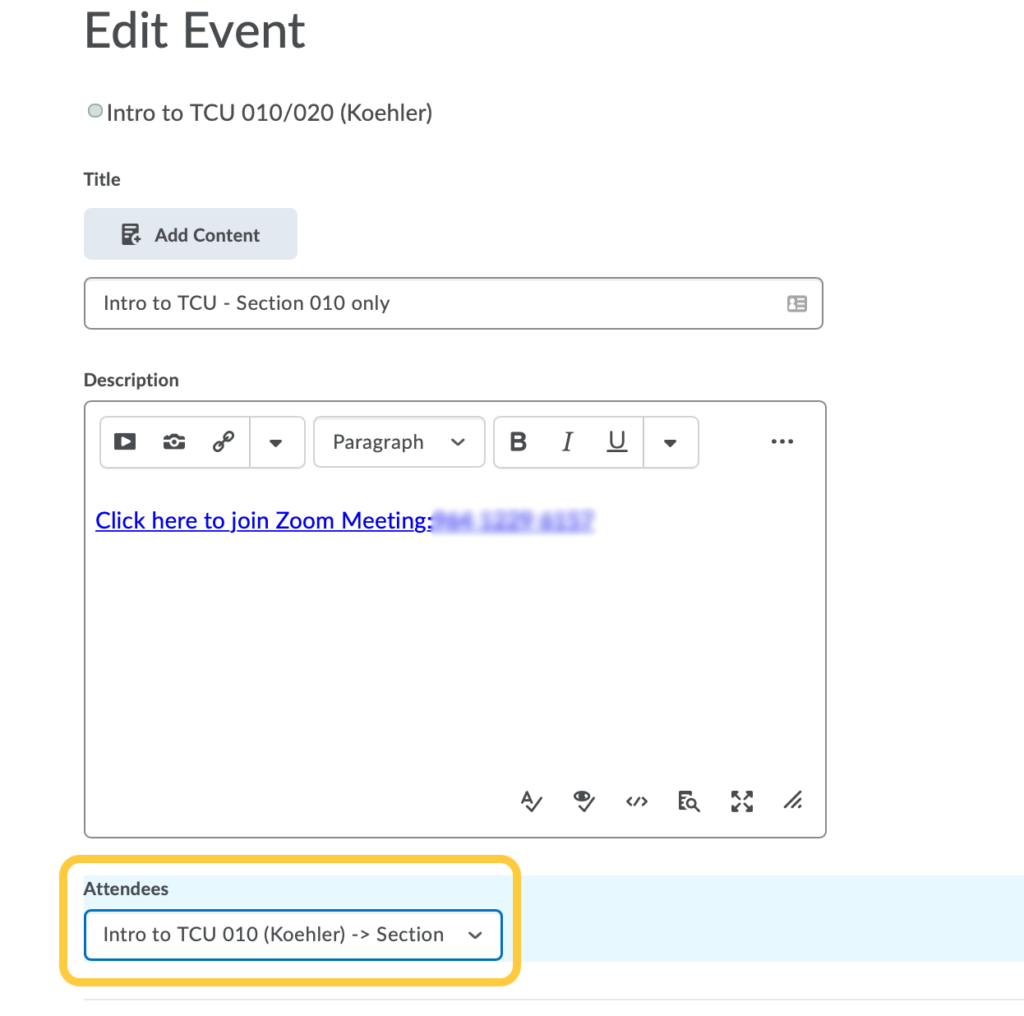
- On the Edit Event page, below the meeting description, click the Attendees drop-down menu, and select the section who should attend the meeting. By default, everyone in the course offering can view the event. Changing this to a specific section will display this event only to those in the section you choose.
- Click Save on the bottom of the page.

- If your meeting is recurring, a pop-up will appear asking if you want to apply the change to All events in this series, the selected occurrence, or the selected and future occurrences. If this is a new meeting, we recommend selecting All events in this series, then click Update.
- Click Save on the bottom of the page again.
- If you need to set up an individual or recurring meeting for other sections in this course, repeat these steps.