Print Quiz or Quiz Key
There isn’t a built-in way to print a quiz within TCU Online, however instructors have a few options for either printing the preview from Firefox browser (recommended), or from other browsers creating a submission view, then copy/pasting into Microsoft Word.
Print a Blank Quiz
Print a Blank Quiz from Firefox (Recommended)
Instructors can print a quiz while previewing a quiz in the Firefox browser. Firefox is currently the only browser that permits you to print a quiz in TCU Online.
NOTE: In order to print a list of all quiz questions, you will need to ensure your quiz is set to display all quiz questions on the same page.
If you do not already have the Firefox browser, start by downloading Firefox.
- Open your Firefox browser and login to TCU Online.
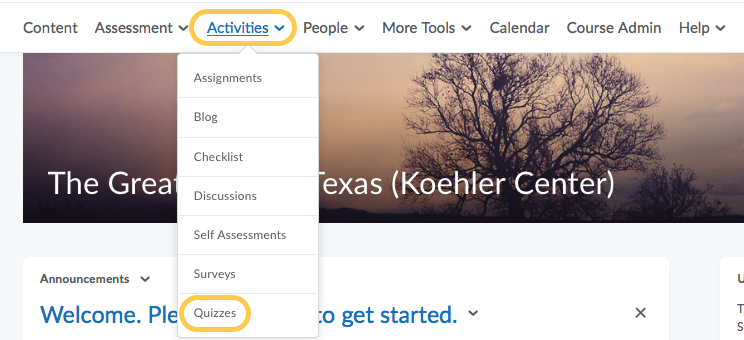
- On the navbar, click the Activities menu, then select Quizzes.
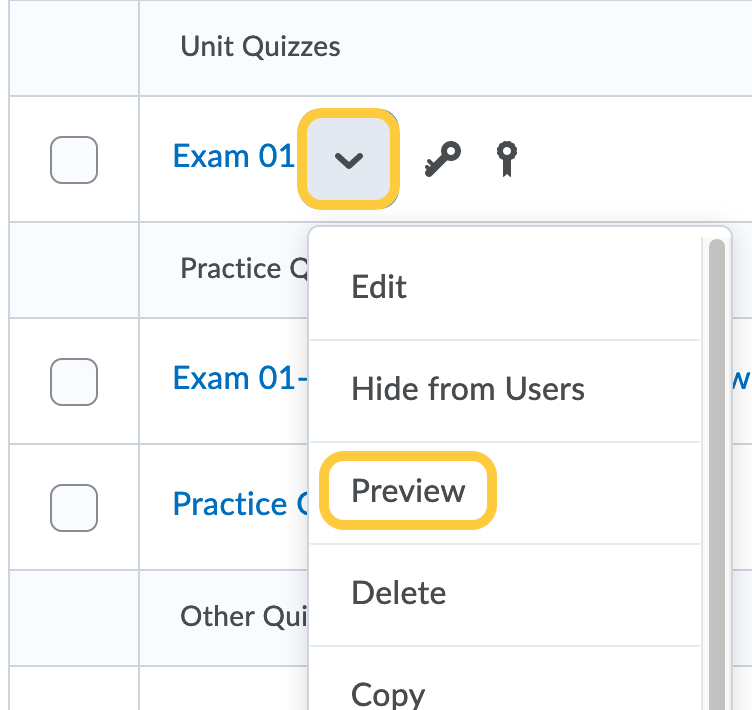
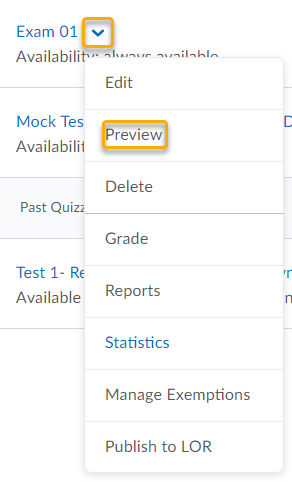
- Click on the context menu next to the quiz you want to print, then select Preview.
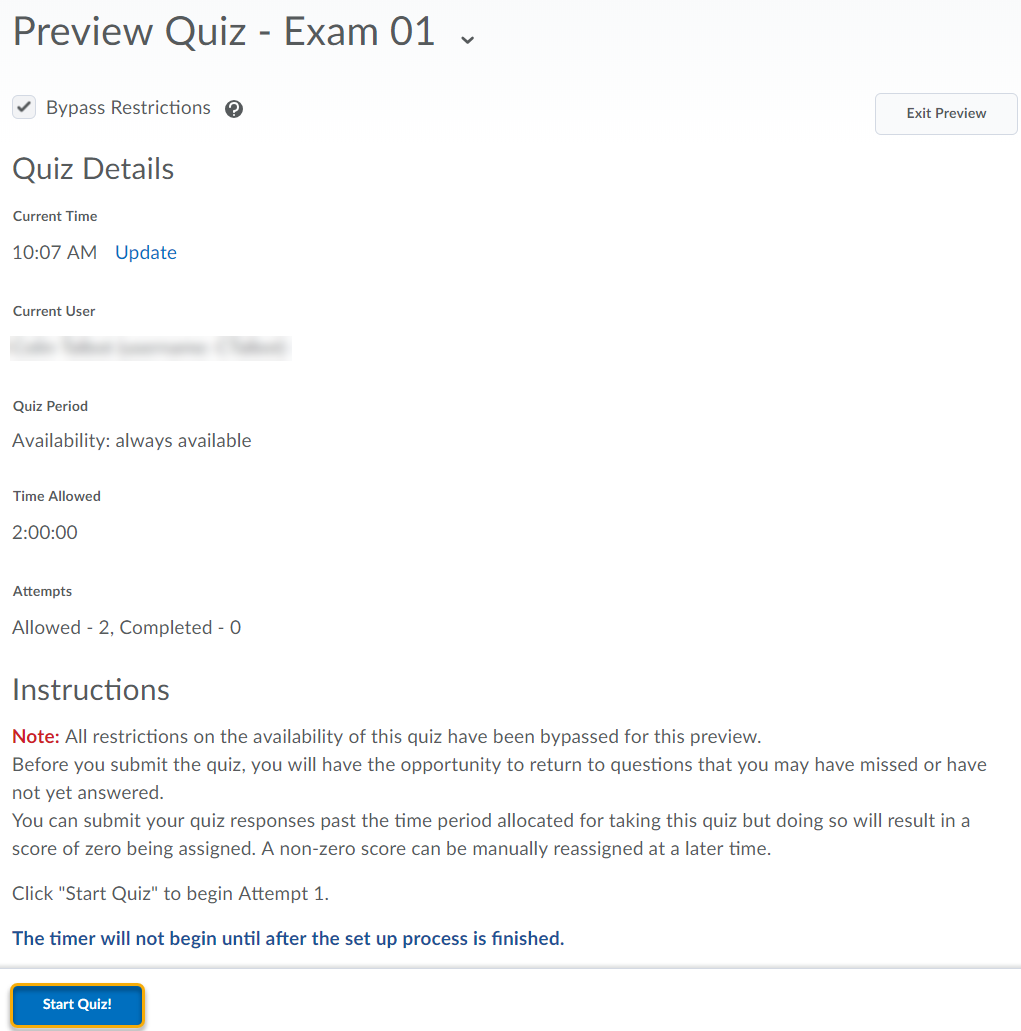
- Select the Bypass Restrictions checkbox.

- Click Start Quiz!

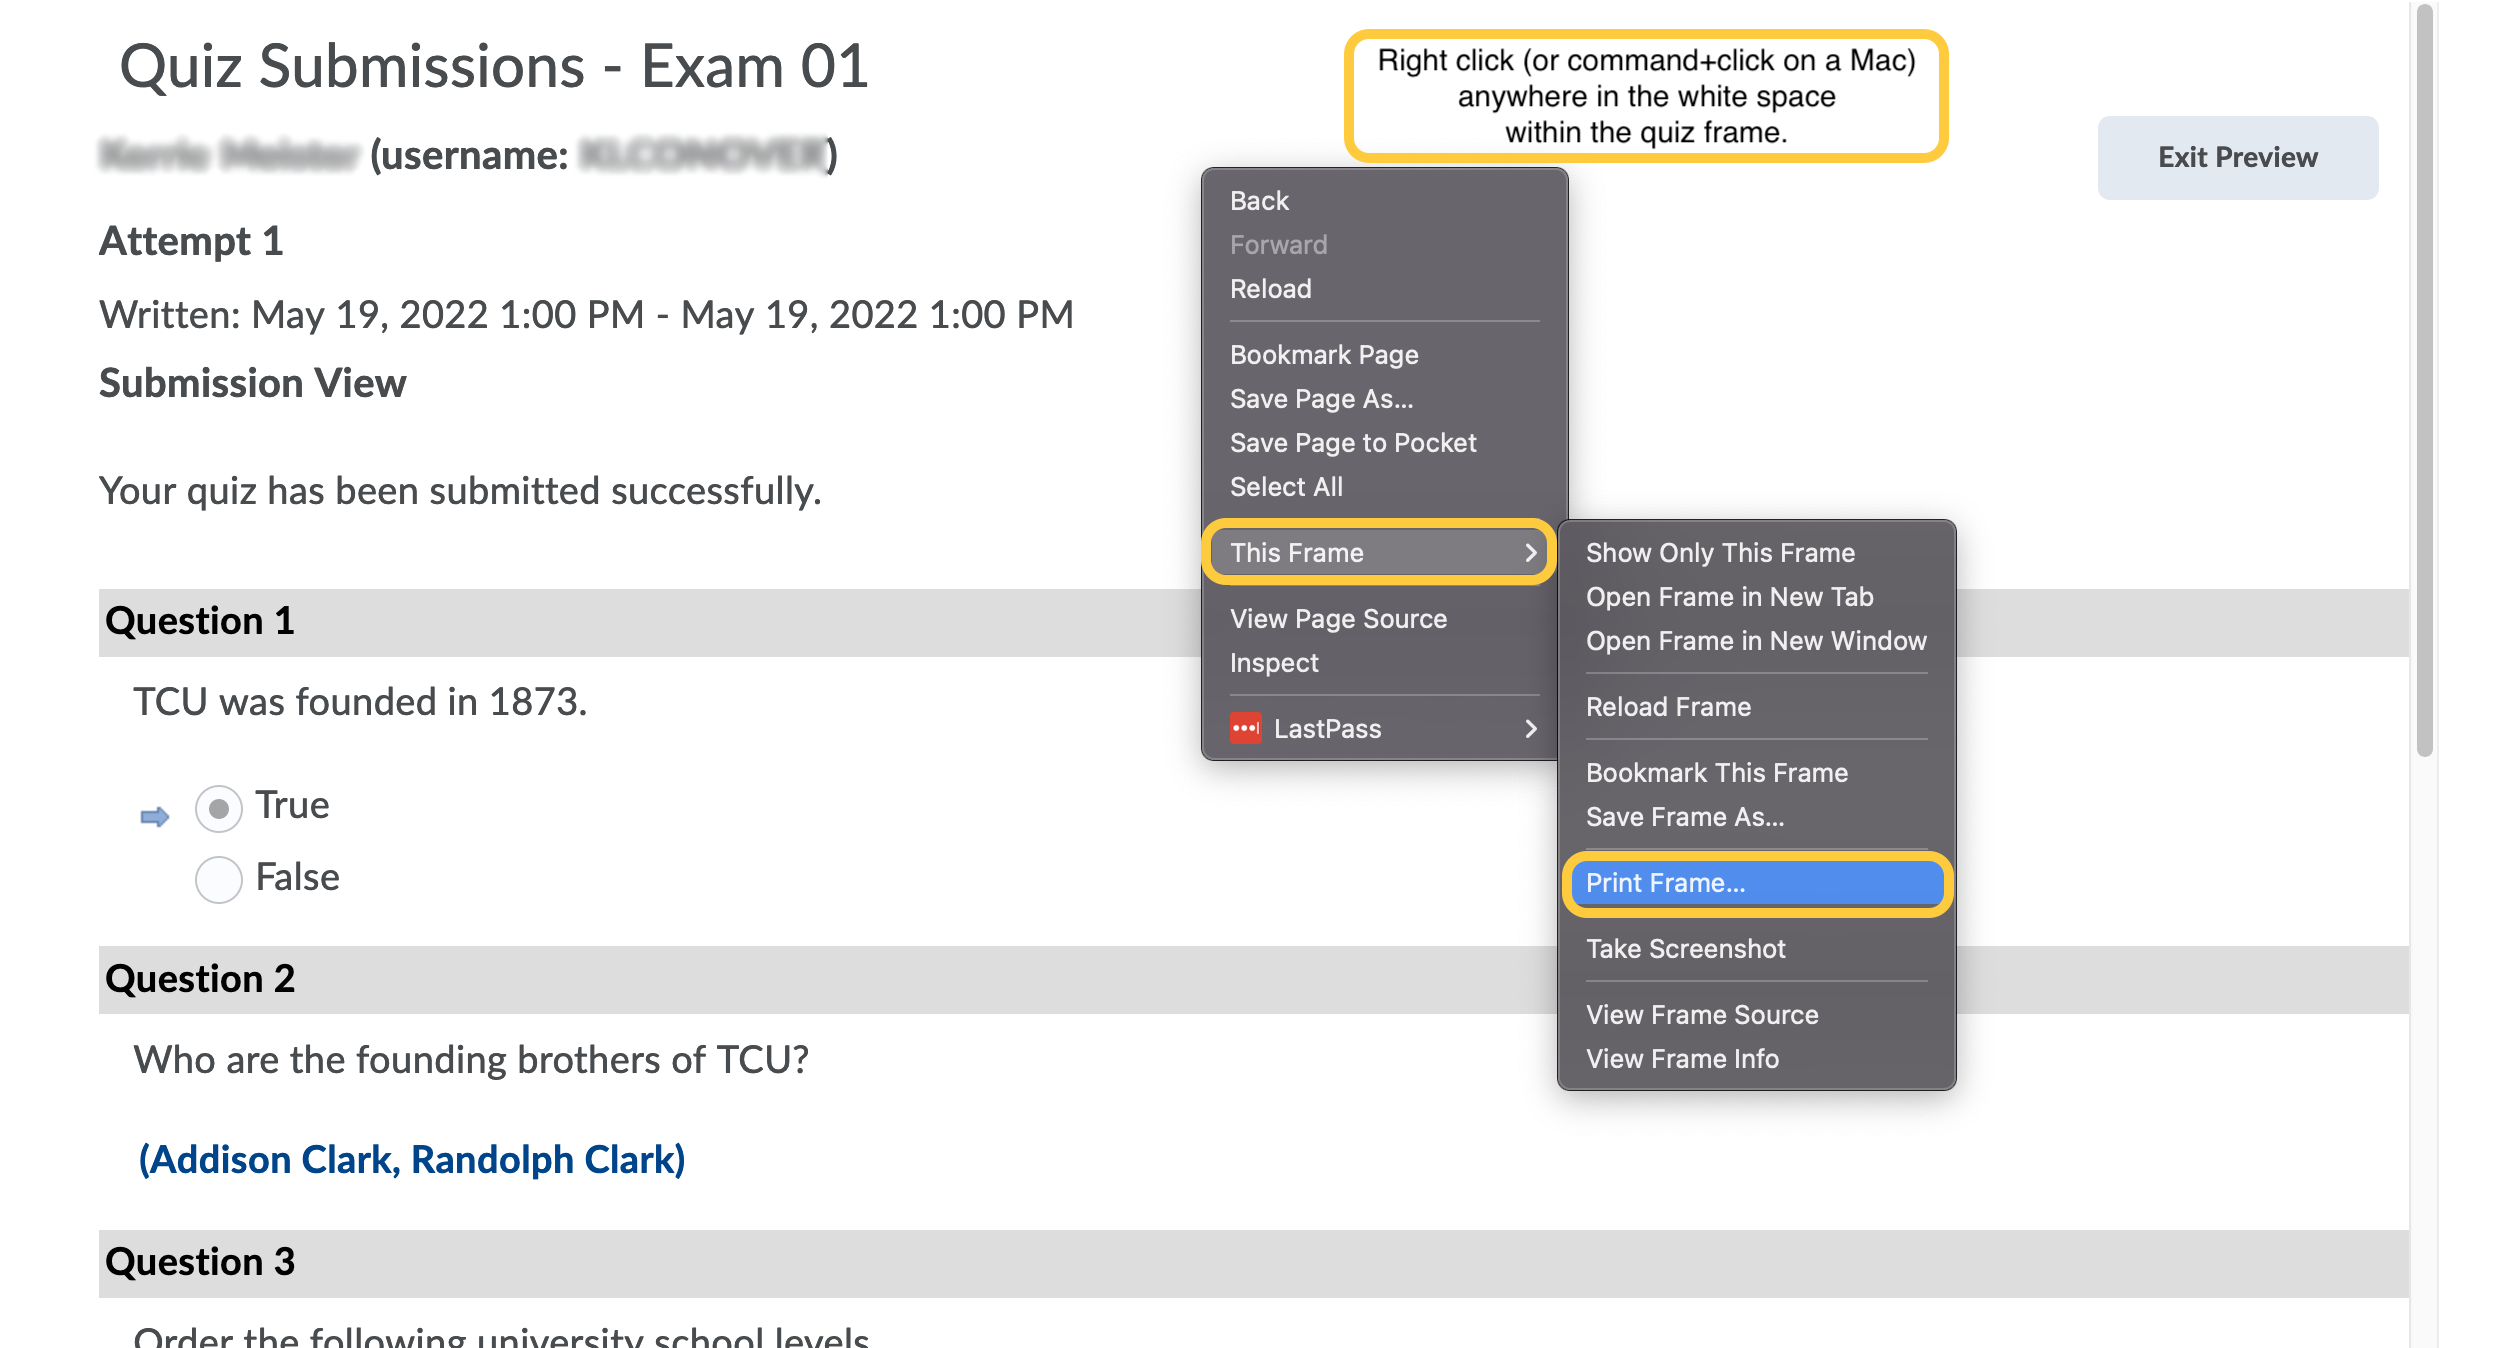
- Once the quiz opens, right-click on the quiz preview page and select This Frame > Print Frame.
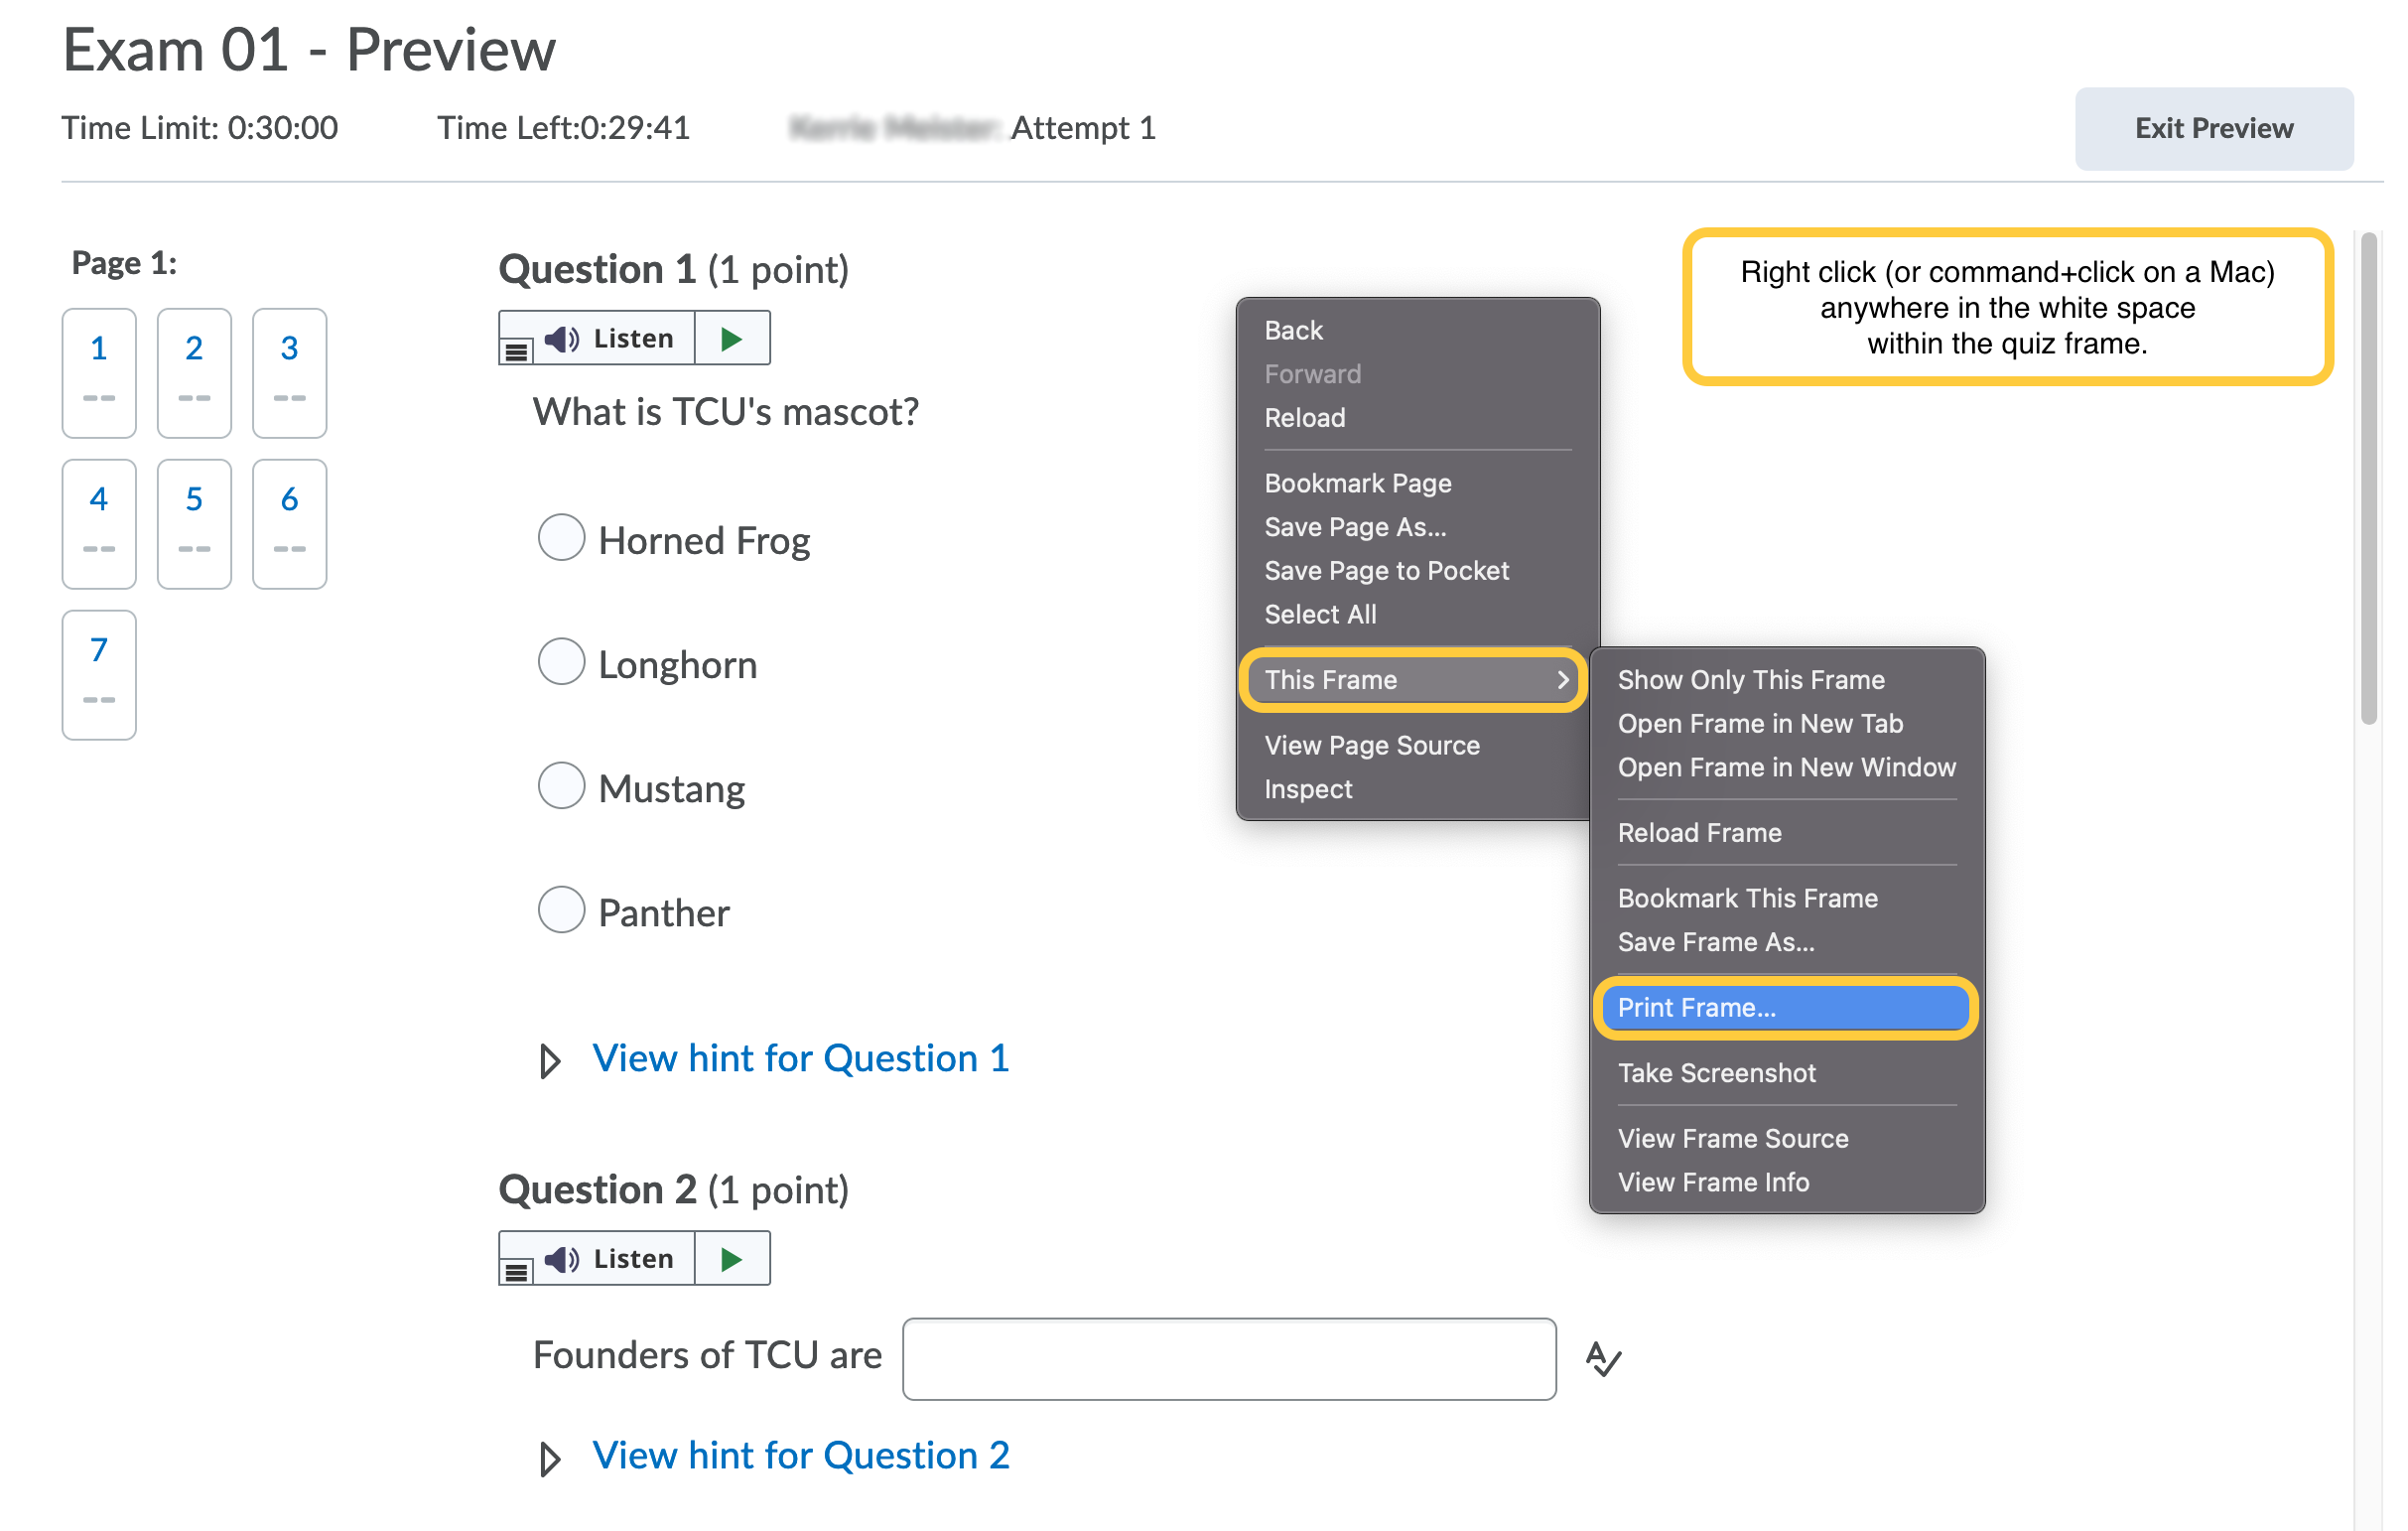
- Set your preferred printer and settings or select Save to PDF. Then click Print.
Instructions adapted from Carlton University.
Print a Blank Quiz from All Other Browsers
The workaround below includes creating a submission view, and copy/pasting into Microsoft Word.
These steps require the instructor to print a view of the quiz. A Submission View is the page that is displayed after the Submit Quiz button is selected when taking or previewing a quiz. Among other things, the Submission View can display none or all quiz questions, the user responses, and the correct responses to the questions if desired. For the purpose of simply printing the quiz, we will set the view to show all questions without user responses.
First, Create the Submission View:
- On the navbar, click the Activities menu, then select Quizzes.
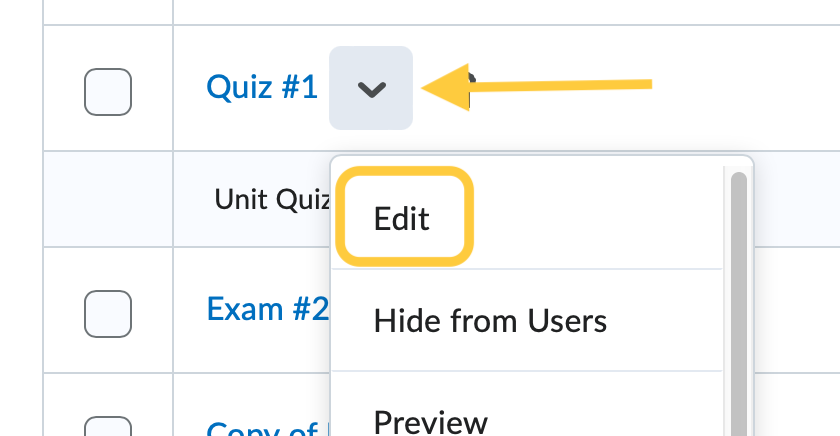
- On the Manage Quizzes page, from the context menu of the quiz, click Edit.
- Select the title on the Evaluation & Feedback panel to expand these options and set your preferences.
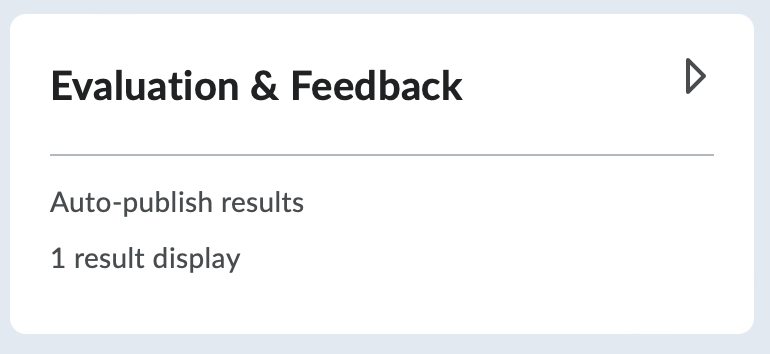
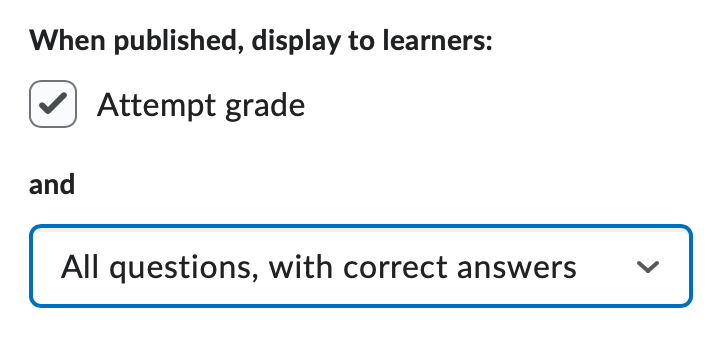
- Under When published, display to learners, select the following:
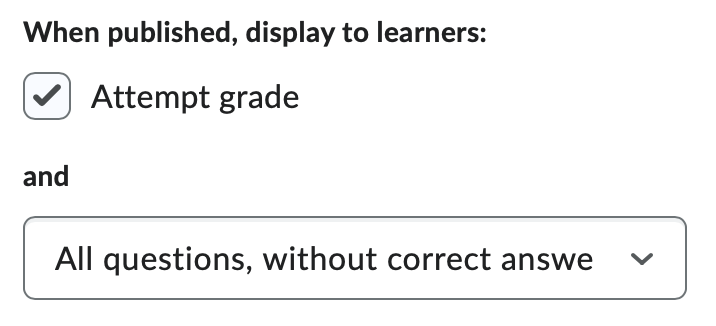
- Check the box for attempt grade. (Checked by default)
- For a blank quiz, select: All questions, without correct answers
- Click Save and close.
Now that you have created the view you can print all of the questions from the Submission View:
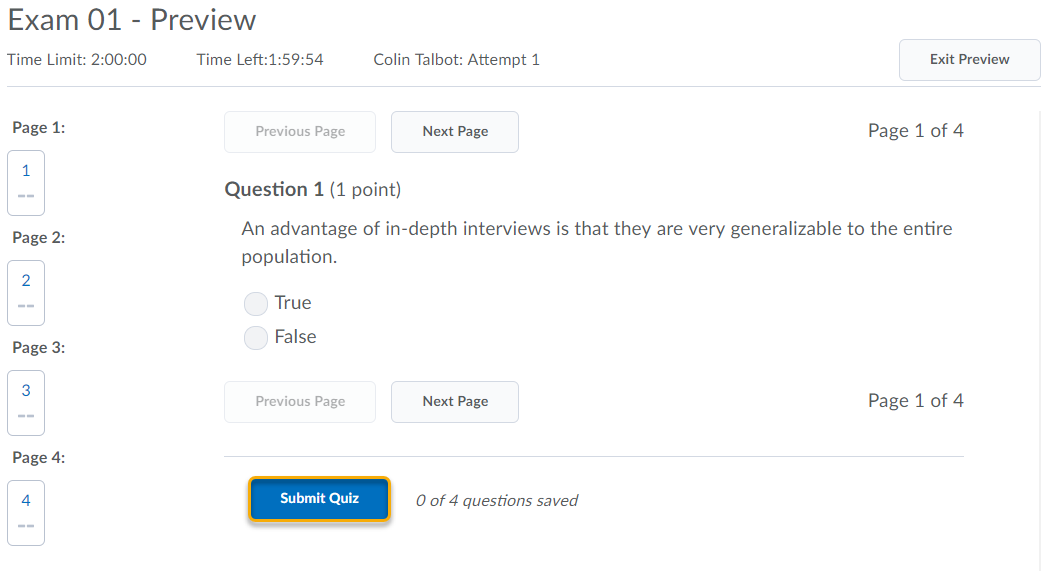
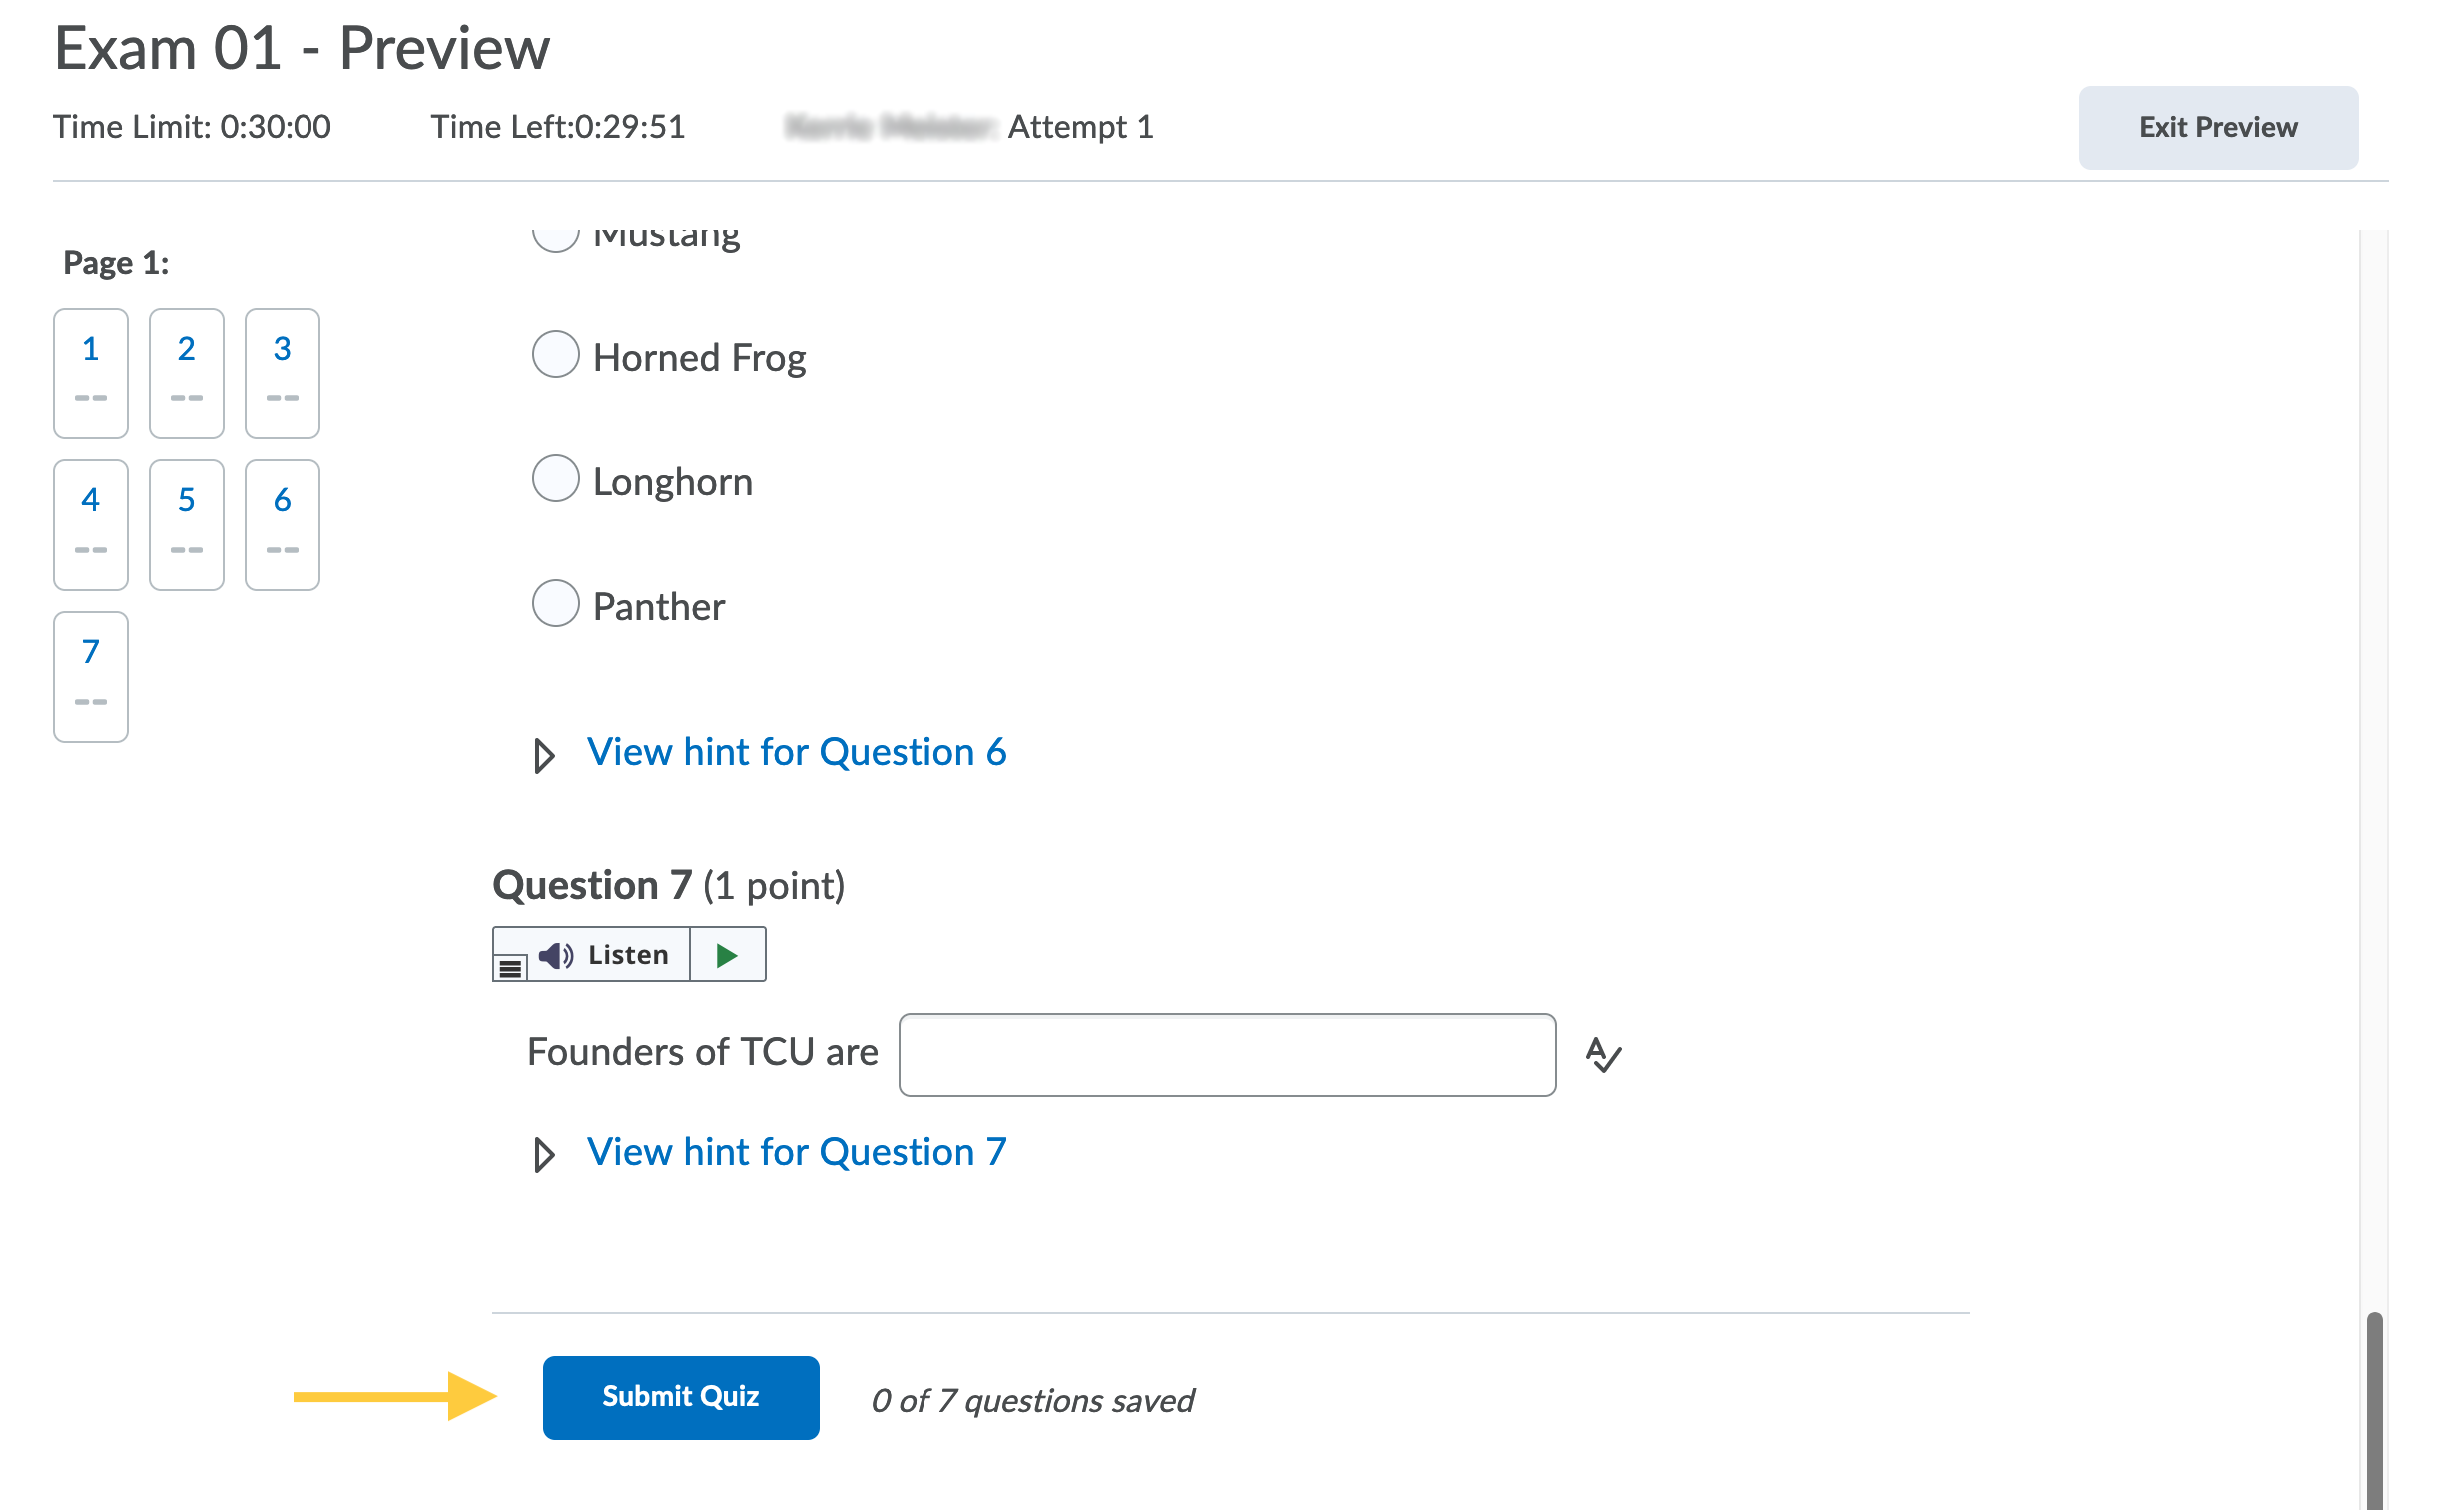
- Click on the context menu of the quiz you want to print and select Preview.
- Select Start Quiz!.
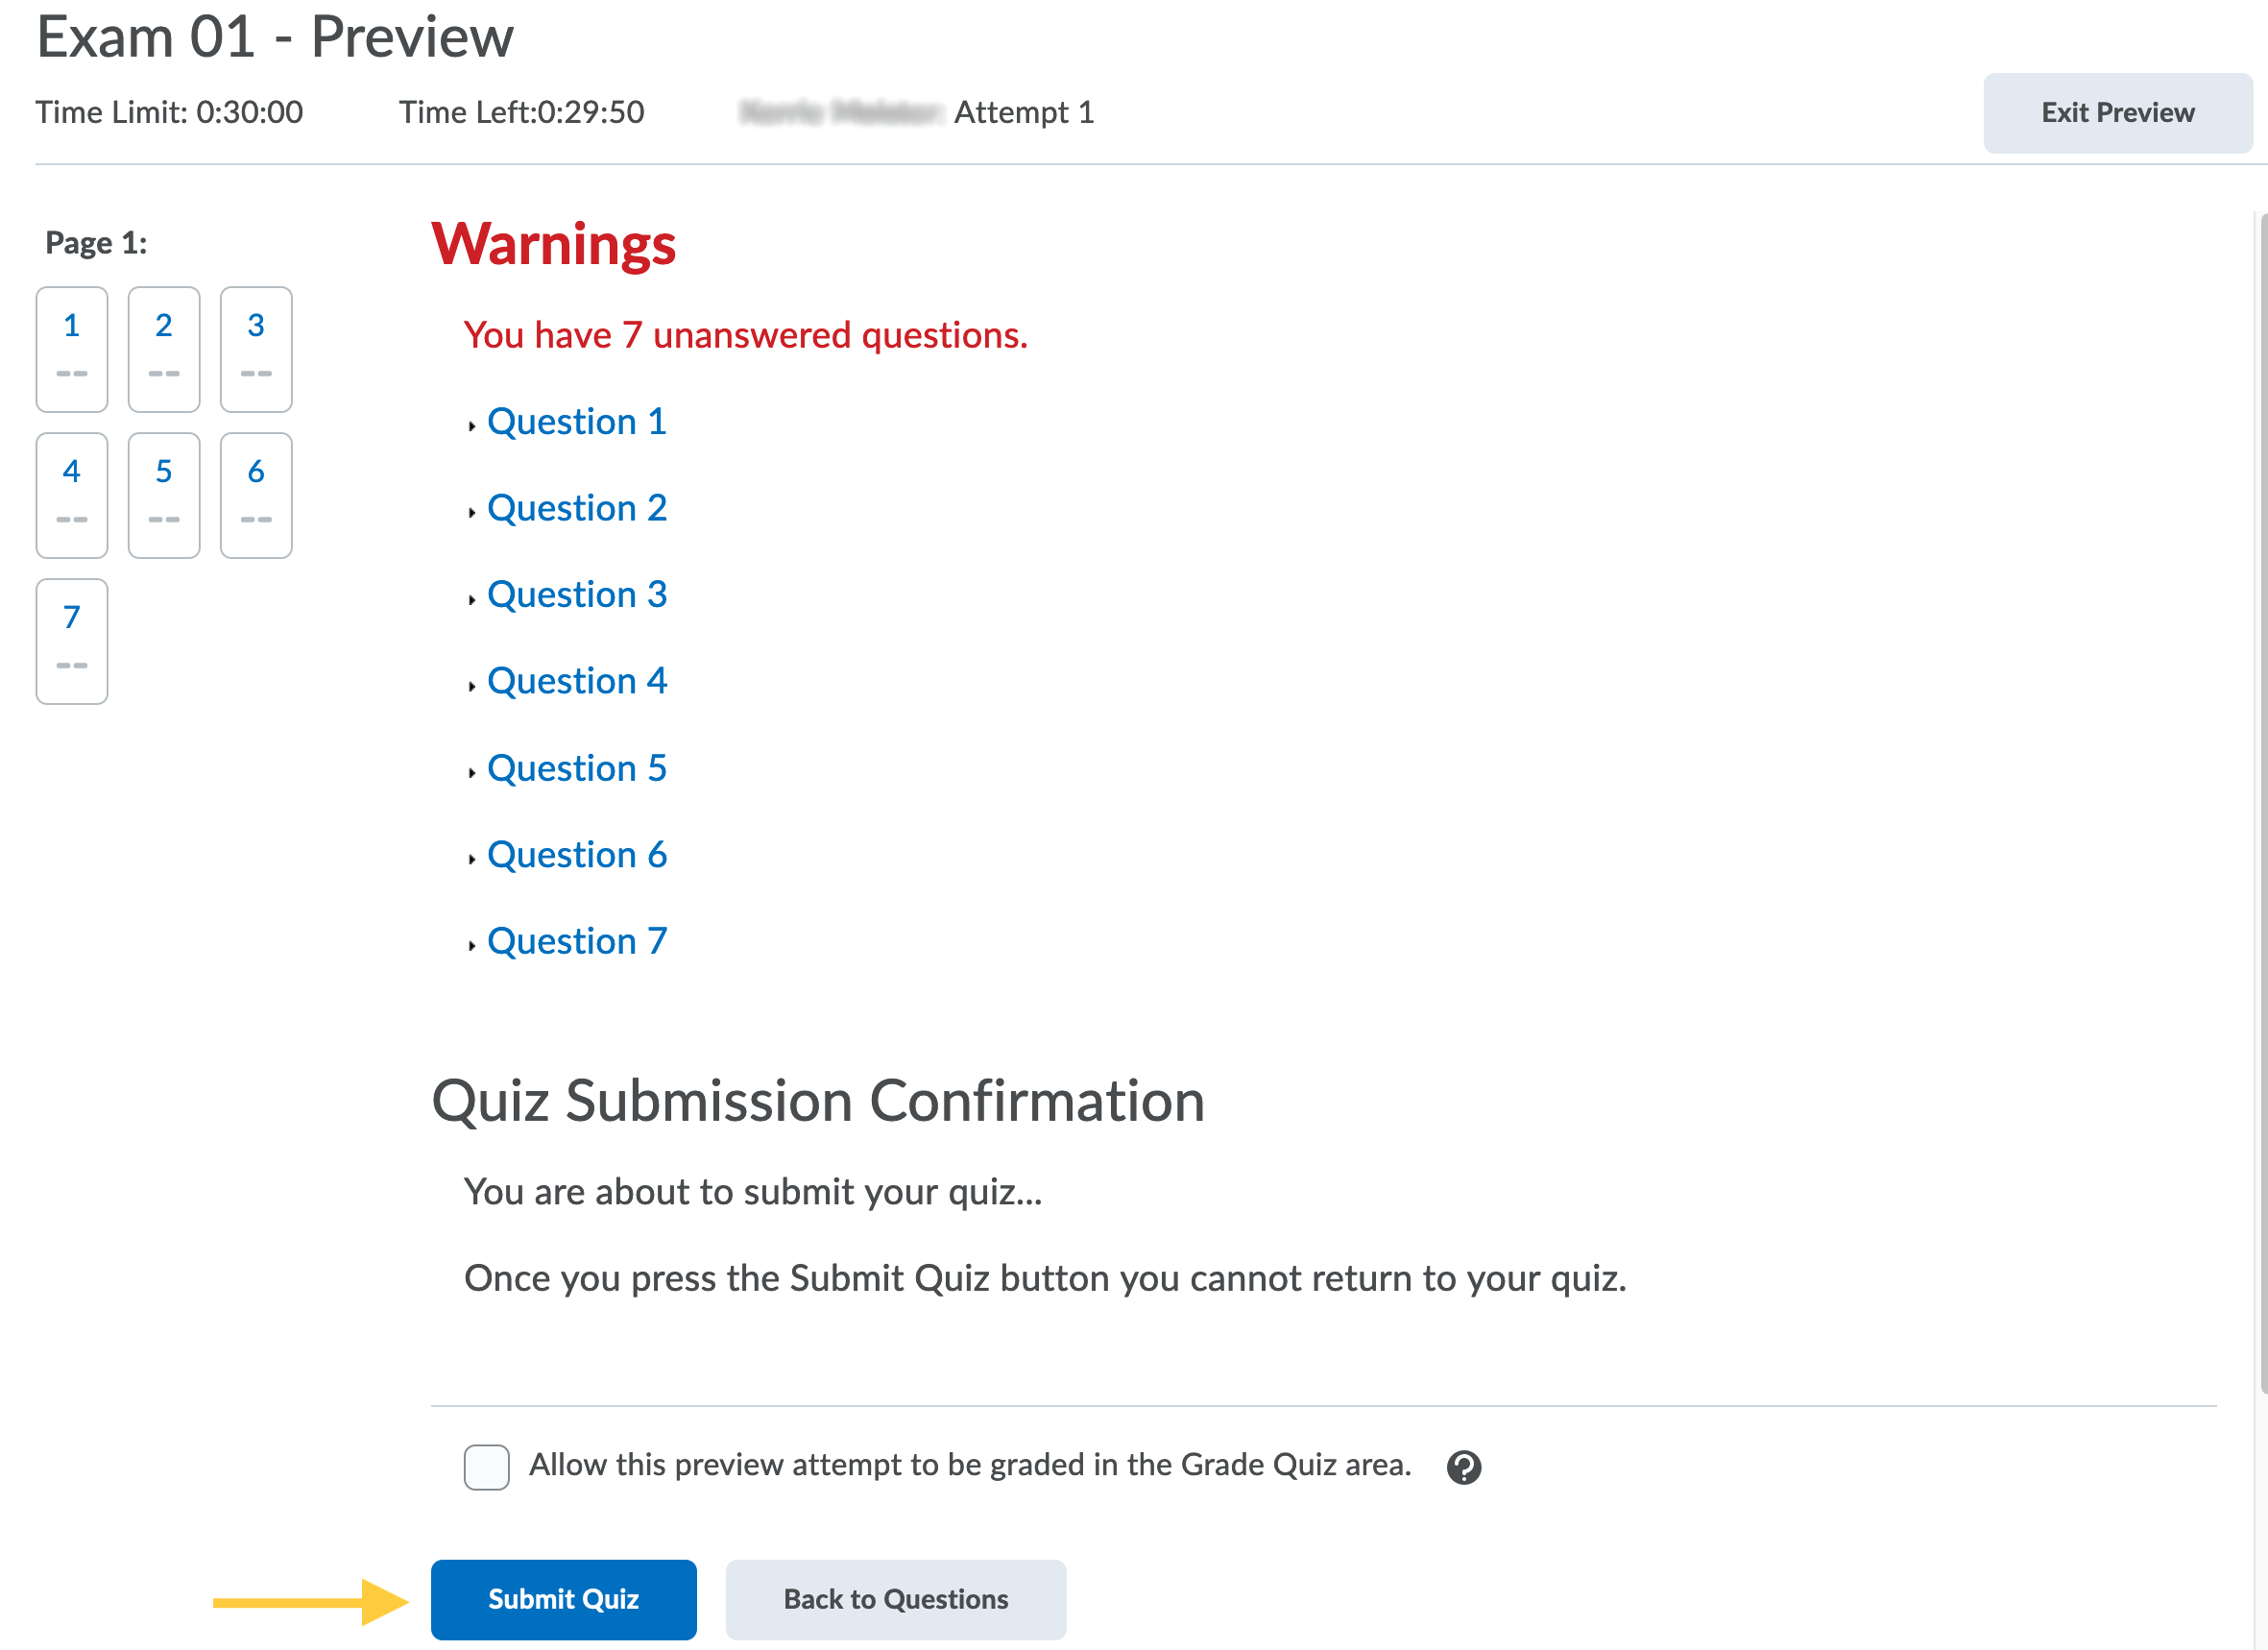
- Click on the Submit Quiz button.
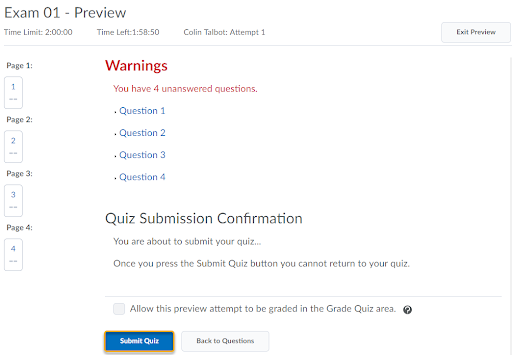
- Click the Submit Quiz button again.
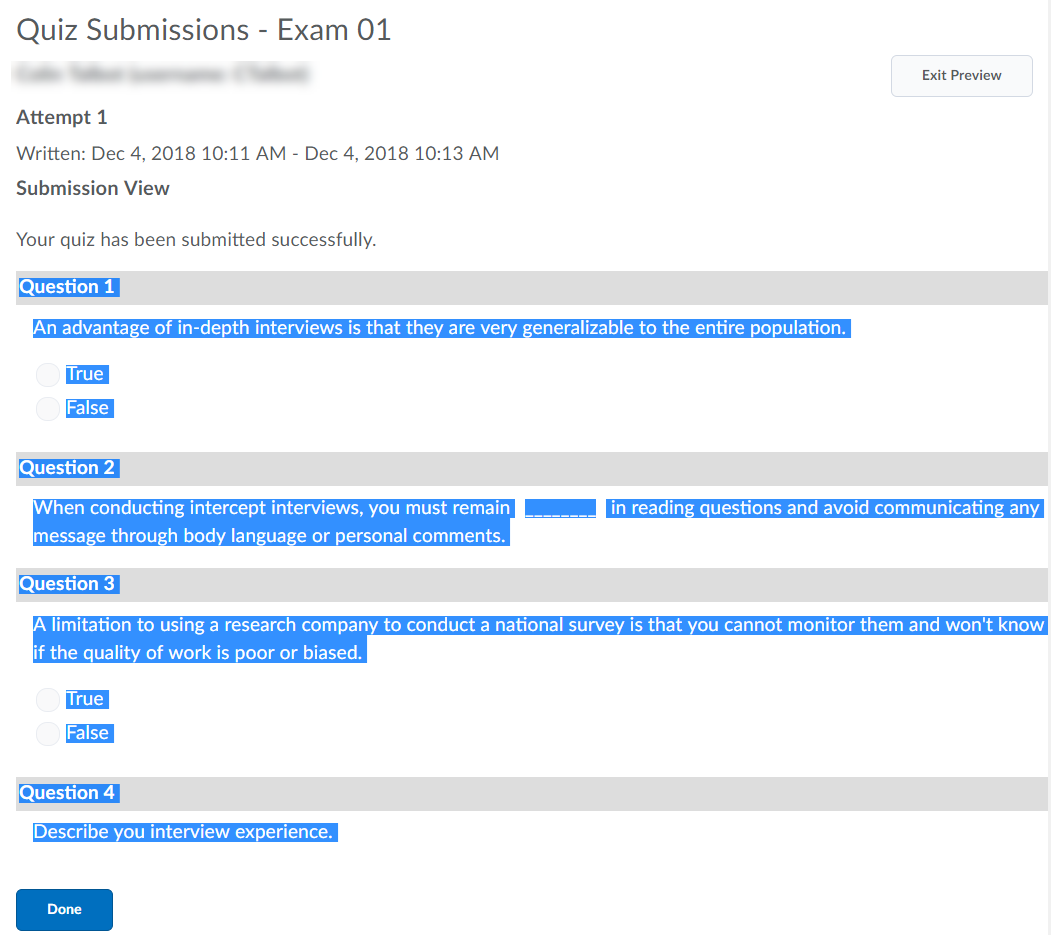
- Highlight all of the quiz questions. Click to the left of the wording Question 1. Use the vertical scroll bar to scroll down to the bottom of the page until you can see the end of the text for the last question in the Quiz. Hold down the Shift key on the keyboard. Point to and click to the right of the end of the text for the last question while still holding down the shift key on the keyboard.
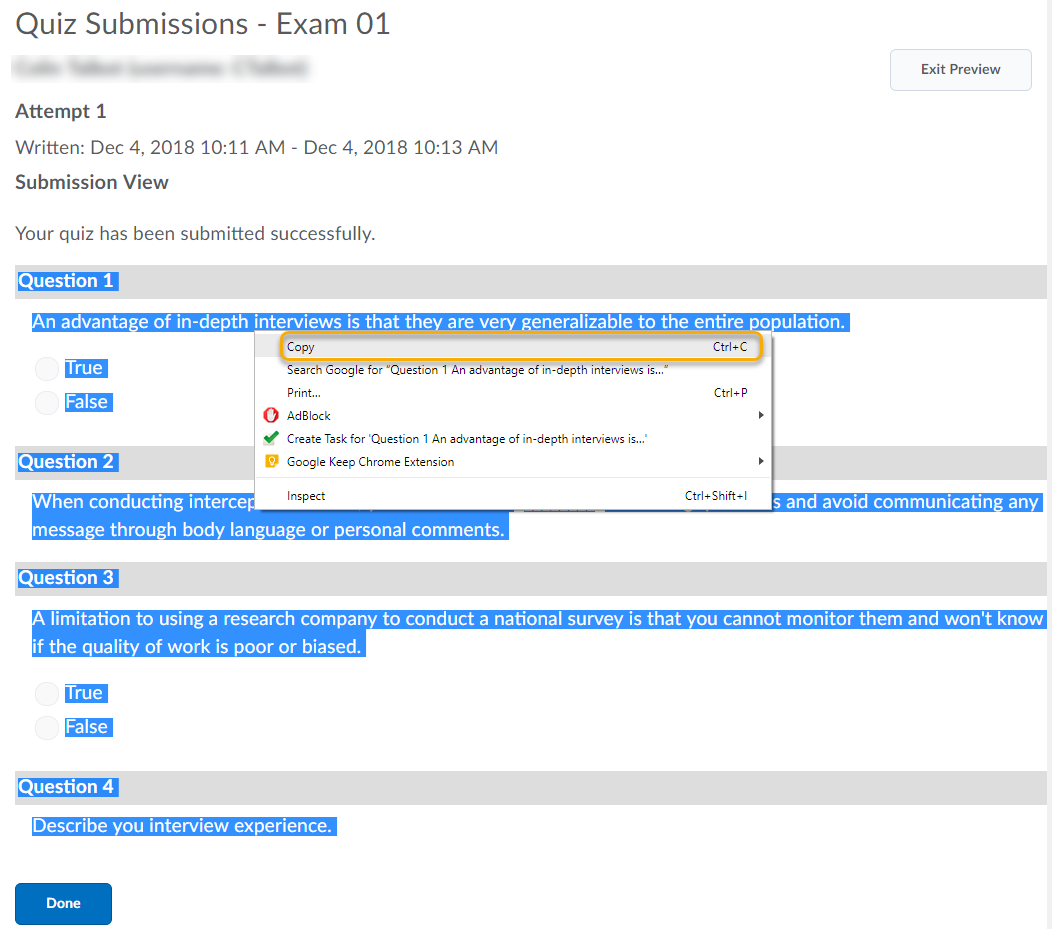
- Copy the selected text. You may use whatever method you are comfortable with, use CTRL + C, Command + C, on the keyboard or right-click or command-click on the selected text and select Copy.
- Open Microsoft Word.
- Paste the copied text into Microsoft Word. You may use whatever method you are comfortable with, use CTRL + V or COMMAND + V on the keyboard or select the Paste button from the toolbar.
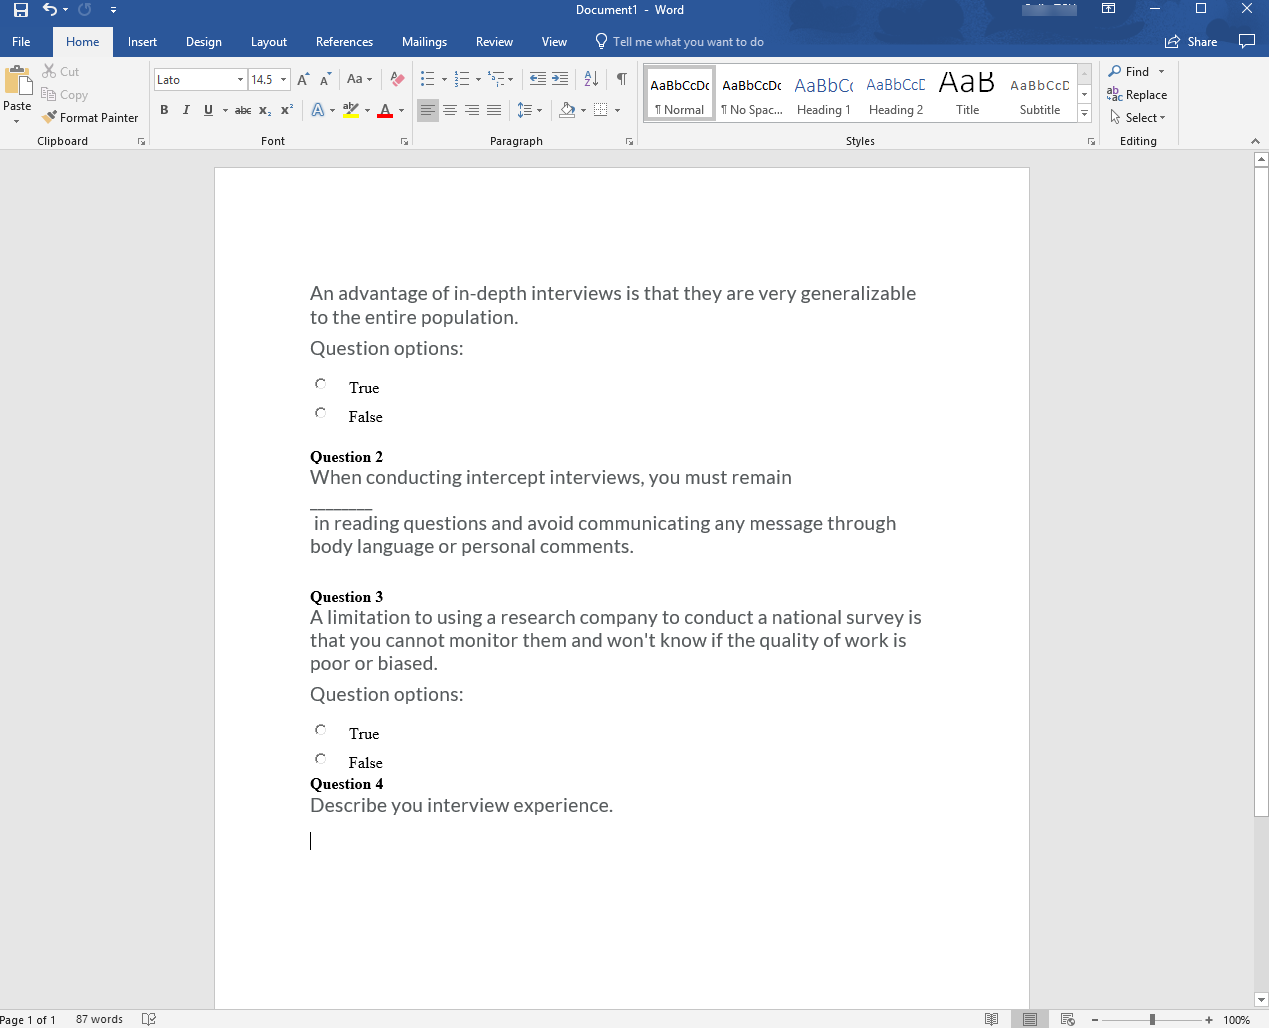
- Format as desired. Save, print, or send the electronic copy.
IMPORTANT: Once this is complete, remember to go back and change your submission views settings. Otherwise students will see (and have access to) all the questions when they submit their quiz: To change this back to the original settings, go back into Edit Quiz and click Submission Views. Clicked for the Default submission view (set above) and under “Show Questions?” change the Yes to No. Save changes.
Print a Quiz Key
Print a Quiz Key from Firefox (Recommended)
Instructors can print a quiz or a quiz key in the Firefox browser. Firefox is currently the only browser that permits you to print a quiz in TCU Online.
NOTE: In order to print a list of all quiz questions, you will need to ensure your quiz is set to display all quiz questions on the same page.
If you do not already have the Firefox browser, start by downloading Firefox.
The steps below include creating a submission view, then printing the browser frame.
A Submission View is the page that is displayed after the Submit Quiz button is selected when taking or previewing a quiz. Among other things, the Submission View can display none or all quiz questions, the user responses, and the correct responses to the questions if desired.
Step 1: Create the Submission View
- On the navbar, click the Activities menu, then select Quizzes.
- On the Manage Quizzes page, from the context menu of the quiz, click Edit.
- Select the title on the Evaluation & Feedback panel to expand these options and set your preferences.
- Under When published, display to learners, select the following:
- Check the box for attempt grade. (Checked by default)
- For a quiz key, check the box for Show question answers.
- Check the box for attempt grade. (Checked by default)
- Click Save and Close.
Step 2: Preview & Print Submission View
Now that you have created the view you can print all of the questions from the Submission View:
- Click on the context menu of the quiz you want to print and select Preview.
- Select the Bypass Restrictions checkbox.
- Click Start Quiz!
- Without answering any questions, click on the Submit Quiz button.
- Click the Submit Quiz button again. Ignore the warnings letting you know you didn’t answer questions.
- Upon quiz submission, on the quiz submission page, right-click on the page and select This Frame > Print Frame.
- Set your preferred printer and settings or select Save to PDF. Then click Print.
Instructions adapted from Carlton University.
Print a Quiz Key from All Other Browsers
The workaround below includes creating a submission view, and copy/pasting into Microsoft Word.
These steps require the instructor to print a view of the quiz. A Submission View is the page that is displayed after the Submit Quiz button is selected when taking or previewing a quiz. Among other things, the Submission View can display none or all quiz questions, the user responses, and the correct responses to the questions if desired. For the purpose of simply printing the quiz, we will set the view to show all questions without user responses.
Step 1: Create the Submission View
- On the navbar, click the Activities menu, then select Quizzes.
- On the Manage Quizzes page, from the context menu of the quiz, click Edit.
- Select the title on the Evaluation & Feedback panel to expand these options and set your preferences.
- Under When published, display to learners, select the following:
- Check the box for attempt grade. (Checked by default)
- For a quiz key, check the box for Show question answers.
- Check the box for attempt grade. (Checked by default)
- Click Save and Close.
Step 2: Preview, Copy & Paste Submission View, then Print
Now that you have created the view you can print all of the questions from the Submission View:
- Click on the context menu of the quiz you want to print and select Preview.
- Select Start Quiz!.
- Click on the Submit Quiz button.
- Click the Submit Quiz button again.
- Highlight all of the quiz questions. Click to the left of the wording Question 1. Use the vertical scroll bar to scroll down to the bottom of the page until you can see the end of the text for the last question in the Quiz. Hold down the Shift key on the keyboard. Point to and click to the right of the end of the text for the last question while still holding down the shift key on the keyboard.
- Copy the selected text. You may use whatever method you are comfortable with, use CTRL + C, Command + C, on the keyboard or right-click or command-click on the selected text and select Copy.
- Open Microsoft Word.
- Paste the copied text into Microsoft Word. You may use whatever method you are comfortable with, use CTRL + V or COMMAND + V on the keyboard or select the Paste button from the toolbar.
- Format as desired. Save, print, or send the electronic copy.
IMPORTANT: Once this is complete, remember to go back and change your submission views settings. Otherwise students will see (and have access to) all the questions when they submit their quiz: To change this back to the original settings, go back into Edit Quiz and click Submission Views. Clicked for the Default submission view (set above) and under “Show Questions?” change the Yes to No. Save changes.