Export Course Components
- Open the course that you want to export (either the entire course or components from the course).
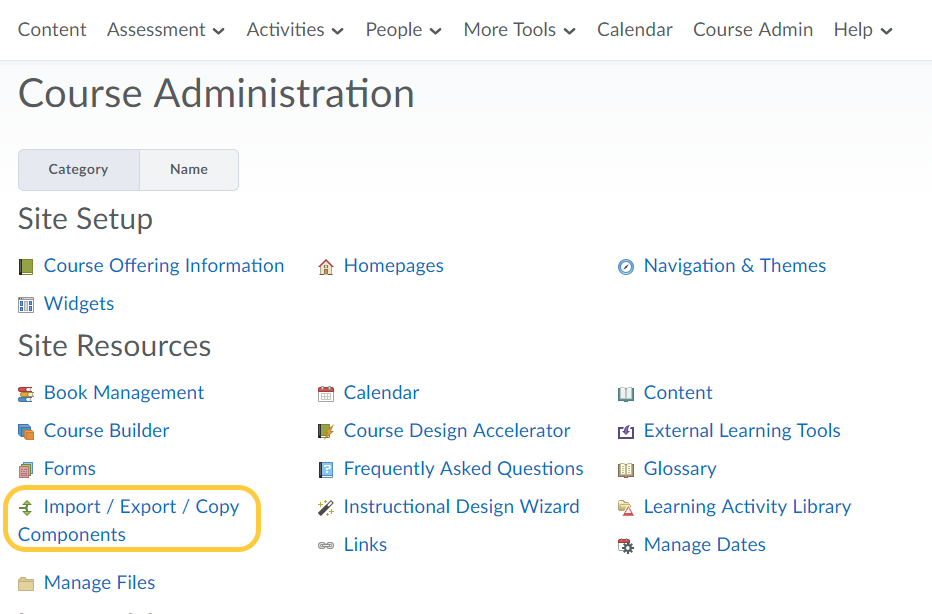
- On the nav bar, click Course Admin.

- Click Import/Export/Copy Components.
- Select one of the following options:
-
- Export as Brightspace Package -The Brightspace Package is the standard export for Brightspace LMS, it contains all the necessary resources you need to share your course with another Brightspace site. The Brightspace Package is based on the IMS Content Packaging specification. This option is recommend if you plan to import the course into another course in TCU Online.

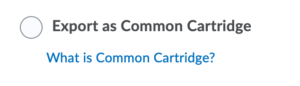
- Export as Common Cartridge – Common Cartridge is a specification developed by the IMS Global Learning Consortium. The specification describes a set of open standards for content, assessment, and digital content that allows publishers and content creators to create LMS-independent course packages. Brightspace exports as IMS Common Cartridge 1.3
- Export as Brightspace Package -The Brightspace Package is the standard export for Brightspace LMS, it contains all the necessary resources you need to share your course with another Brightspace site. The Brightspace Package is based on the IMS Content Packaging specification. This option is recommend if you plan to import the course into another course in TCU Online.
- Export as Thin Common Cartridge – Thin Common Cartridge (Thin CC) is a specification developed by the IMS Global Learning Consortium. The Thin CC standard is a subset of Common Cartridge developed to package Learning Tools Interoperability (LTI) Links, Web Links, and metadata. Brightspace exports as IMS Thin CC 1.3.

-
- Click Start.
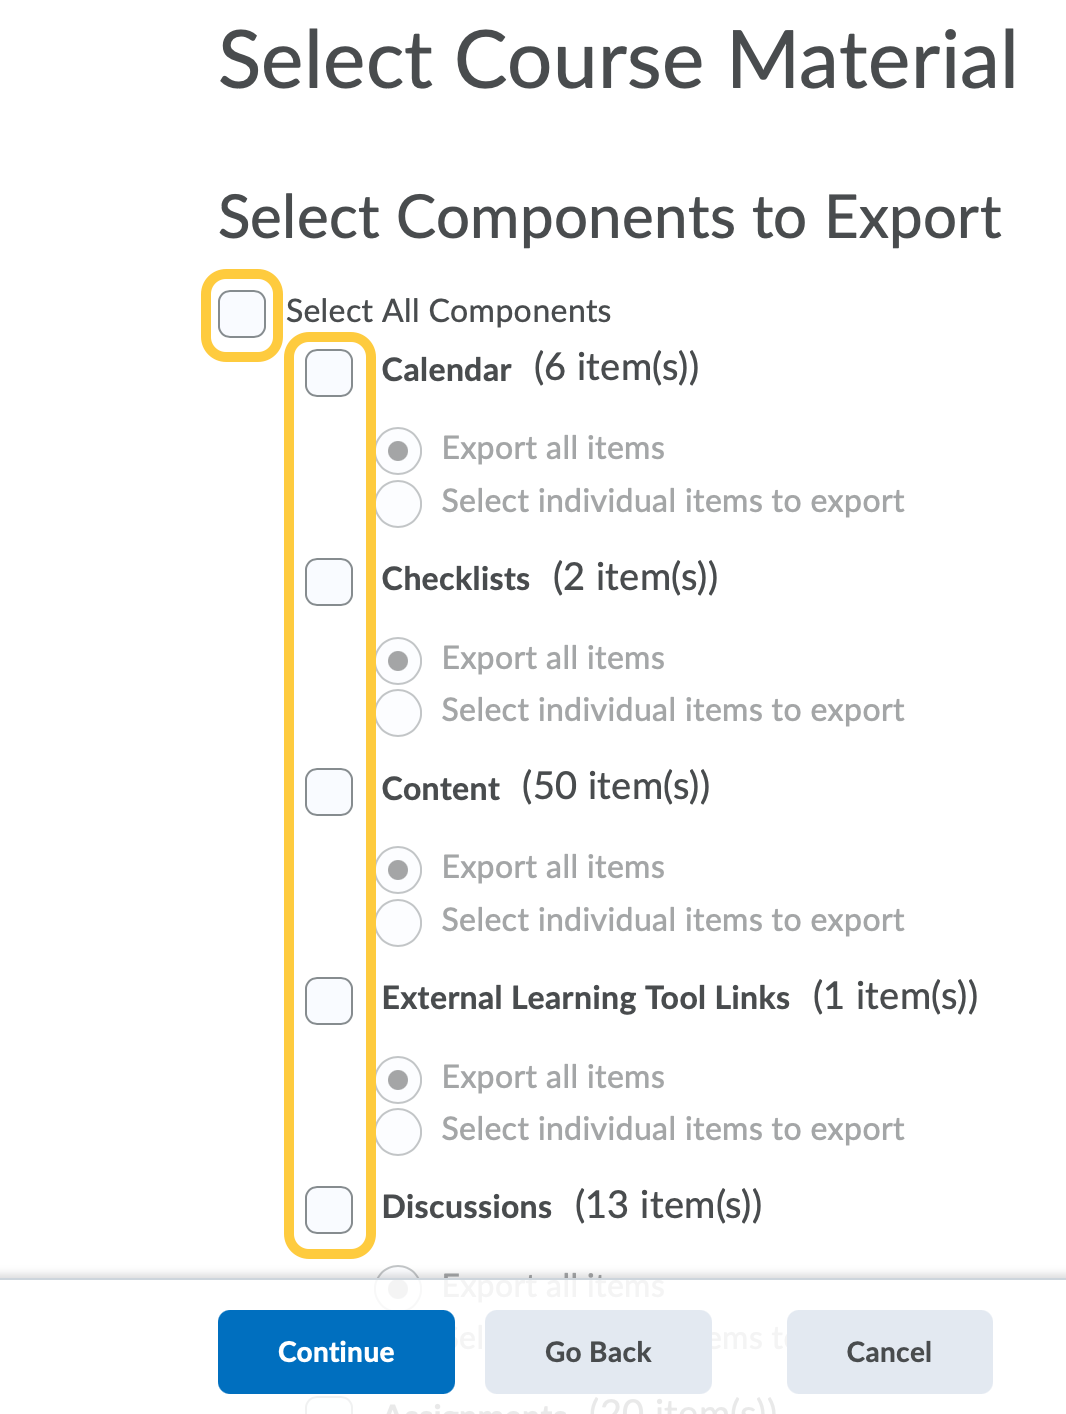
- In the Select Components to Export section, to export all components, select the Select All Components check box or select the check box for the particular components you want to export. To export only certain items from a component, select the Select individual items to export radio button.
- Click Continue.
- If you chose
- Select individual items to export for any component in the previous step, the Select Items page appears. This page lists all of the items and any sub-items contained in the current component. To view sub-items, click the + Expand icon next to an item. Select the individual items and sub-items you want to export and click Next. When you have finished selecting individual items from components, the Confirm Components to Export page appears.
- Select All Components, the Confirm Components to Export page appears. You have the option to modify selections for each tool by clicking Modify.
- Click Export.
- The Export started dialog displays to confirm the export is underway.
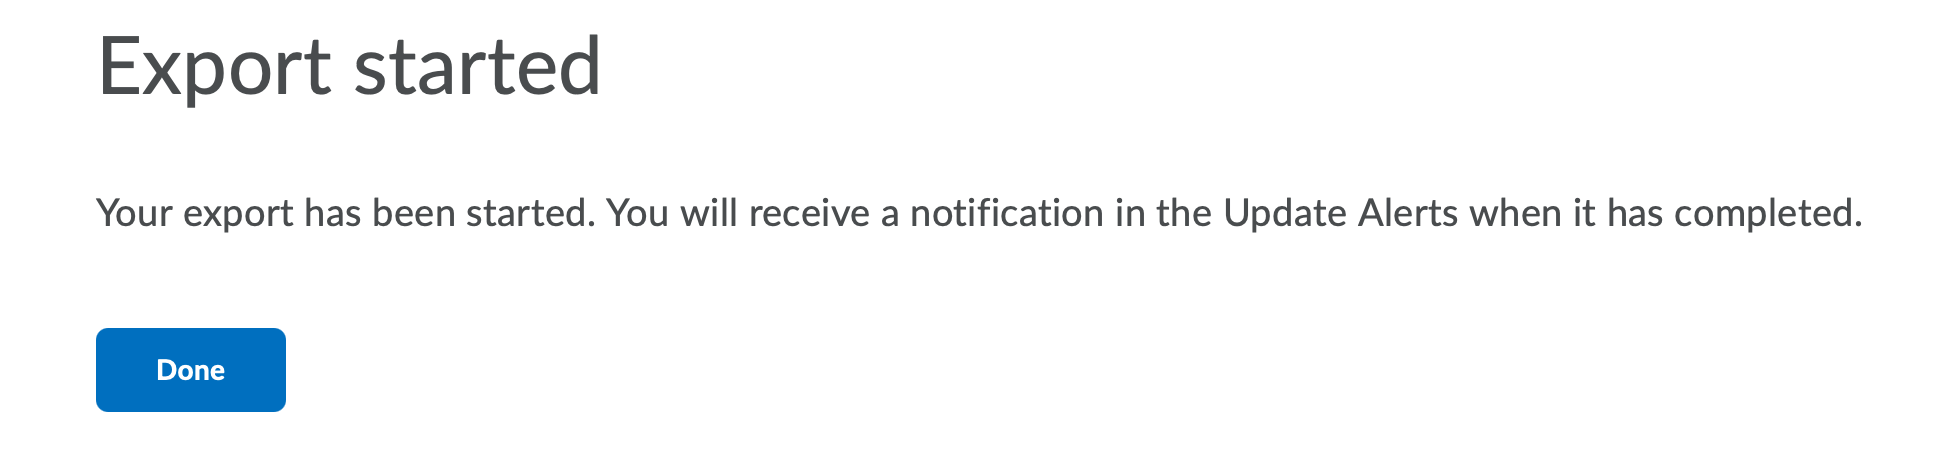
- Click Done.
- When the export package is ready for download, a notification is generated and will be visible as an orange dot on the bell icon in the navigation bar.

- Click the bell icon to open the notification.
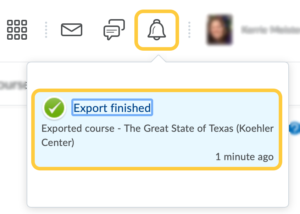
- Click the Export finished notification message. This directs you back to the Import/Export/Copy Components tool in your course.
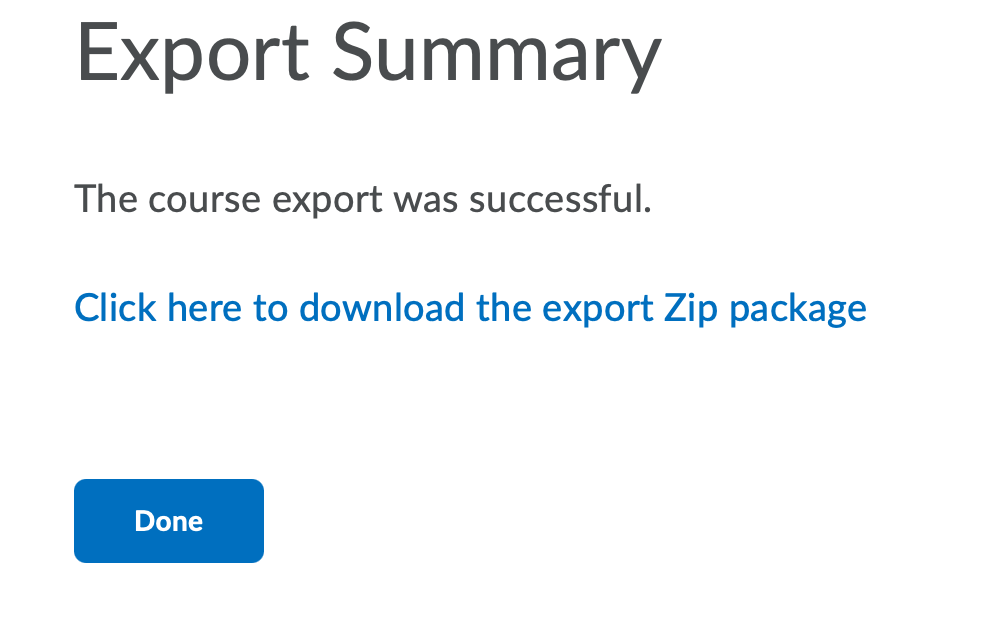
- Click the Click here to download the export Zip package link.


Note: The Course Export file naming convention will includes the course offering code to make files more identifiable. For a semester course, this would include the year, semester, course number, and course section.