Enroll Course Leaders or Students into Groups
The way to enroll a course leader into groups depends on whether they have access to all groups or only select groups. Users should have access to all groups if they are responsible for mediating, grading, and working on material for the entire class. They should have access to select groups if they are only responsible for mediating, grading, or working on material for a particular group.
Add course leaders that are working with select groups the same way you add users. Since the can be auto enrolled into groups permission is set for Professor and TA type roles, users that lead courses and assist users (like teaching assistants) are added to groups at the same time as regular users; this could mean that all or most of your teaching team end up in the same group. Make sure you even out enrollment using the Enroll Users page.
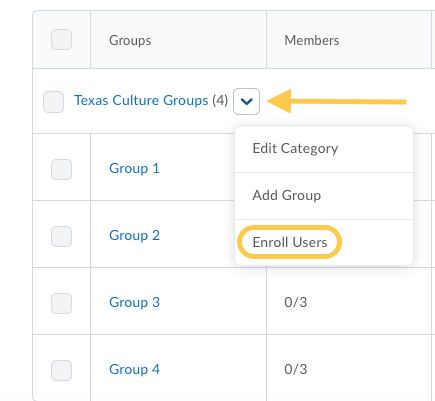
- On the nav bar, click the People menu, then select Groups.

- On the Manage Groups page, click Enroll Users from the context menu of the category that contains the group (or groups) you want to enroll a user in.
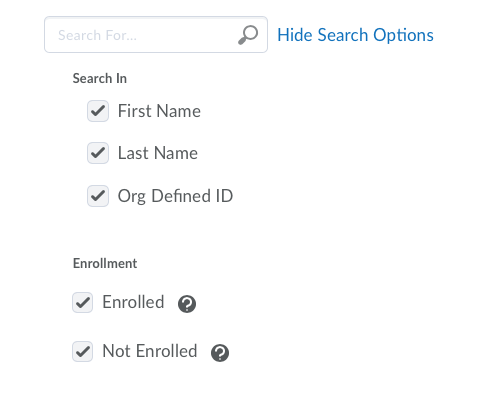
- Optional: In the Search For field, search for the user you want to add. To see a list of users that need to be enrolled, click Show Search Options, then check the box for the Not Enrolled search option.
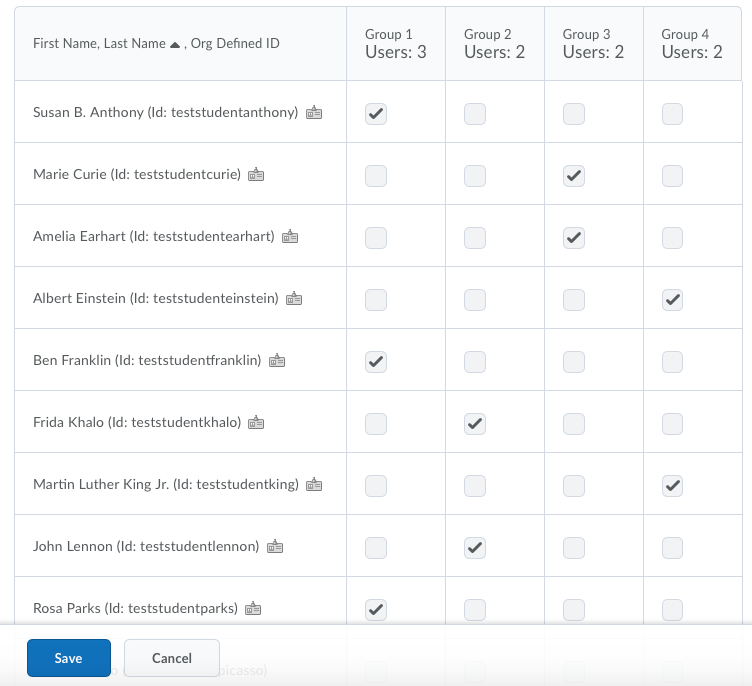
- To add users to groups, select the check boxes beside each user’s name. Clear check boxes to remove users from groups.
Note: Instructors can differentiate between duplicate learner names by displaying the username or TCU ID number (org defined id) beside a student name. Instructors can enable this option in the Manage Groups tools by clicking the Settings link within the Groups tool. By default, the student’s name and TCU ID number (org defined id) will display.
- Click Save.