Create a Weighted Grading System
Watch how to create a weighted grading system..
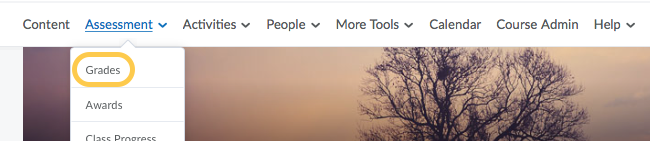
- On the nav bar, click the Assessment menu, then select Grades.
- Select Settings. This is located on the right side of the screen.

- There are three tabs across the top of the page. Select the far right tab “Calculation Options.”

- Select Weighted under Grading System.

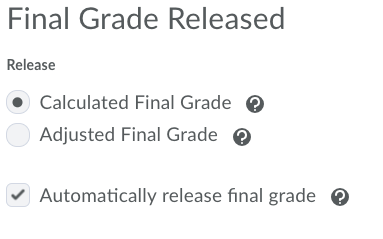
- Select Final Grade Released preferences. To learn more, see Calculated and Adjusted Final Grades. Leave the box checked for Automatically release the final grade.
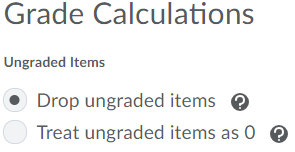
- Select Grade Calculation preferences. It is recommend that instructors start by selecting Drop ungraded items. Otherwise, students will see a low score at the beginning of the semester due to zeros entered for assignments they have not yet completed. Then, if you wish to Treat ungraded items as 0 as the end of the term, you can revise these settings at that time.
- Select Auto Update preferences. It is recommended to check the box to automatically keep final grades updated.

- Select Save then click the middle tab at the top of the page for Course Display Options.

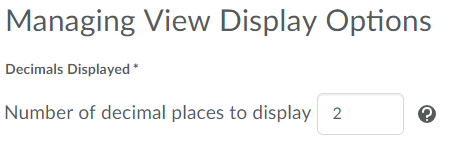
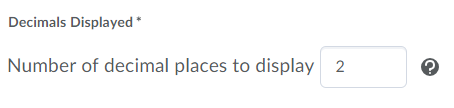
- Select Managing View Display Options. Enter the number of Decimals Displayed. This controls the number of decimal places that you as the instructor will see. The value must be an integer between 0 and 5 (default is 2).
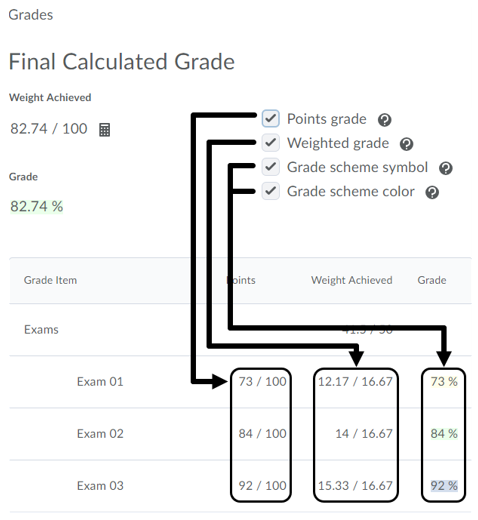
- Set your preferences for Student View Display Options. These settings control what the students see in their Grades view, and they can be adjusted at anytime during a course. You can choose to select one or all of the options. We recommend selecting the first two checkboxes for Points and Grade Scheme Symbol at a minimum. Unless an alternative scheme has been created, the default scheme symbol is the percentage grade.
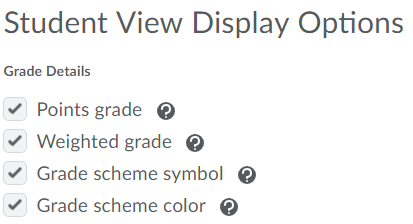
Example of Grade Details in a student view:
- Enter the number of Decimals Displayed for students. This controls the number of decimal places that students will see. The value must be an integer between 0 and 5 (default is 2).
- Characters displayed. This setting determines how many characters of a Text grade item users can see in their view of the Grades tool. The value must be an integer between 0 and 50 (default is 20). If the text item is longer than the characters displayed, the text will be truncated.

- Final Grade Calculations. Check the box to display how the final grade is calculated. Selecting this options will allow students to see only grade items that determined their final grade, and filter out non-graded items (dropped grades, bonus items that they didn’t earn credit for, and other non-graded items.)

- Select Save then click the left tab at the top of the page for Personal Display Options.

- Set your preferences for Managing View Display Options, starting with User Details and Grade Details.

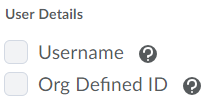
- Check the boxes for which User Details you want to view when grading. Note: By Default, student names display, so other User Details are not necessary for most grading scenarios.
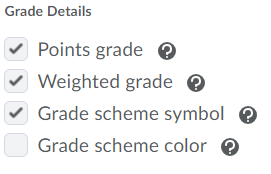
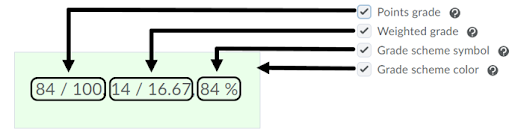
- Grade Details. These settings control what the instructor sees in the Grades view. These can be adjusted at anytime during a course. We recommend selecting the first two checkboxes for Points and Grade Scheme Symbol at a minimum. Unless an alternative scheme has been created, the default scheme symbol is the percentage grade.
Example of Grade Details in an instructor view.
- Enter the number of characters (up to 50) to display for text items. Default is 50 characters.

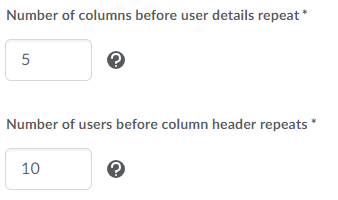
- The user details column and column headers lock in place when scrolling through the gradebook so these settings can be ignored. But, if desired, you can select the number of columns (up to 99) and users (up to 50) before user details and column headers repeat which affects the display on some mobile devices. Default is 5 columns and 10 users.
- Select your preference for Repeat Final Grades. By default “Repeat calculated final grade at the start of the user list” is checked. If you are using adjusted final grades, you can check the box for that option instead.

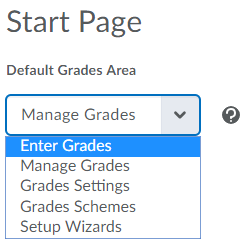
- Start Page. Once your settings are configured, we recommend that the Default Grades Area be “Enter Grades.” Then, when you access the Grades tool, you will go directly into the Enter Grades view, rather than a Manage or Settings view.
- Select Save, then Close.