Add Closed Captions to Audio Content with the Media Editor
Instructors can add and edit closed captions for audio files. Closed Captions can be automatically generated or uploaded from a .vtt or .srt file to make audio content accessible to all users. We recommend using the desktop experience when editing audio files.
Adding Closed Captions is important, not only for accessibility, but also to allow viewers to search by keywords. Users have the ability to search for a keyword in the video caption track and see those spots reflected on the timeline. A caption track must be present for the video and the user must have captions turned on to use the Search option.
Note: In Content, the editor features are only available for newly uploaded audio-video files and do not apply to files that were uploaded prior to January 2022.
- On the nav bar, click Content.

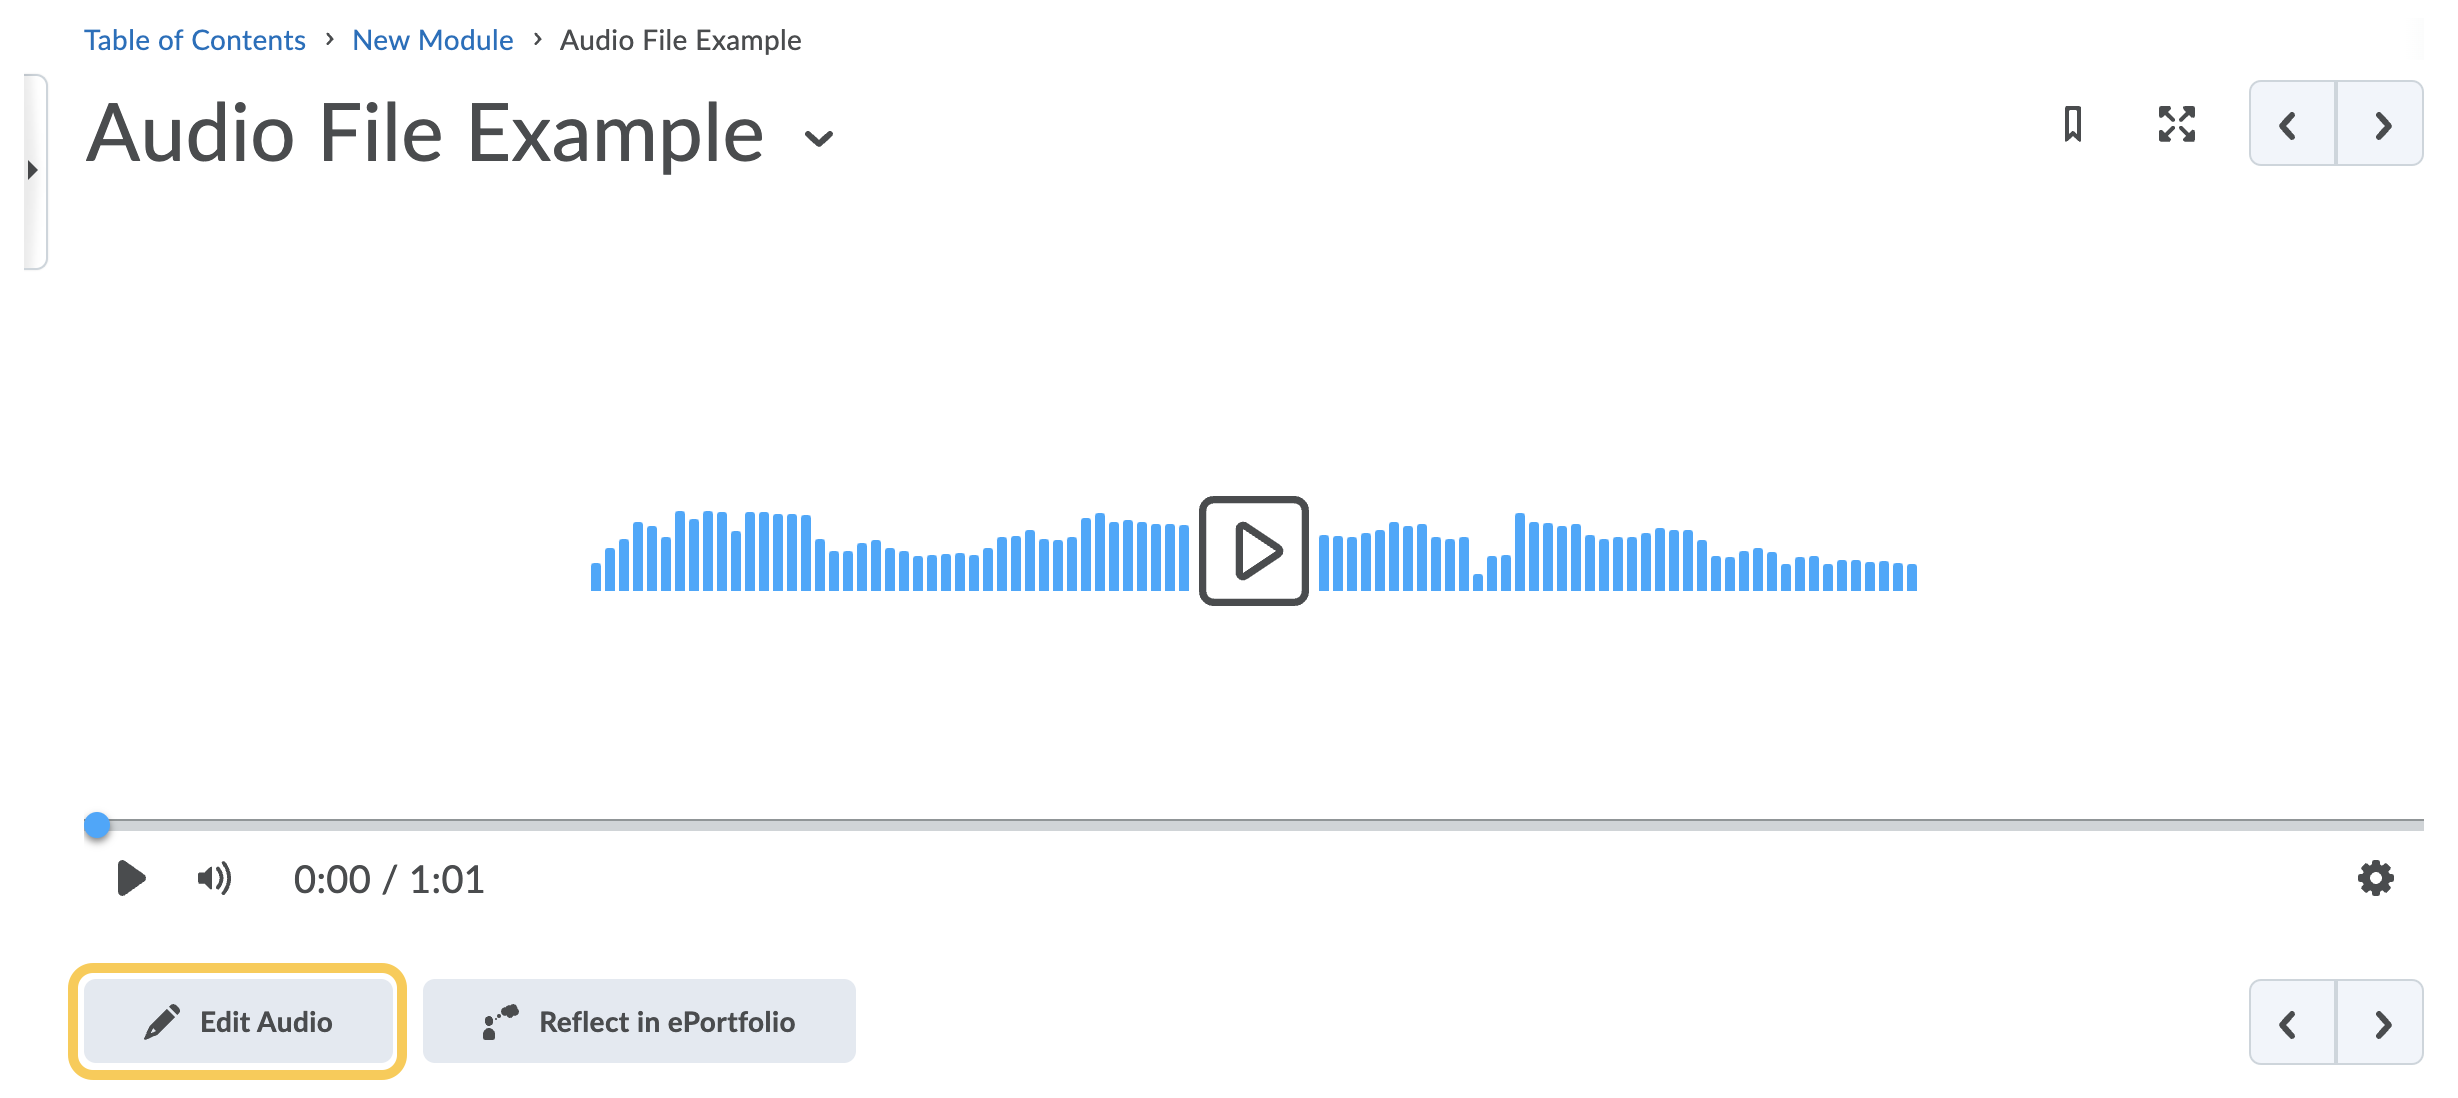
- Select the module containing your audio topic, then select the audio title.
- Click Edit Audio.
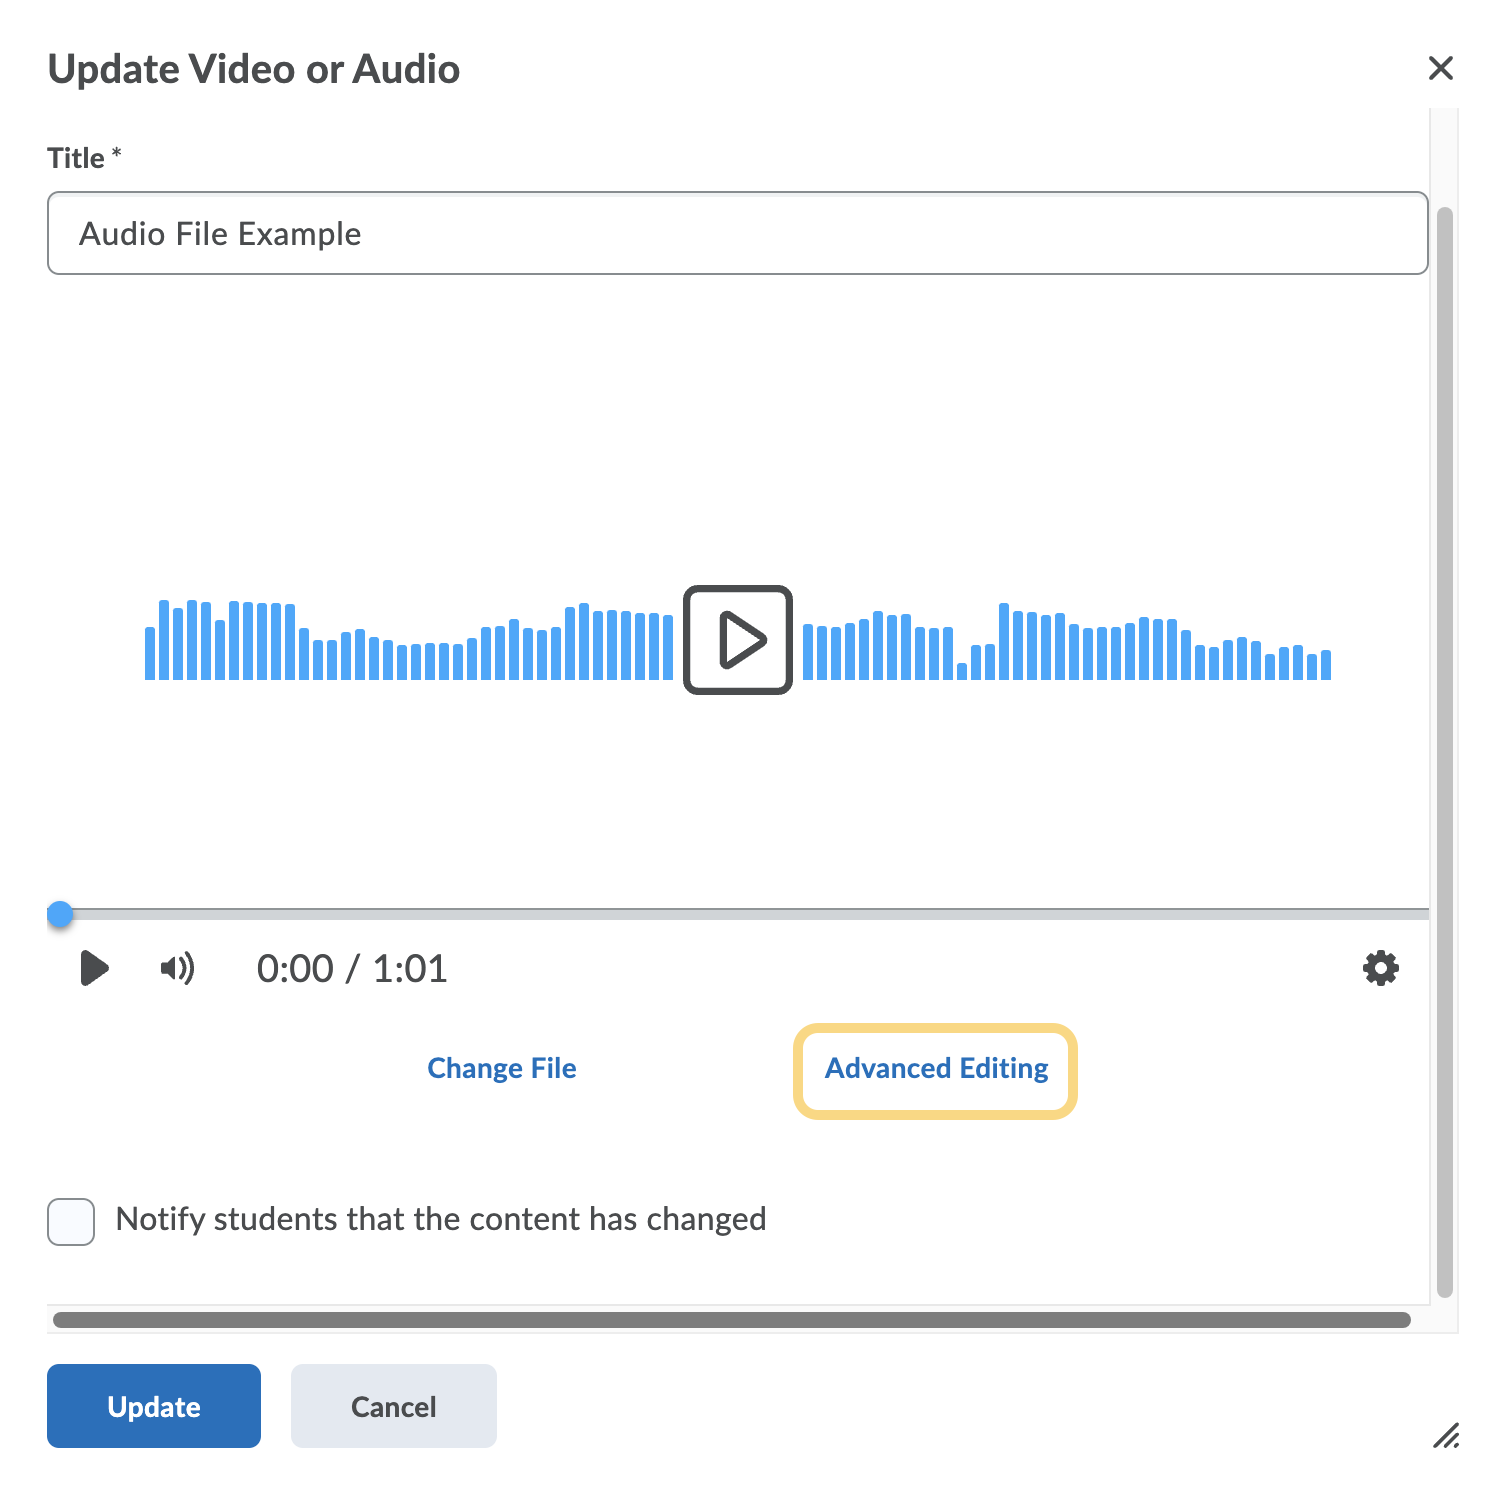
- Click Advanced Editing.
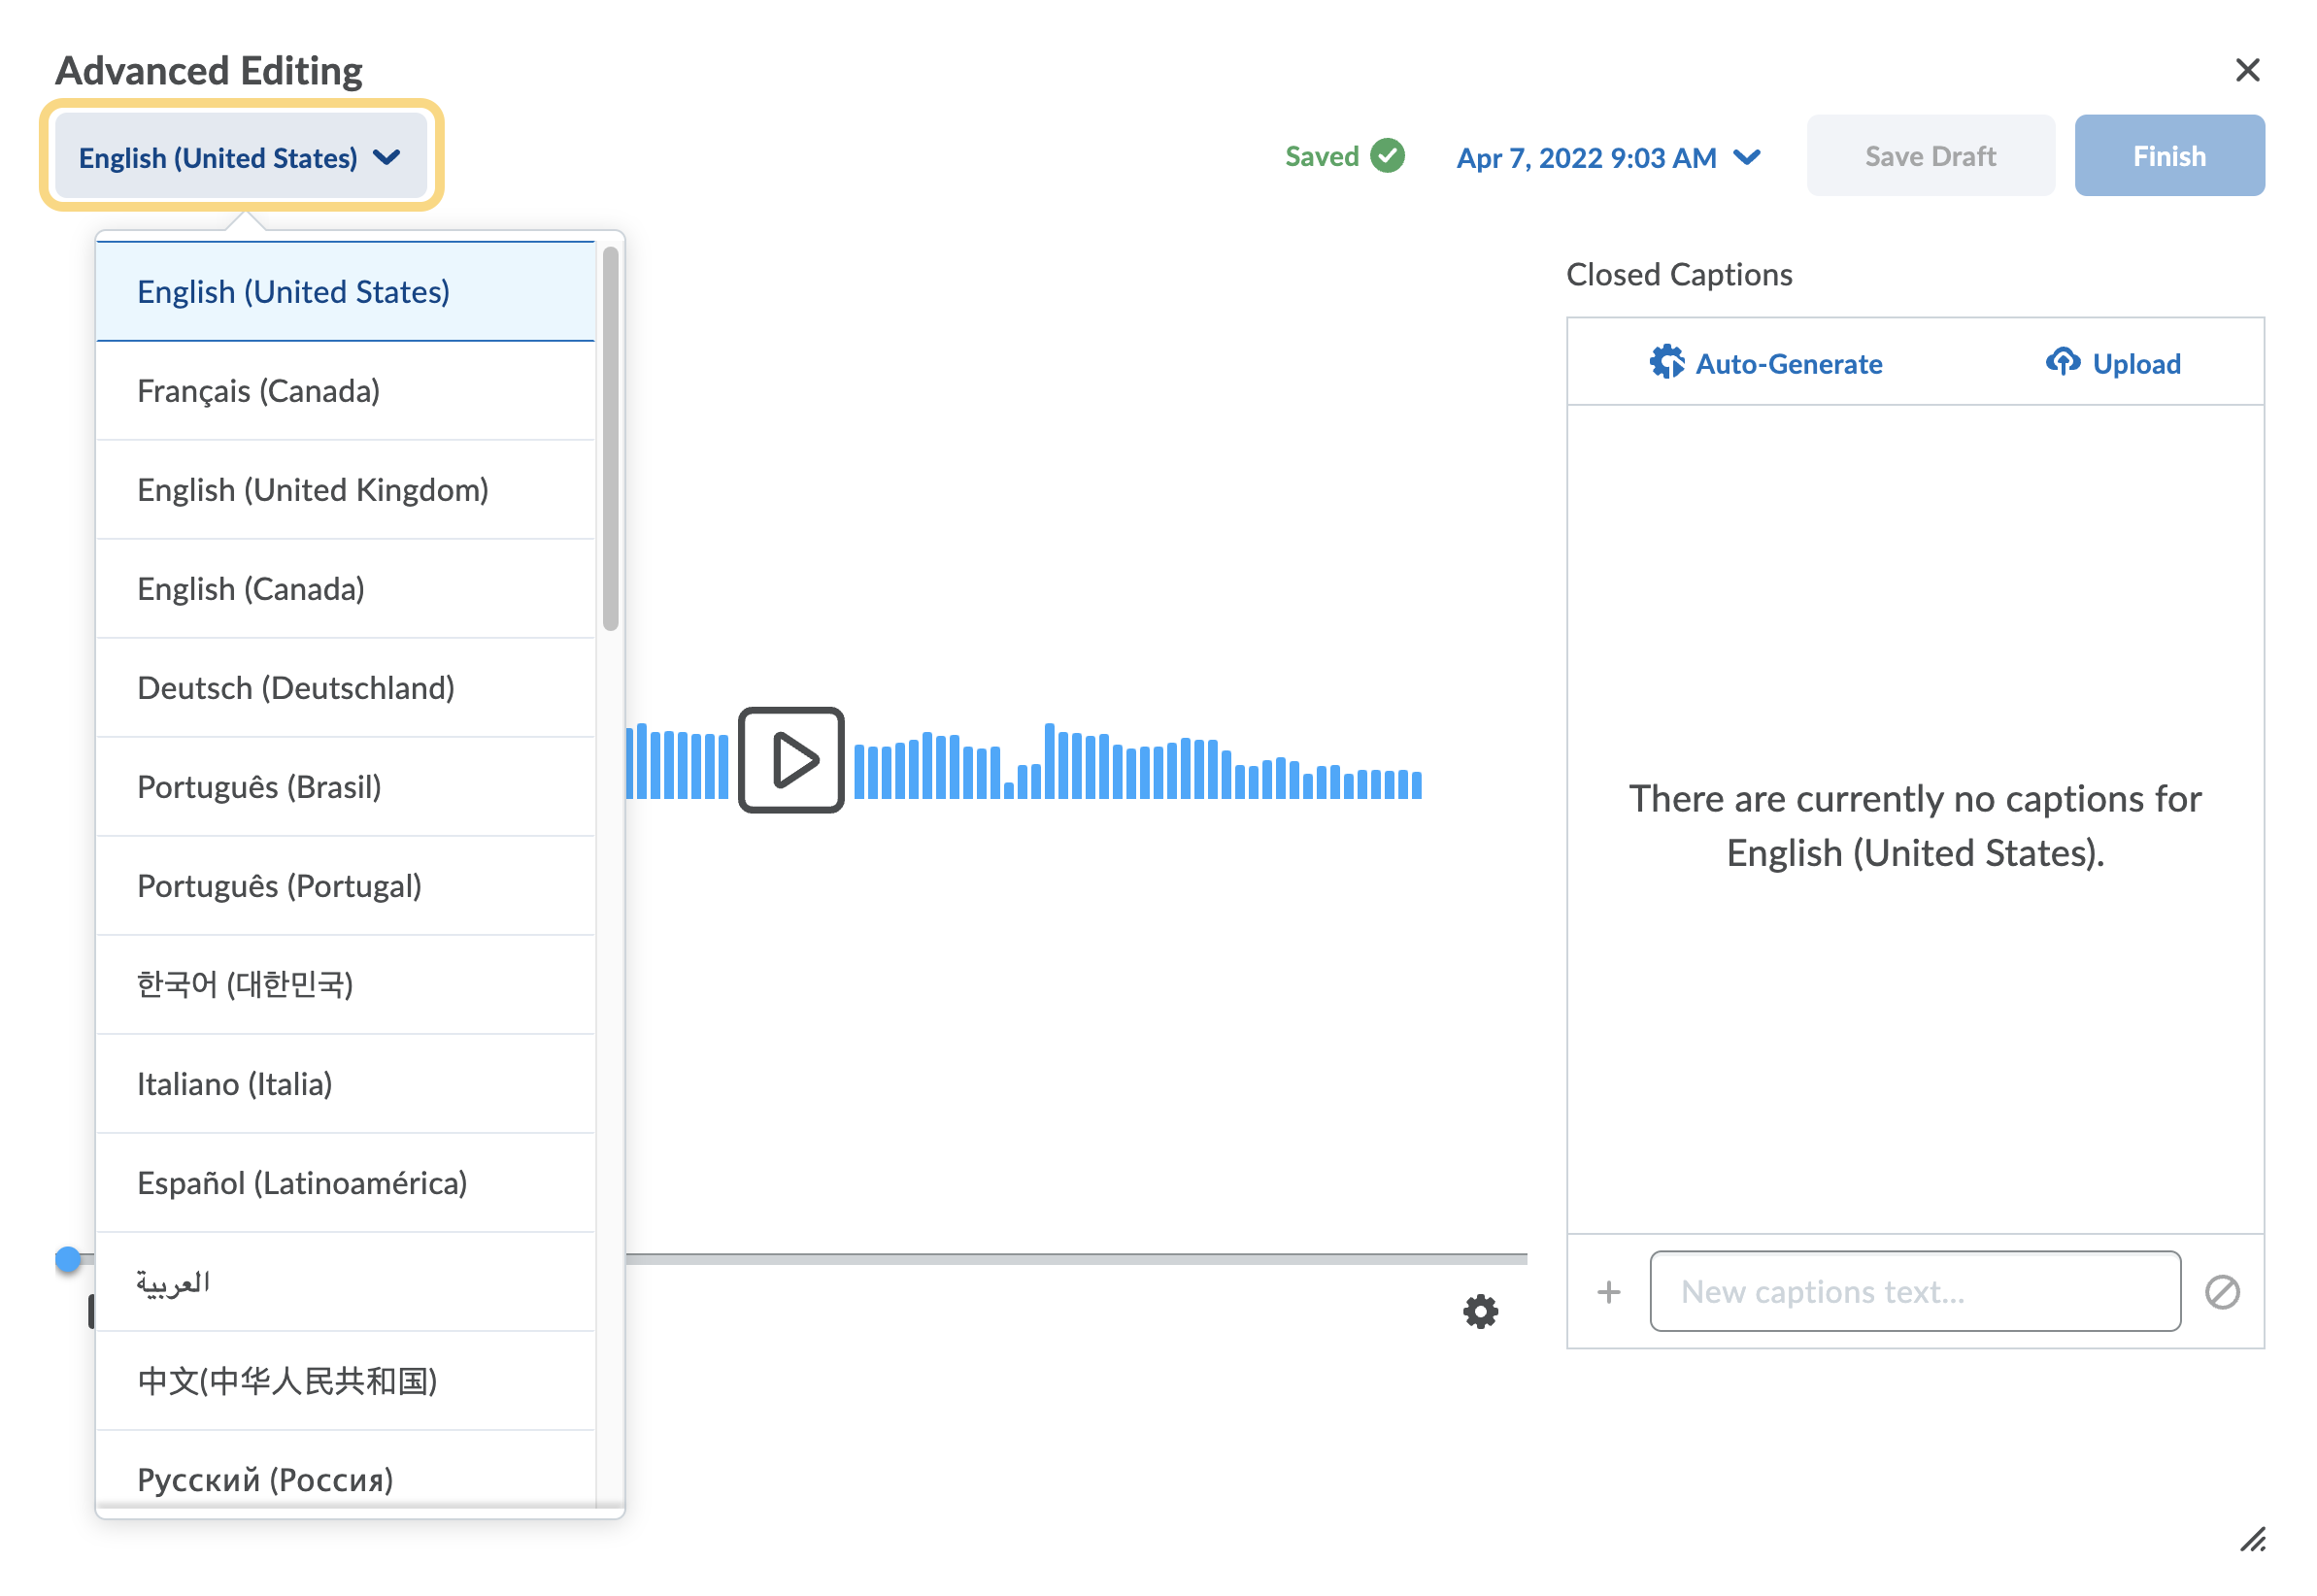
- Select the language from the dropdown menu on the top left side of the video. This selection will be used for closed captions.
- Do either:
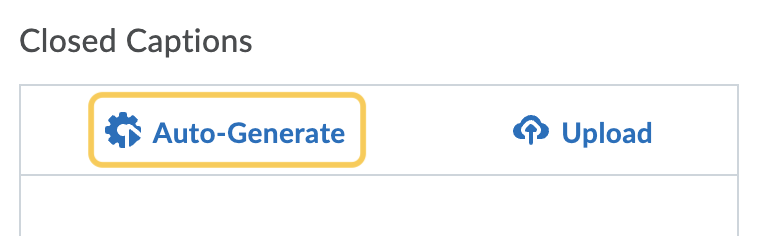
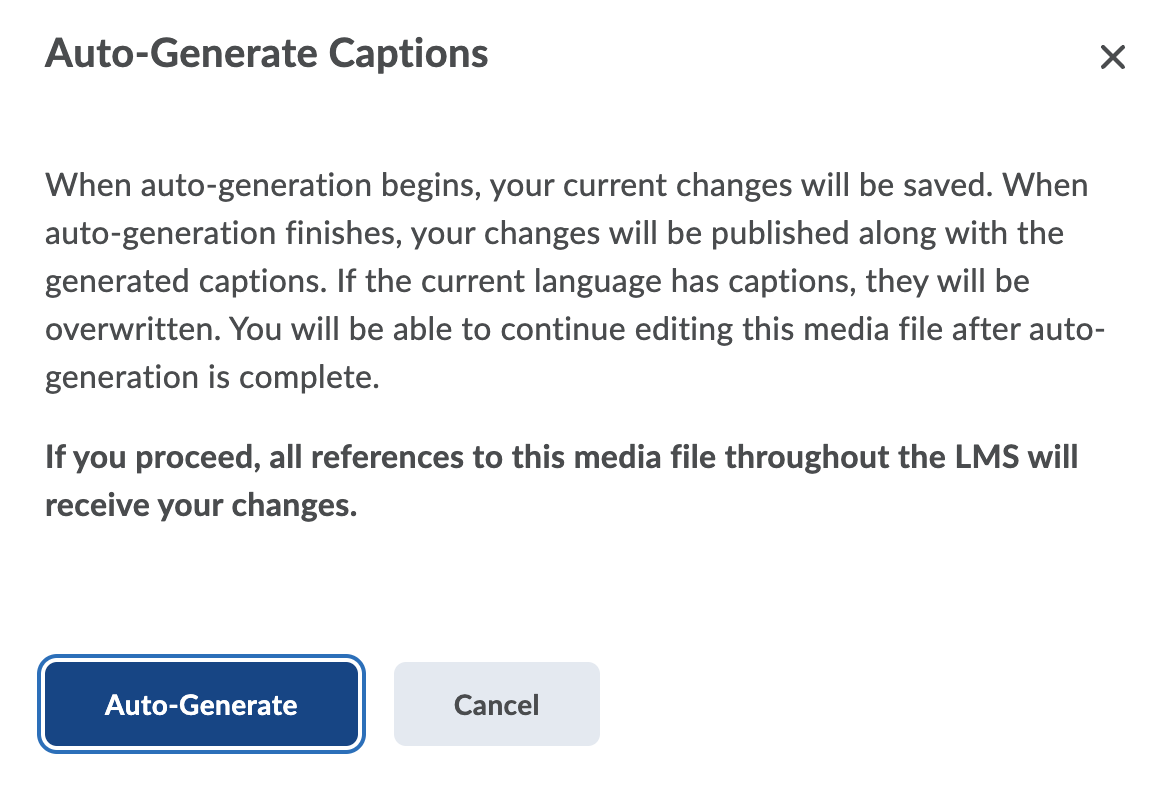
- Recommended: Click Auto-generate.
A pop-up box will appear with the following message “When auto-generation begins, your current changes will be saved. When auto-generation finishes, your changes will be published along with the generated captions. If the current language has captions, they will be overwritten. You will be able to continue editing this media file after auto-generation is complete. If you proceed, all references to this media file throughout the LMS will receive your changes.” Click Auto-Generate.
- Or Upload a .vtt or .srt file.
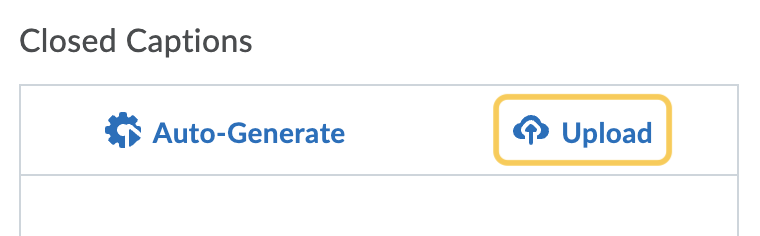
- Recommended: Click Auto-generate.
- Once the captions are generated, you must review and edit them for accuracy. Follow the steps below to edit captions
- The captions will display on the right side of the audio preview.
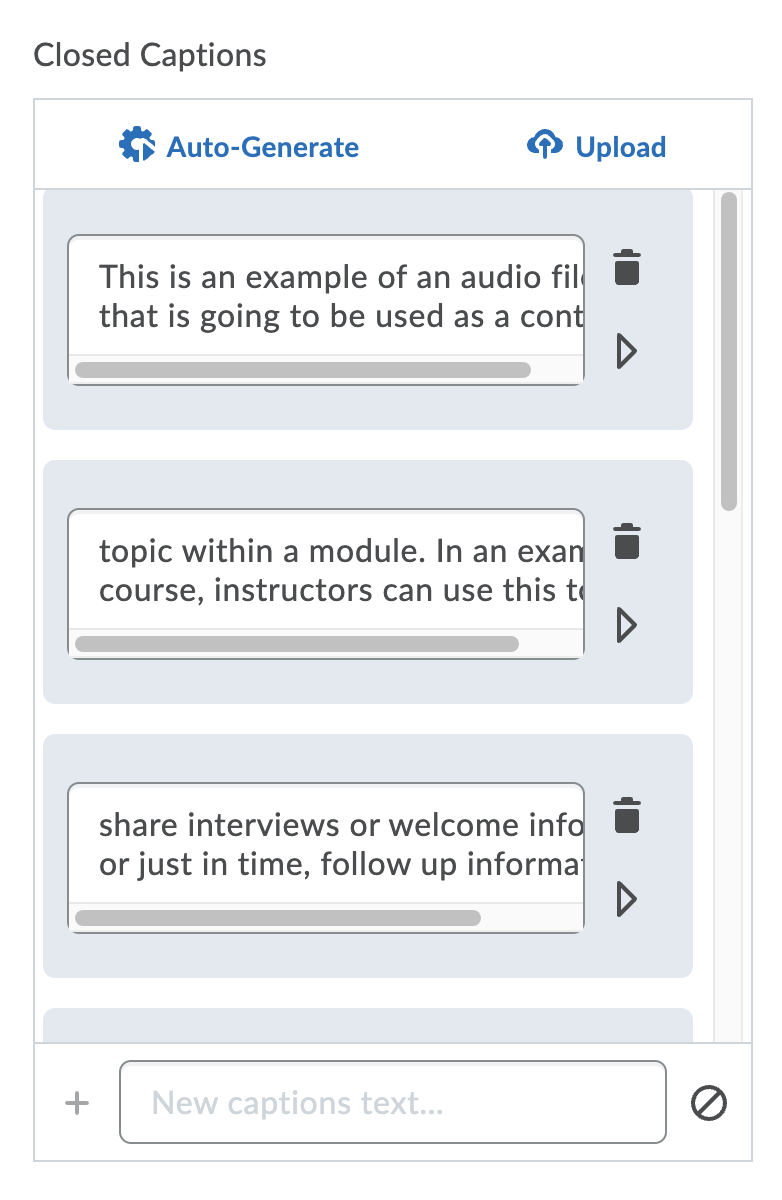
- Review the text for accuracy. If you find issues, click your mouse into the caption field and edit the text as needed.
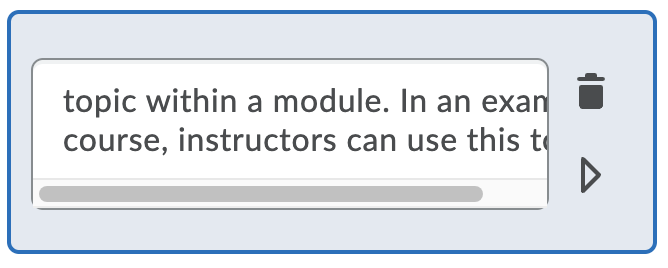
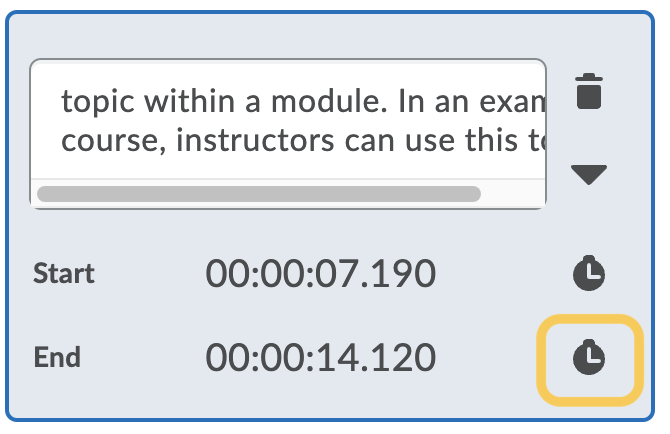
- If you find that captions are not flowing naturally with the sentences or speech pattern, you can modify the caption text (typically by cut/paste excess text into the previous or next caption). Then, click the arrow to open the expanded controls for this caption cue.Next, click play on the video in the video preview, up until the point the next caption needs to begin & pause the video. To set the new caption end time, click the clock to the right of the “End” time for that caption.
- When you are done editing, you can:

- Save Draft – keeps the changes, but doesn’t update the published file(s)
- Finish – saves the changes and publishes a new version of the file
- Use the version timeline dropdown (this is a date + time) to return to a previous version of the file. The latest Saved version appears wherever the file is used within TCU Online.
- Click the X in the top right corner to close the Advanced Editor.
- Optional: Check the box to notify students that the content has changed.
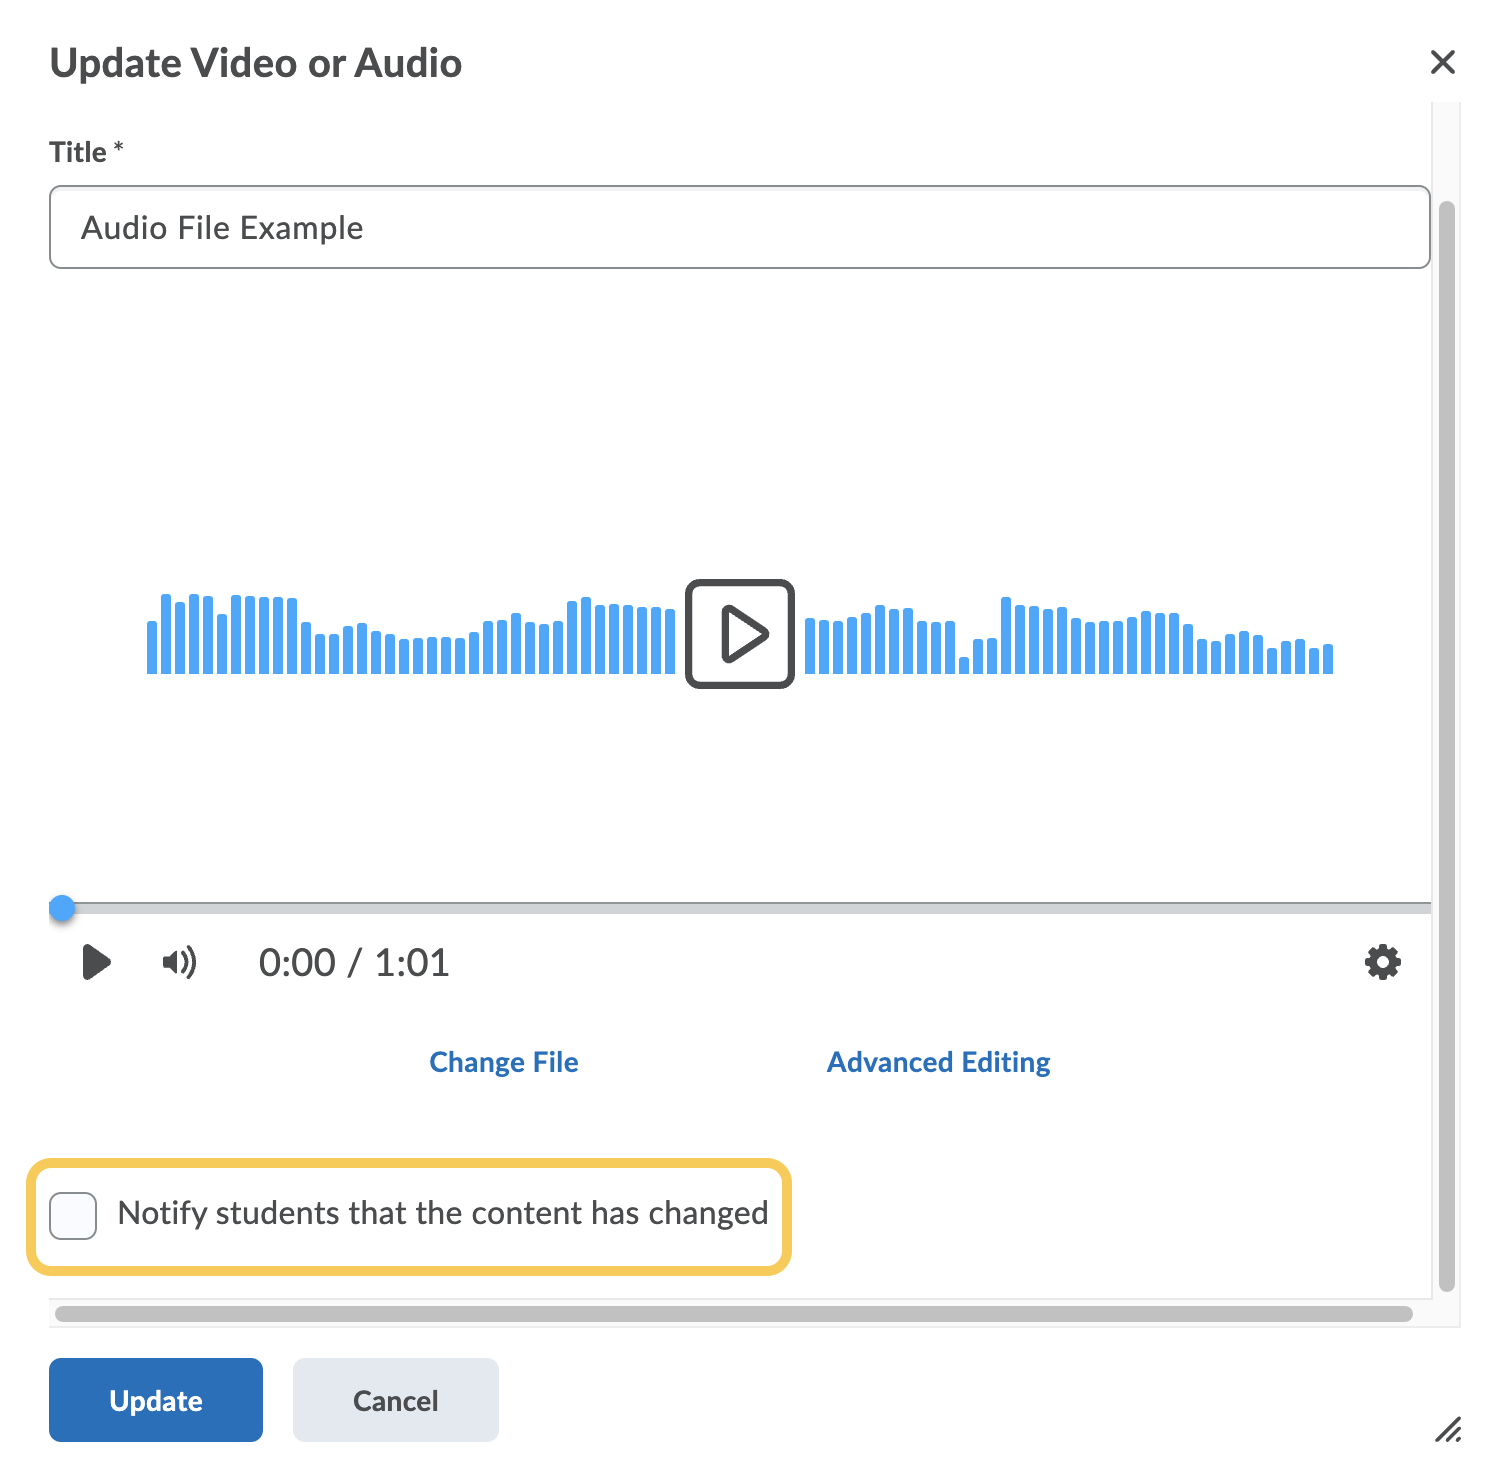
- Click Update.