Add a Twitter Widget to your Course Homepage
Faculty can add a Twitter widget to their Course Homepage by creating a customized Homepage. Follow the steps below to create a homepage and also add a Twitter widget to display within the course.
Create a Twitter Widget and a Custom Homepage
- Log in to TCU Online, then select the course you want to add the widget.
- Select Course Admin from the Navigation bar.

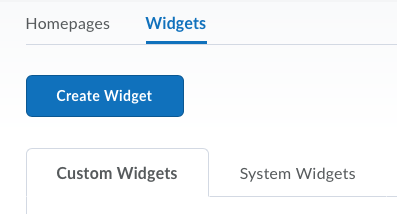
- Select Homepages from the Tools list.
- Select Widgets, then click the blue “Create Widget” button.

- Enter a title and description for the widget. In the example below, I simply called it Twitter. [ Note, you can create a widget for a hashtag (#SMITH10803 for example) or an account.]
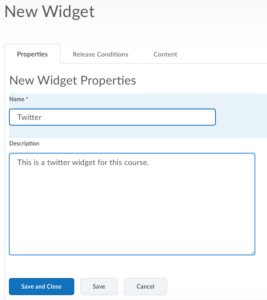
- Click Save, then select the Content tab.
- At this point, you need to open a new browser window or tab, and navigate to http://www.twitter.com.
- In the Search Twitter field, type the account or hashtag you want to create a widget for. I’ll give both examples below:
- Create a widget for a Twitter account
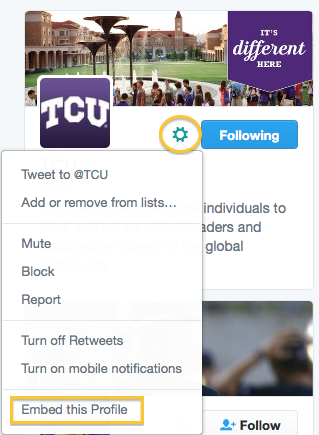
- Search for the account on twitter.com and then select the “gear” next to the account’s name. Then select Embed This Profile.
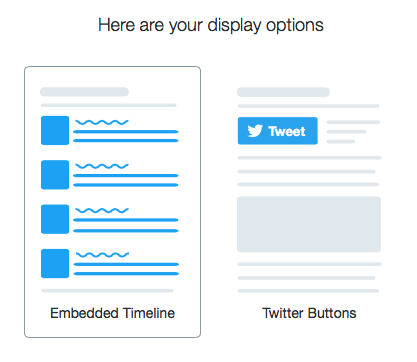
- Then, select Embedded Timeline.
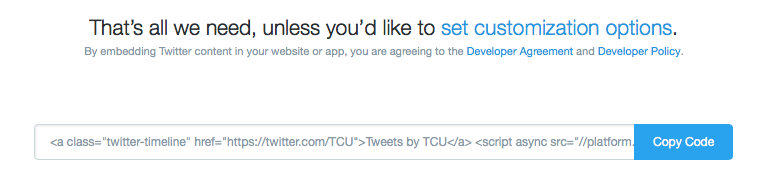
- Select copy code. Then continue on to step 9 in the instructions below.
- Search for the account on twitter.com and then select the “gear” next to the account’s name. Then select Embed This Profile.
- Create a Widget from a Hashtag
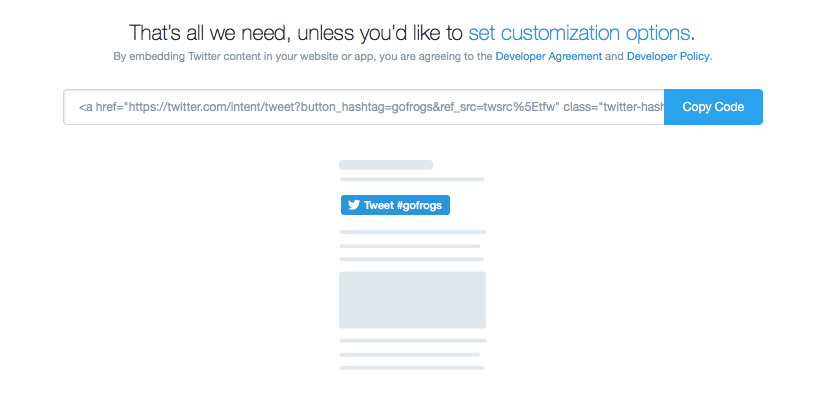
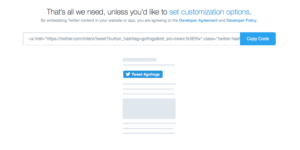
- Go to publish.twitter.com and enter the hashtag you wish to use then click Enter/Return on your keyboard. In the example below, I used #gofrogs.

- The embed information will display on the page.
- Optional: Select “set customization options” and enter your preferred custom settings.
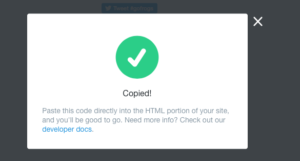
- The HTML code will appear below the preview on the right side of the screen at the bottom. Click your mouse on the code (or click the “Copy Code” button) and the code will be copied.
- Go to publish.twitter.com and enter the hashtag you wish to use then click Enter/Return on your keyboard. In the example below, I used #gofrogs.
- Create a widget for a Twitter account
- Return to the browser tab/window with your course’s Edit Widget page and select the HTML Source Editor.

- Paste the code you copied from either the profile or the hashtag search widget you created in Twitter.
- Click Save. [NOTE: the visual editor will display something like “#gofrogs Tweets” or “@TCU on Twitter”- that is OK. The full widget will appear when it is added to a Homepage. Click Save and Close.
- Select the Homepages link at the top of the page, and click Create a Homepage.
- Give the Homepage a title, such as ENGL 10803 Homepage. In my example below, I will call it Design 101 Homepage. Give it a description if you choose, then select the type to be “Widget-based.”
- KEEP the Homepage Header, so that it is easier for support to assist you with this course, and for consistency between courses for students.

- Select your Layout by clicking “Change Layout.” [Note: typically the more simple layouts work best.] In my example below, I am using Basic Plus layout.
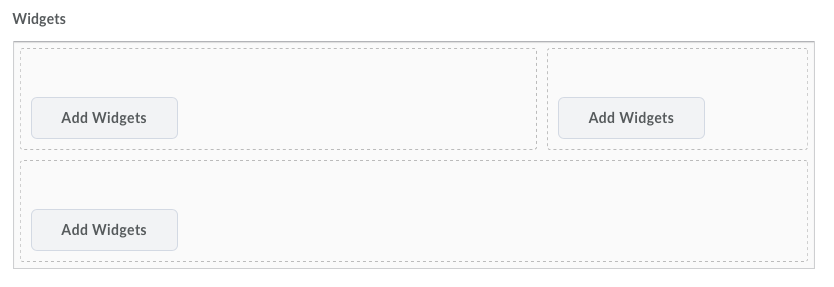
- Then select Add Widgets in each of the layout panels to add your widgets.
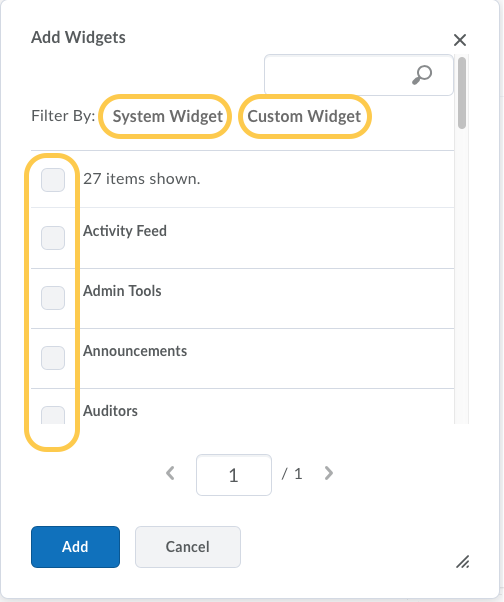
- The Add Widgets pop-up window filters the widgets into System Widgets and Custom Widgets. Select each tab at the top. Check the box next to each widget you want to add. Your Twitter widget will appear under the Custom Widget filter.
- The Koehler Center recommends that you include the Announcements widget on your course home page always.
- If you want to move your widgets to other panels in the layout, simply drag and drop them to the desired location. Once you have everything set where you want it, click Save and Close.
- Next, set your Active Homepage, by selecting the drop down menu on the top of the page, to your new Homepage and click Apply.
- Select your course from the on the Minibar to refresh the page and take you to the Homepage. If you decide to shift your widgets to other panels, simply return to Course Admin>Homepages and select your Homepage to modify it.