Upon accessing the ReadSpeaker TextAid Reader tool, the following full browser view will display, with the tools on the left side of the page.
Remember All users must first access TextAid from within TCU Online. The link to TextAid is found by first selecting a course in TCU Online you are enrolled into, then click the More Tools menu on the nav bar, then select TextAid. After agreeing to the terms and conditions, your account is created. Accessing TextAid from TCU Online will launch the ReadSpeaker TextAid application that displays in a full browser window.
Learn about the ReadSpeaker TextAid Tool and how to access it.
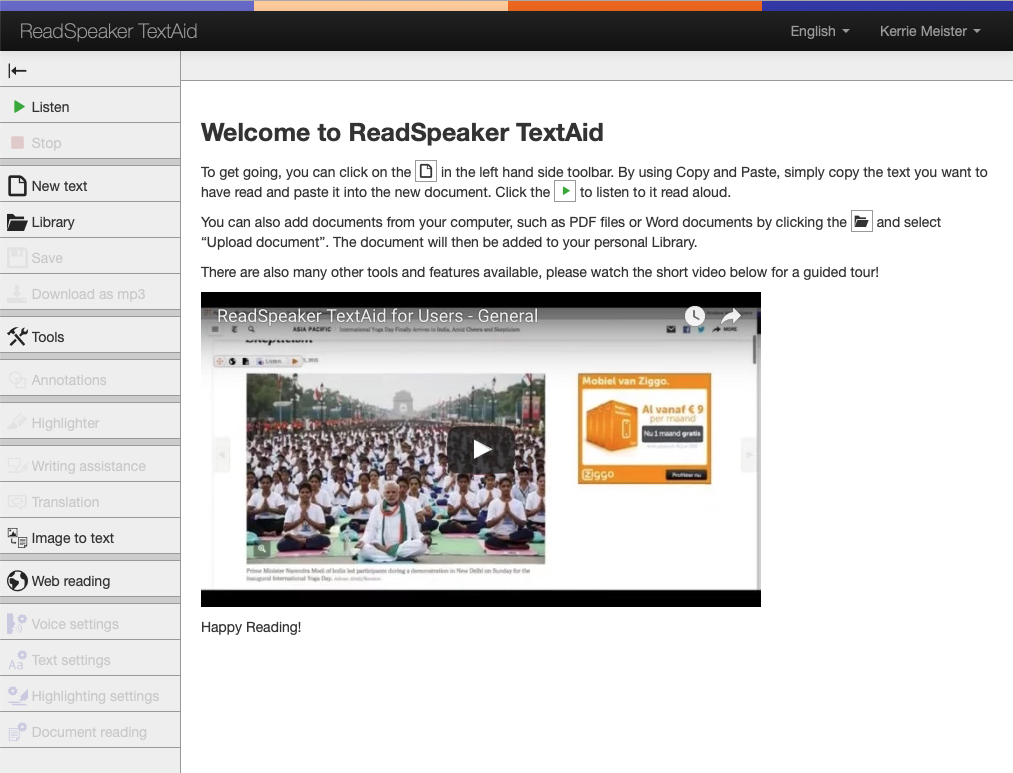
On the left side are 8 areas. Some of the areas are in gray in the image above, but will become clickable links as we access that area of TextAid. We will look at each area moving from the top of the menu to the bottom of the menu.
Web Reader: Listen Controls and Expand/Close Menu Tools
The table below provides the tool names, images, and descriptions.
| Tool Name | Tool Image | Tool Description |
| Expand Menu |  | The expand menu button has an arrow pointing to the right. Clicking on this button will expand the sidebar so that you will have more choices of tools. |
| Collapse Menu |  | The collapse menu button has an arrow pointing to the left. Clicking on this button will collapse the menu which gives more space for the document. You will find this option useful with smaller screens. |
| Listen |  | When you click the listen button, the document will be read to you. |
| Pause |  | Press the pause button to temporarily pause the reading. |
| Play |  | The play button is the same as the listen button, except it will pick the reader back up from where you paused it. |
| Stop |  | The stop button stops the recording. |
Web Reader Tools: New Text, Library, Save, and Download to mp3 Tools
These options allow you to add new text, the library, save documents, and download documents as mp3 files
| Tool Name | Tool Image | Tool Description |
| New Text |  | The new text option is used to create new text in TextAid. When you click on the button a blank file opens in an editor. You have several options in the editor which include formats (headers, inline, blocks), bold, italics, bulleted or numbered lists, spell check, increase and decrease font, reading speed, language, alignment, and increase or decrease indentations. Once you have typed up your document you are able to save it. |
| Save |  | When you click on the save button, you will then have four choices: Save As, Download as PDF, Download as Word, and Print. |
| Save Choices | 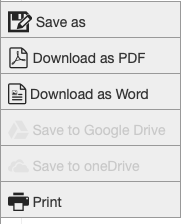 | The choices when saving as listed in the button to the left. Notice that you can save the document electronically in TextAid (Save As); you can download the document to PDF, or to Word. You can also print the document. These choices appear when you click on the arrows that appear on the right side of the save button. |
| Download to mp3 | 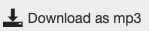 | Another option for your text is to download it to an mp3 file. This can be done by clicking on the download to mp3 option, agreeing to the terms of use, selecting the save location and naming the file. You can then transfer and listen to the file on any device that plays mp3 files. |
| Library |  | The library in TextAid has many options. Among the options are documents that you upload and store in your TextAid library, documents that are shared with you, and the ability to download the documents as mp3 files. |
Web Reader: Tools
This area includes a screen mask, a reading ruler, and a talking calculator.
| Tool Name | Tool Image | Tool Description |
| Tools | 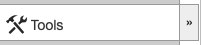 | When you click on the tools option, you will have three choices. You will see the options when you click on the arrows on the right side of the button. |
| Tool Options | 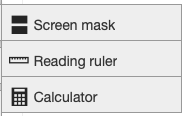 | Each of the options are separate buttons. The screen mask grays out the screen above and below the selected area. You can scroll and the mask follows along with you. The reading ruler option grays out the screen below the line you are reading. As you scroll the ruler follows you. The calculator is a talking calculator that has the basic functions of addition, subtraction, multiplication, and division. |
Web Reader: Annotation and Highlighting Tools
When you open a pdf file from the library, you can annotate and or highlight the file. The following table provides the tool names, images, and descriptions.
| Tool Name | Tool Image | Tool Description |
| Annotations | 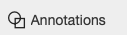 | When you select annotations, you will get a pop-up set of tools to use with the annotations. |
| Annotation Tools | 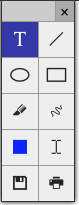 | Among the annotation tools are text, drawing tools (line, circle, rectangle, and free style), highlighter, ink choices, a reader, save, and print. To use these tools, simply click on the tool, navigate to where you wish to annotate the document and begin your annotations. If you wish to remove an annotation, click on the annotation and you will see a trash can appear. Click on the trash can to remove the annotation. |
| Show or Hide Annotations | 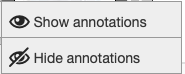 | When you click on the right-hand side of the annotations button, there will be a set of arrows. Clicking on the arrows brings up the choices of show annotations or hide annotations. Both of these options are individual buttons. Once you have annotated a document, you can select if you wish to show or hide the annotations by using these buttons. |
| Highlighter |  | When you select the highlighter button, a set of tools opens. |
| Highlighter Tools |  | The highlighter tool bar has an arrow for selecting a region to be read. The next four buttons are color choices of yellow, blue, green, and red. The three horizontal bars opens a menu for you to select whether or not you want to collect the highlights, clear the page highlights, or clear the document highlights. The "x" is used to close this tool bar. |
| Highlighter Options |  | When you click on the right-hand side of the highlighter button, there will be a set of arrows. Clicking on the arrows brings up the choices of show highlights or hide highlights. Both of these options are individual buttons. Once you have annotated a document with your highlights, you can select if you wish to show or hide the highlights by using these buttons. |
Web Reader: Writing Assistance, Translation, and Image to Text Tools
These tool provides assistance with writing, translation and optical character recognition.
| Tool Name | Tool Image | Tool Description |
| Writing Assistance | 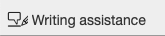 | The writing assistance tool reads what you are writing as you go along. Begin with a new text document (see New Text above), and select how you want the reading to be done. When you click on the writing assistance button, a menu will pop-up. In this menu, you can select it to read the individual letters, the individual words, or the individual sentences. You can also select to sound out or spell out letters. You have choices of word predictions and the delay before the reading begins. This tool is great for learning new vocabulary and a second language. |
| Translation |  | The translation tool translates the entire document into the chosen language. Open a document in TextAid. Click on the translation button, and select your language from the choices provided in the pop-up menu. Click the translate button in the pop-up menu. The document is now in the new language. This is a great tool for learning new languages and the grammar in the new language. |
| Image to Text | 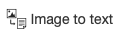 | This is an optical character recognition (OCR) tool. If you have a scanned document which scanned as a single image, or a picture that has writing on it, then this tool will convert the image to text. Begin by clicking on the image to text button, select the file, the language, and location where you want to save the document. You will also want to select "Save as editable text" and give the document a filename. Click Start. Once the image is converted, it will appear in your library. You are per limited to 100 pages per month per account. Also, TextAid has a limit of 20000 characters per saved text. If the result of the image-to-text conversion exceed this limit, the text will not be readable. A standard A4 (8.27" X 11.69") document contains approximately 2000 characters, depending on the font size and spacing. |
Web Reader: Web Reading and Setting Tools
The tools below assist with web reading and provide additional setting options.
| Tool Name | Tool Image | Tool Description |
| Web Reading | 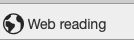 | When you click on the web reading button, you will see a page pop-up. This page has the instructions for how to install the bookmark for your web browser. With the bookmark you are able to read web pages. More about the bookmark will be at the end of this lesson. |
| Voice Settings | 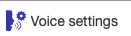 | The voice settings button allows you to select your reading language, and reading speed. |
| Text Settings |  | The text settings button allows you to select your text color, background color, text size, text font, and line spacing. |
| Highlighting Settings |  | The highlighting settings allows you select word color, sentence color, and text color. Within these options, you can select to have the words or sentences underlined, or to have no color on the words or sentences. |
| Document Reading |  | This option is called document reading settings. Selections can be made by mouse, by region, and from mouse pointer to the end of the page. You can also select for the reader to automatically flip to the next page in the document. |