Create a Video Announcement Using the Video Note Tool
Video Note allows instructors to create up to a 30 minute video in many places in TCU Online, including the Announcement tool. Videos might include updates about the class, modules, or content items, as well as feedback on activities in the course. In an online course, Video Note allows you to add a face to a name, and is a great way to create a personal connection between students and instructors.
In both online and face-to-face courses, instructors can use Video Note within the Announcements tool to welcome students to the class or introduce new material. If you create a welcome video, make sure to introduce yourself, briefly explain what you hope students will gain by experiencing your course, and any general introductory expectations you might have.
Note: The Video Note tool works best in Chrome and Firefox browsers.
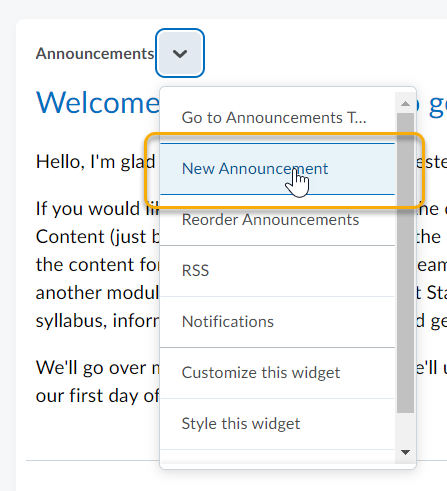
- From the course homepage Announcements widget, select the context menu to the right of Announcements, then select New Announcement.
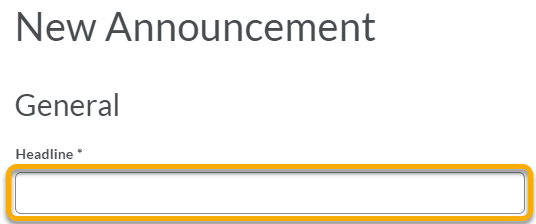
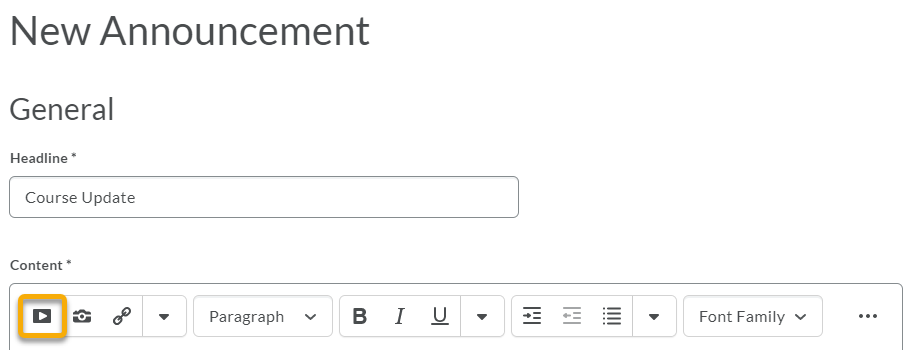
- Enter a Headline for your announcement.
- In the Content area click on the Insert Stuff button on the HTML Editor toolbar.
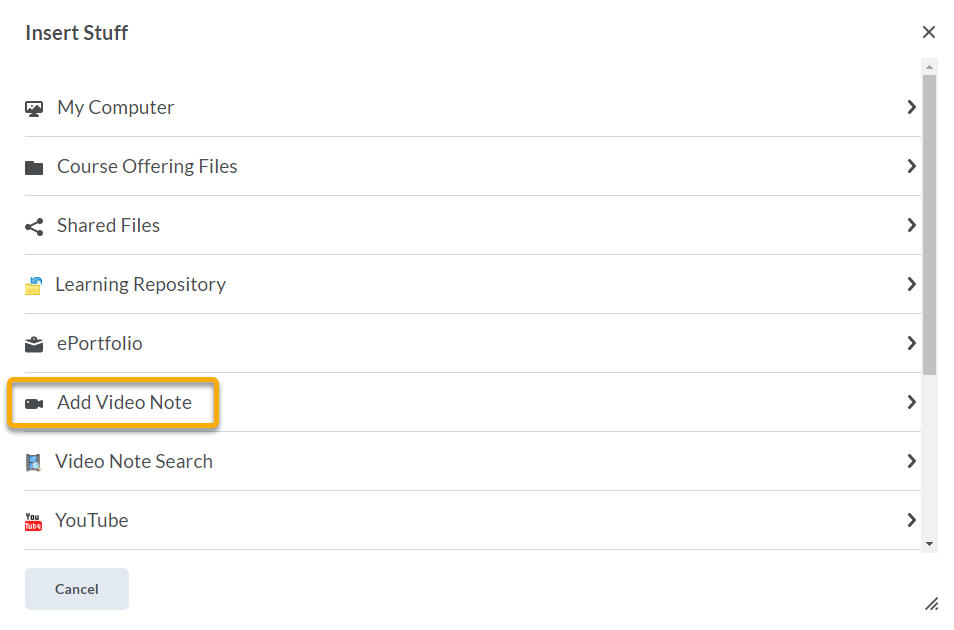
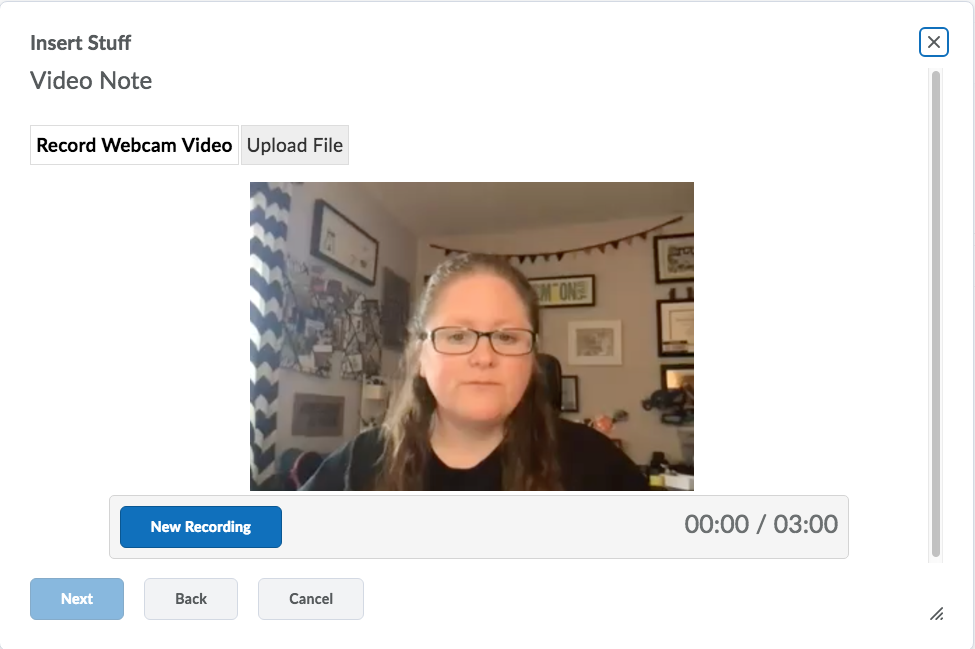
- Click Add Video Note.
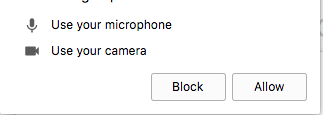
- If your browser prompts you, click Allow to use your camera and microphone.
- Click on the New Recording button.
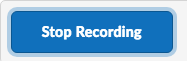
- Click on the Stop Recording button when you finish recording.
- To preview your video note, click Play.
- If you want to re-record, click Clear. If you are satisfied with your recording, click Next.
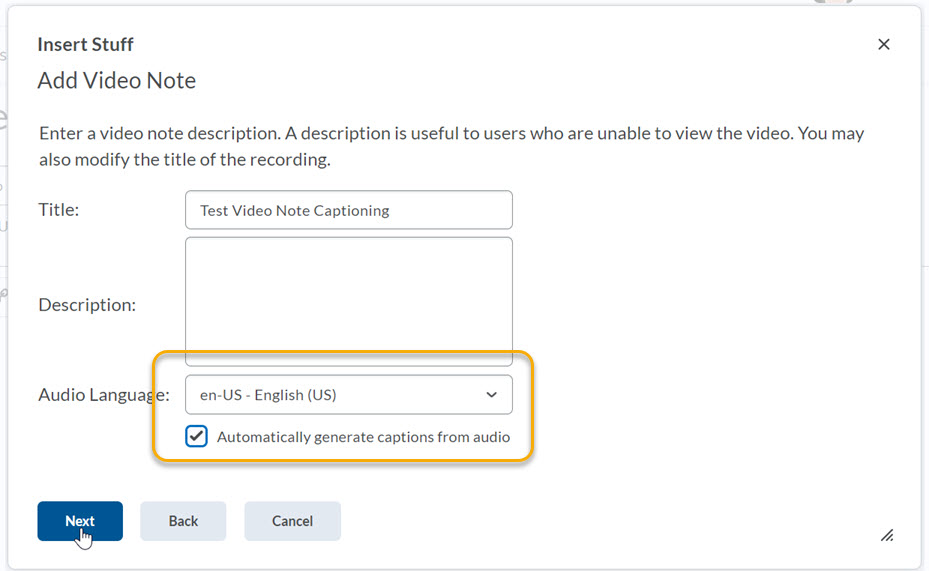
- Enter a title, description, and captioning information for your video note.
- A description is useful to users who are unable to view the video.
- Important – Add captions for Accessibility: First select the Audio Language and then check the box to Automatically generate captions from audio.
- Click Next. The media file will process. Click refresh to preview the video. Note: The video note saves to Video Note Search. If you have permission to search and insert video notes, you can reuse this video in the future.
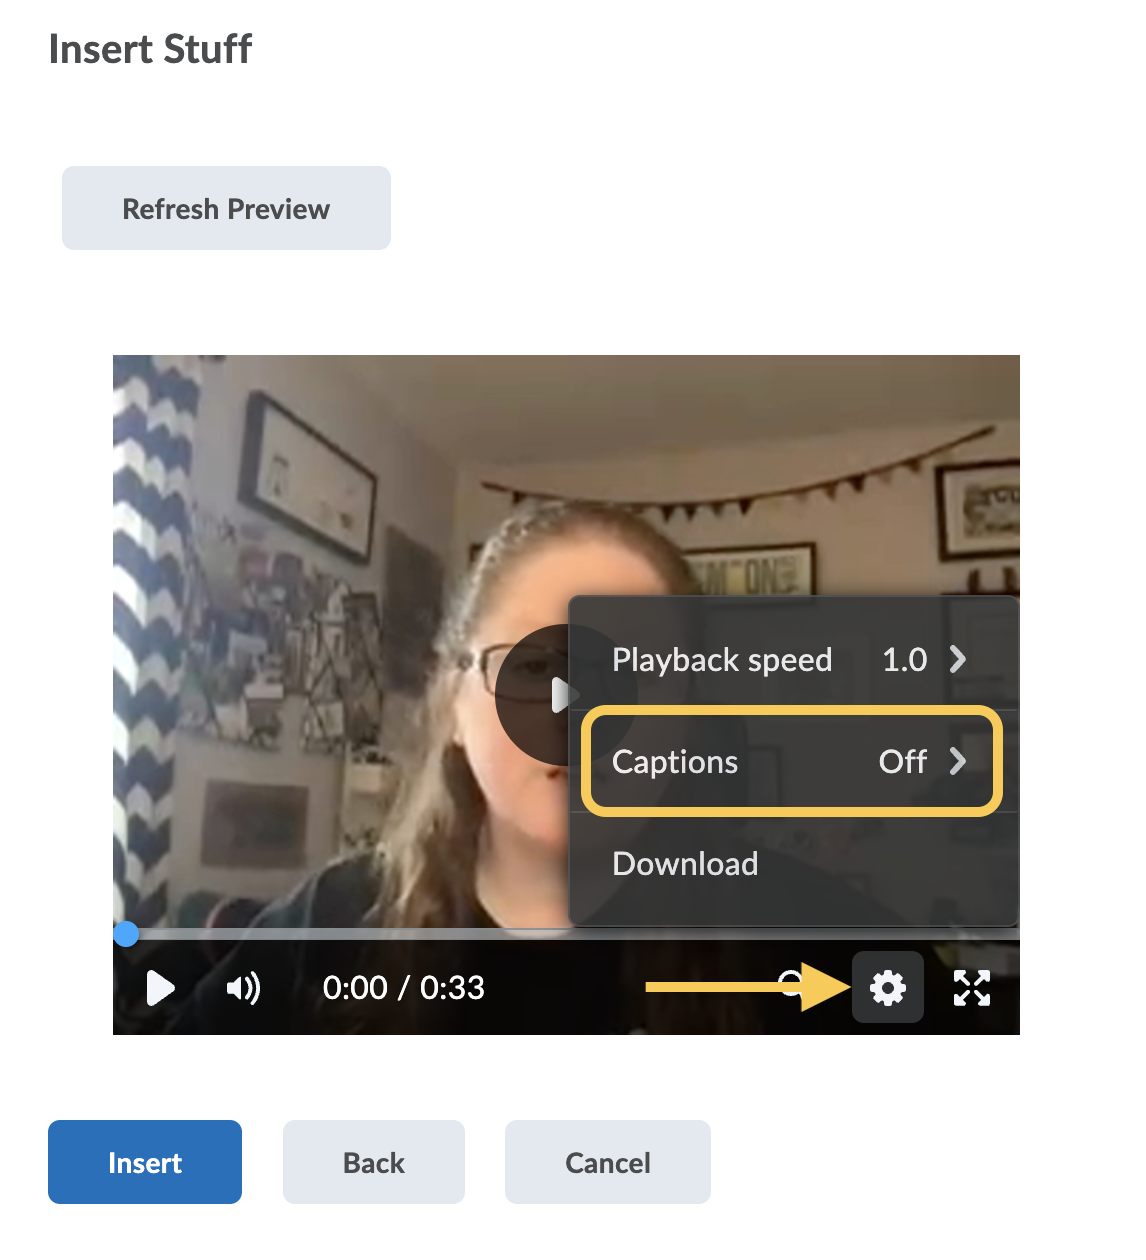
- You can preview the video note before you insert it. (If your video doesn’t initially appear, click on the Refresh Preview button.).
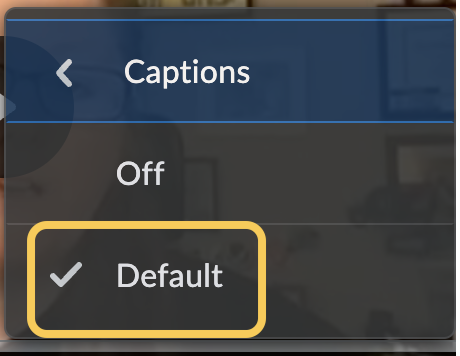
- Important: Since you generated captions, you must enable them to display.
- Click the Settings (gear icon) in the right corner of the video, then select Captions.
- Click Insert to continue.
- Within the content area of the announcement, type any additional content you want to appear with your video note.
- Set Availability of your Announcement:
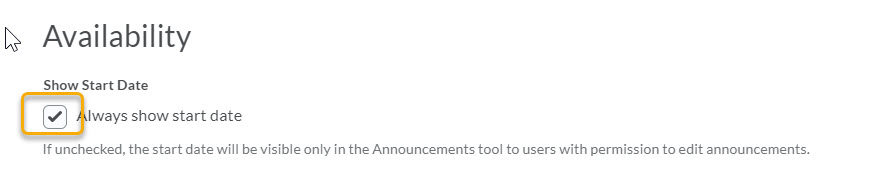
- By default, the Announcement’s start date and time will appear below the announcement headline on the course homepage. Optional: Uncheck the Show Start Date checkbox for Always show start date to hide the announcement start date.
- In the Start Date and End Date fields, select the dates that you want the announcement to be available. Announcements publish immediately, unless you specify an alternate start date. Note: Post-dated Announcements items do not display in the Announcements widget even if users have permission to see future Announcements items. They can be found within the list of Announcements items on the Announcements page.
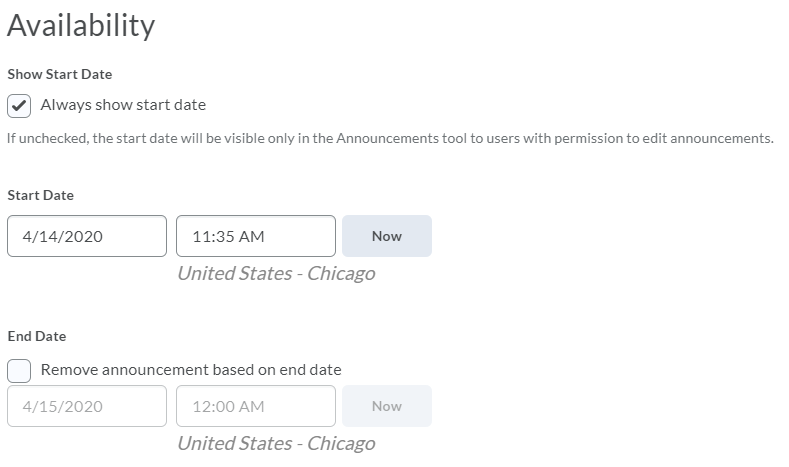
- Recommended: Set an End Date so only relevant announcements display. You can remove an Announcements item on a specific date by selecting the Remove Announcement based on end date check box. You and administrators can still see the Announcements item after its end date, but it will not display in the Announcements widget for your students.
- By default, the Announcement’s start date and time will appear below the announcement headline on the course homepage. Optional: Uncheck the Show Start Date checkbox for Always show start date to hide the announcement start date.
- Click the Publish button to post your Video Announcement.

Note: If your uploaded video note needs editing or closed captions, please review the Edit Video Notes with the Media Editor page.